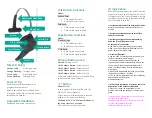
Mic LED Colors
Orange
Solid
: Listening A Lane
Orange
Flashing
: Talking A Lane
Green
Solid
: Listening B Lane
Green
Flashing
: Talking B Lane
Color ID Tip
Used to identify different functions
programed into headsets.
Black is install by default and Red, Blue,
Green and Yellow can be installed and are
included with headset.
Adjustable Headband
Headband is adjusted to proper fit.
Talk Button Functions:
Modes:
Push
to
Talk:
Click and hold to talk.
Release button to listen.
Talk
Lock:
Click button once to talk.
Click button again to listen.
Page Button Functions:
Modes:
Push
to
Page:
Click and hold to talk.
Release button to listen.
Talk
Lock:
Click button once to talk.
Click button again to listen.
Volume Button Levels
Default:
Volume Level 1
Click
Volume
Button:
Volume Level 2
Click
Volume
Button:
Volume Level 3
Click
Volume
Button:
Volume Level 4
Click
Volume
Button:
Volume Level 5
At Volume Level 5, headset will double beep
and next button click: Volume 1
“S” Button
Double
Click:
to change lanes (when installed with the
WX‐CC412 Center Module).
Voice prompt will announce what lane the
headset is currently switched too.
Click
and
hold
“S”
and
Volume
Buttons
at
the
same
time
for
2
seconds:
This will activate the Alert feature.
ID registration
Before using this product, the unit ID must be
registered in the Center Module. After the ID
is registered in the Center Module, wireless
communication between this product and the
Center Module is enabled
.
1)
Set the Center Module to “ID Registration” mode.
Refer to the operating instructions of the Center
Module.
2)
Rotate the microphone boom to turn off the
power of the headset.
3)
Rotate the microphone boom while holding
down the [T] and [P] buttons to turn
on the power of the headset.
● The headset enters the ID Registration setting
mode. You will hear “Registration Mode” and the
power indicator will blink orange.
4)
Press the [T] button*.
● You can hear “Connecting Center Module A” and
the lane Indicator will blink orange.
● If the Center Module is a WX
‐
CC412(A), ID
registration for Lane B is automatically started, the
voice message “Connecting Center Module B” is
heard from the earphone, and the lane indicator
blinks green.
● When the ID Registration succeeds, you will hear
“Registration complete”, “Headset
xx” (xx: ID number registered in the Center Module),
and the power indicator stops
blinking and stays on.
5)
When the ID registration is complete, cancel “ID
Registration” mode of the Center Module.
●
When this is done, “ID Registration” of this
product is cancelled and the power indicator turns
green.
* When this unit is connected to the WX
‐
C3010, its
ID is registered in the Center
Module of Lane A when the [T1] button is pressed
or in the Center Module of Lane B
when the [T2] button is pressed.
Color
ID
Tip
Mic
LED
Adjustable
Headband
Ear
Pad
Talk
(T)
Button
Volume
Button
Page
(P)
Button
Head
Pad


