5
Setting up the Scanner
1
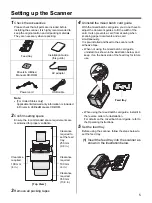
Check the accessories
Please check that all parts are included before
installing the scanner. It is highly recommended to
keep the original carton and all packing materials.
They are necessary when repacking.
Note:
•
[For United States only]
Applicable limited warranty information is included
in Drivers & Utilities/Manuals CD-ROM.
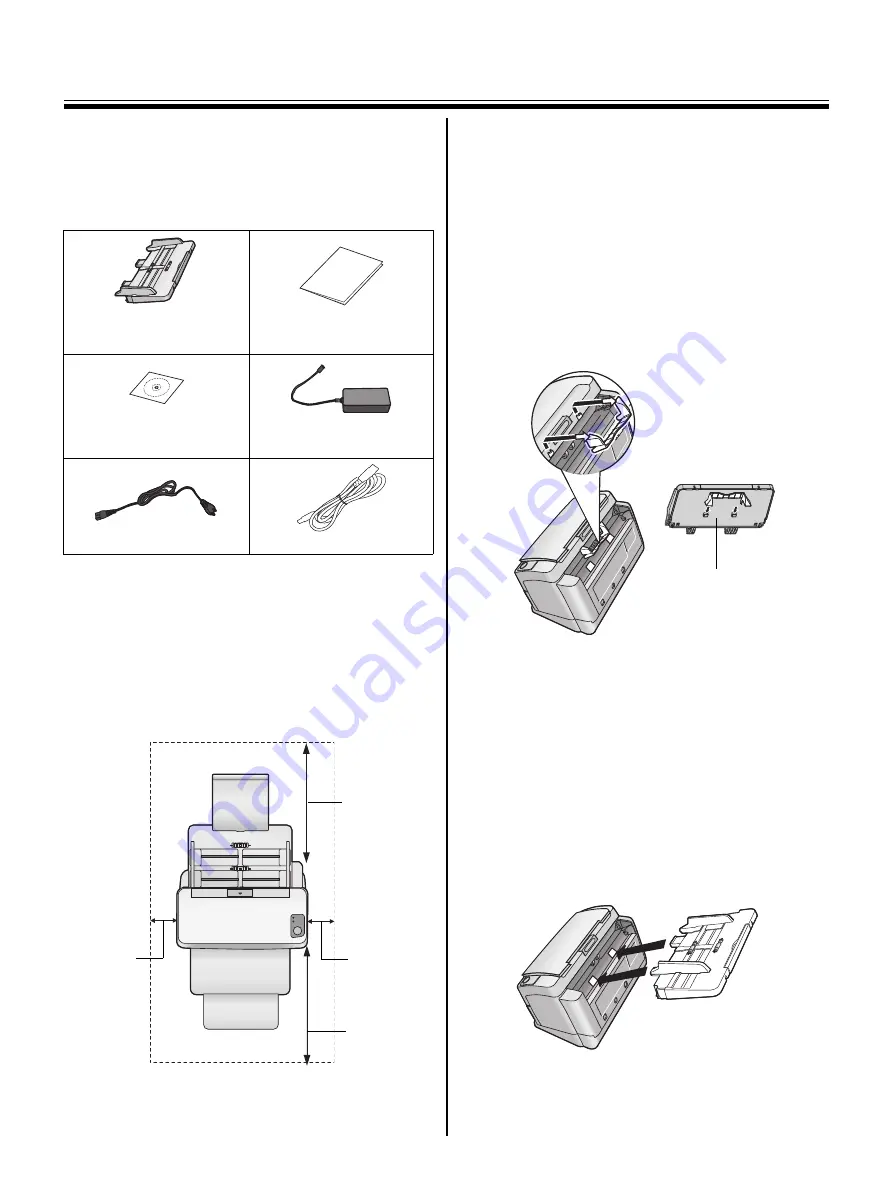
2
Confirm setting space
Ensure the recommended space requirements are
maintained for proper ventilation.
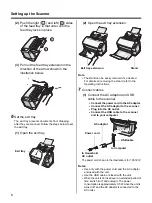
3
Remove all packing tapes
4
Uninstall the mixed batch card guide
With the mixed batch card guide, you do not have to
adjust the document guides to fit the width of the
card. It also prevents a card from skewing when
scanning paper documents and a card
simultaneously.
It is pre-installed and fixed to the scanner with
adhesive tape.
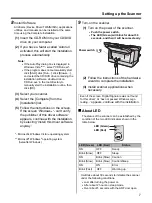
•
When not using the mixed batch card guide,
uninstall it as shown in the illustration below, and
keep it on the back side of the feed tray for future
use.
•
When using the mixed batch card guide, install it in
the reverse order of uninstallation.
For details on the mixed batch card guide, refer to
the Operating Instructions.
5
Set the feed tray
Before using the scanner, follow the steps below to
set the feed tray.
(1)
Insert the feed tray into the scanner as
shown in the illustration below.
Feed tray
Installation Guide
(this guide)
Drivers & Utilities/
Manuals CD-ROM
AC adaptor
Power cord
USB cable
Clearance
required to
set the feed
tray.
250 mm
(9.8 in.)
Clearance
required.
100 mm
(4 in.)
Clearance
required.
100 mm
(4 in.)
[ Top View ]
Clearance
required.
350 mm
(13.8 in.)
Feed tray


