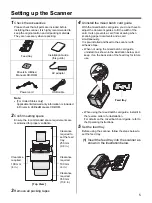
Setting up the Scanner
6
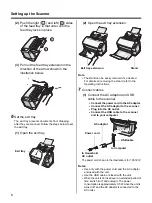
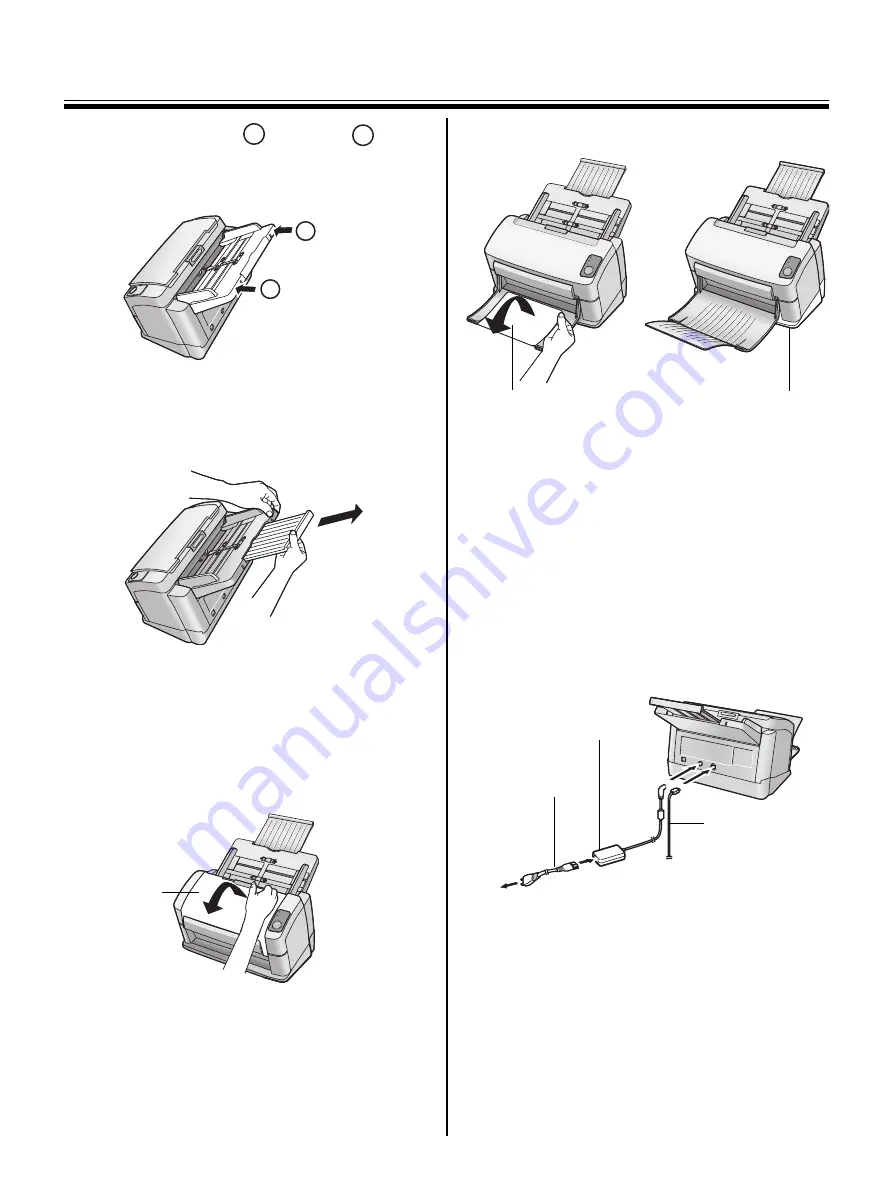
(2)
Push the right (
) and left (
) sides
of the feed tray in that order until the
feed tray locks in place.
(3)
Pull out the feed tray extension in the
direction of the arrow shown in the
illustration below.
6
Set the exit tray
The exit tray prevents documents from dropping
after they are scanned. Follow the steps below to set
the exit tray.
(1)
Open the exit tray.
(2)
Open the exit tray extension.
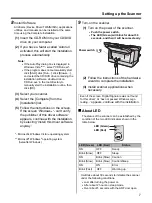
Note:
•
The stand can be easily removed if so desired.
For details on removing the stand, refer to the
Operating Instructions.
7
Connect cables
(1)
Connect the AC adaptor and USB
cable to the scanner.
•
Connect the power cord to the AC adaptor.
•
Connect the AC adaptor to the scanner.
•
Plug into the AC outlet.
•
Connect the USB cable to the scanner
and to your computer.
)
The power cord shown in the illustration is for 100-120V.
Notes:
•
Use only with the power cord and the AC adaptor
enclosed with the unit.
•
Use the USB cable enclosed with the unit.
•
When the unit is not used over an extended period of
time, switch it off, and unplug it. The power
consumption is approximately 0.5 W when the unit is
turned off, and the AC adaptor is connected to the
AC outlet.
A
B
A
B
Exit tray
Exit tray extension
Stand
to Household
AC outlet
to Computer
AC adaptor
Power cord
USB cable


