background image

Setting up the Scanner

7

8

Install Software

All drivers (Device Driver/TWAIN/ISIS), applications, 
utilities, and manuals can be installed at the same 
time using the Complete Installation.

(1)

Insert the CD-ROM into your CD/DVD 
drive on your computer.

(2)

If you have a feature called ’Autorun’ 
activated, this will start the installation 
process automatically.

Note: 

If the AutoPlay dialog box is displayed in 
Windows Vista

TM

 *

1

, select "CDRun.exe".

If the program does not automatically start, 
click [Start], click [Run...], click [Browse...], 
and select the CD/DVD drive containing the 
installation software, double-click on 
’CDRun.exe’ in the root directory to 
manually start the installation routine, then 
click [OK].

(3)

Select your scanner.

(4)

Select the [Complete] from the 
[Installation] list.

(5)

Follow the instructions on the screen.
If the screen 'Windows

®

*

2

 can't verify 

the publisher of this driver software' 
appears, continue with the installation 
by selecting 'Install this driver software 
anyway'.

*

1

 Microsoft

®

 Windows Vista

TM

 operating system 

*

2

 Microsoft

®

 Windows

®

 operating system 

(hereafter Windows)

9

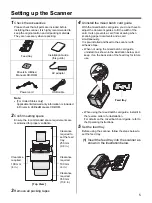
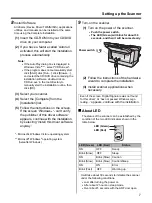
Turn-on the scanner

(1)

Turn on the power of the scanner.

Push the power switch.

The LED (Green) will blink for about 30 
seconds, and then it will become steady.

(2)

Follow the instructions of the hardware 
wizard to complete the installation.

(3)

Install scanner applications when 
necessary.

„

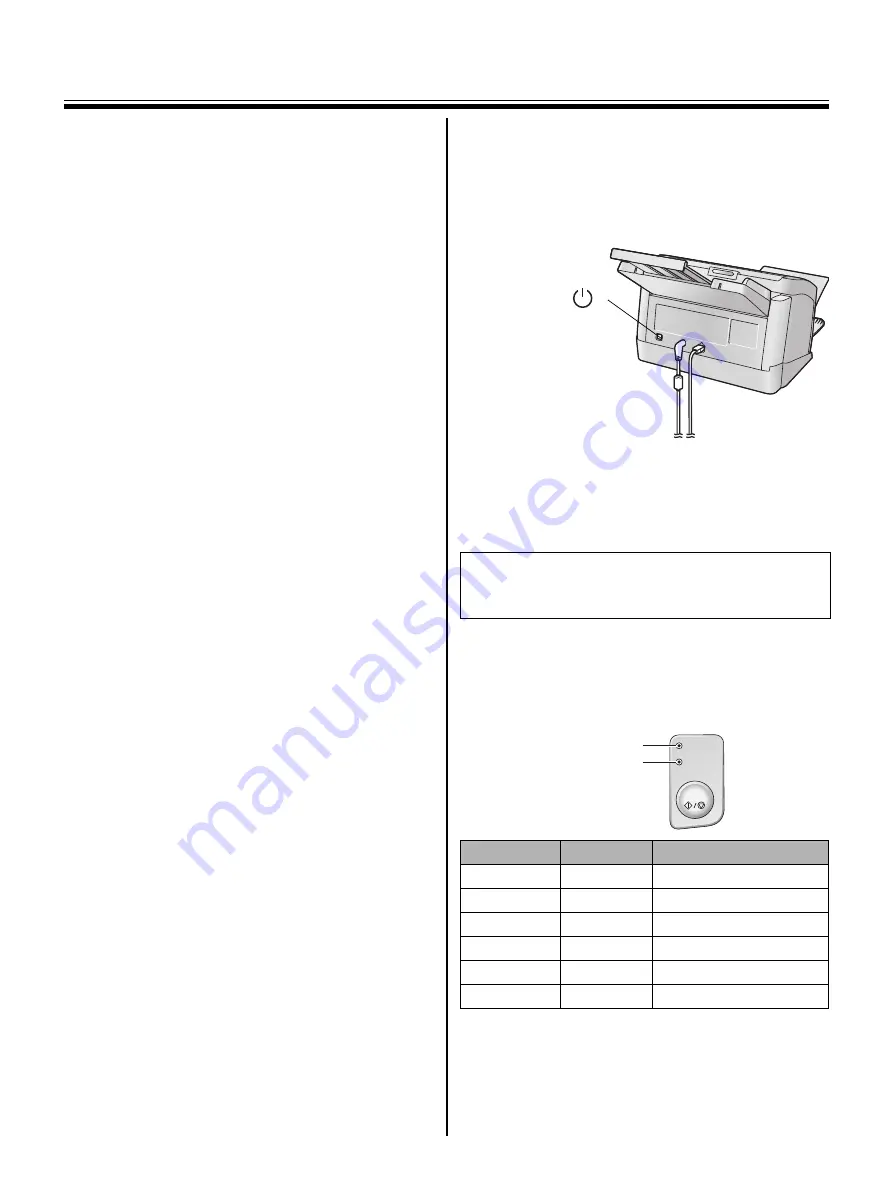
About LED

The status of the scanner can be established by the 
condition of the two LED indicators shown in the 
table below:

*

It will take about 30 seconds to initailize the scanner 

under the following conditions.

Just after turning the power on

After about 2 hours on sleep mode

Over about 5 seconds with the ADF door open

Even if the screen

 ‘

Digital Signature was not found 

for this driver

’ or ‘

has not passed Windows Logo 

testing···

’ appears, continue with the installation.

LED (Green) LED (Red)

Status

ON

OFF

Ready

Blink (Slow)

OFF

Sleep

ON

Blink (Slow) Caution

Blink (Slow)

Blink (Slow) Caution/Sleep

ON

ON

Error

Blink (Fast)

OFF

Warming up

Power switch (


)

Ready

Error

Start / Stop

LED (Green)
LED (Red)

Summary of Contents for Camescope KV-S1025C

Page 1: ...ution for your imaging needs Panasonic developed Panasonic Image Enhancement Technology to improve the quality of your originals With our easy to use functions reliable paper handling easy maintenance and more Panasonic is ready to contribute to your imaging needs Installation Guide Table of Contents Notice 2 For Your Safety 3 Setting up the Scanner 5 Check the accessories 5 Confirm setting space ...

Page 2: ...ing cable when connecting to a host computer Also any unauthorized changes or modifications to this equipment would void the user s authority to operate this device FCC Declaration of Conformity Trade Name Panasonic Model Number KV S1025C or KV S1020C Responsible Party Panasonic Corporation of North America One Panasonic Way Secaucus NJ 07094 U S A Telephone No 1 800 726 2797 This device complies ...

Page 3: ...age to the power cord or plug can cause fire or electric shock Do not attempt to repair the power cord plug or AC adaptor If the power cord or plug is damaged or frayed contact an authorized service representative for a replacement Ensure that the plug connection is free of dust In a damp environment a contaminated connector can draw a significant amount of current that can generate heat and event...

Page 4: ...only with the power cord and AC adaptor enclosed with the unit When the unit is not used over an extended period of time switch it off and unplug it If an unused unit is left connected to a power source for a long period degraded insulation may cause electric shock current leakage or fire Do not position the unit in a location where it is unstable To prevent fire or shock hazard do not expose this...

Page 5: ...scanning paper documents and a card simultaneously It is pre installed and fixed to the scanner with adhesive tape When not using the mixed batch card guide uninstall it as shown in the illustration below and keep it on the back side of the feed tray for future use When using the mixed batch card guide install it in the reverse order of uninstallation For details on the mixed batch card guide refe...

Page 6: ...s 7 Connect cables 1 Connect the AC adaptor and USB cable to the scanner Connect the power cord to the AC adaptor Connect the AC adaptor to the scanner Plug into the AC outlet Connect the USB cable to the scanner and to your computer The power cord shown in the illustration is for 100 120V Notes Use only with the power cord and the AC adaptor enclosed with the unit Use the USB cable enclosed with ...

Page 7: ... by selecting Install this driver software anyway 1 Microsoft Windows VistaTM operating system 2 Microsoft Windows operating system hereafter Windows 9 Turn on the scanner 1 Turn on the power of the scanner Push the power switch The LED Green will blink for about 30 seconds and then it will become steady 2 Follow the instructions of the hardware wizard to complete the installation 3 Install scanne...

Page 8: ...effective utilization of resources please return this product to a nearby authorized collection center registered dismantler or recycler or Panasonic service center when disposing of this product Please see the Panasonic website for further information on collection centers etc http www panasonic co in wps portal home Notice For United States only This product has a fluorescent lamp that contains ...

Reviews: