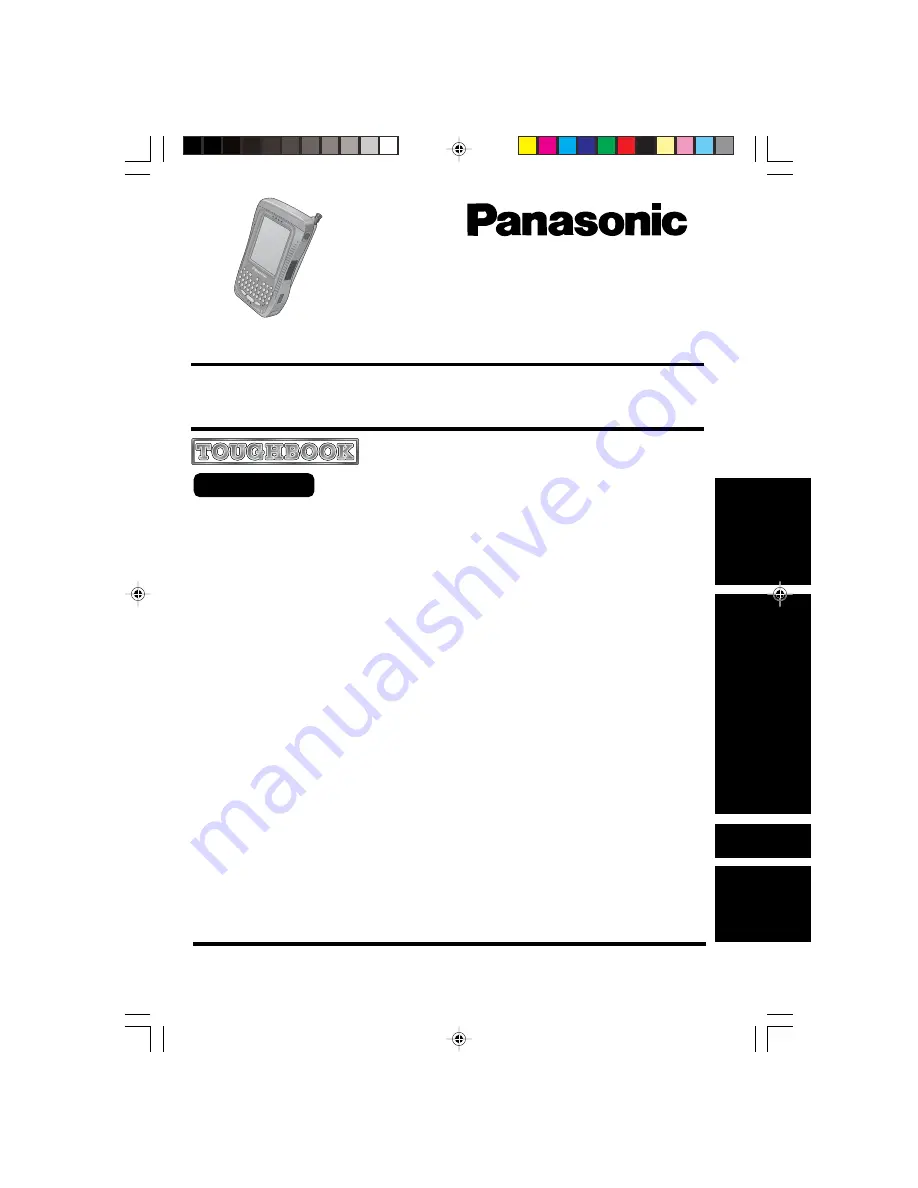
background image

OPERATING INSTRUCTIONS

Handheld Computer

®

Operation

Starting Up/Shutting Down .................................... 15
LCD (Touchscreen) ............................................... 19
Backlight Setting .................................................... 21
Entering Information ............................................... 22
Program Buttons ................................................... 26
Battery Power ........................................................ 27
SD Memory Card/MultiMedia Card ........................ 28
SD Backup ............................................................ 29
Pocket Internet Explorer ........................................ 30
Connecting to Your Computer ............................... 31
Customizing the Computer ................................... 34

Getting Started

Read Me First .......................................................... 3
Precautions ............................................................. 5
What’s in the Box? ................................................... 8
Names and Functions of Parts ................................ 9
First-time Operation ............................................... 12

Contents

Model No.

CF-P1

Series

Please read this instructions manual carefully before using this product and save this manual
for future use.

Operation

Troubleshooting

Dealing with Problems ........................................... 37

Appendix

For Effective Use ................................................... 40
Specifications ........................................................ 41
LIMITED USE LICENSE AGREEMENT ................. 43
LIMITED WARRANTY ............................................ 45

Pocket PC 2002

Summary of Contents for CF-P1Series

Page 1: ...Your Computer 31 Customizing the Computer 34 Getting Started Read Me First 3 Precautions 5 What s in the Box 8 Names and Functions of Parts 9 First time Operation 12 Contents Model No CF P1Series Please read this instructions manual carefully before using this product and save this manual for future use Operation Troubleshooting Dealing with Problems 37 Appendix For Effective Use 40 Specifications...

Page 2: ...e screen then to tap Programs For the CF P1S3 series This illustration means to press the A key Mode key NUM key This illustration means to press and hold the key Mode key then press the NUM key For the CF P1S1 series This illustration means to press the 1 key Where to go for referred information Some of the illustrations in this manual may differ slightly in shape from the actual items in order t...

Page 3: ... different from that to which the receiver is connected Consult the Panasonic Service Center or an experienced radio TV technician for help Warning To assure continued compliance use only shielded interface cables when connecting to a computer or peripheral Also any changes or modifications not expressly approved by the party responsible for compliance could void the user s authority to operate th...

Page 4: ... misapplication may possibly occur Pile au lithium Le micro ordinateur renferme une pile au lithium qui permet de sauvegarder certaines données comme la date et l heure notamment Elle ne devra être remplacée que par un technicien qualifié Avertissement Risque d explosion en cas de non respect de cette mise en garde For Canada This Class B digital apparatus complies with Canadian ICES 003 Cet appar...

Page 5: ...ltiMedia Cards and carry them with you The CF P1 was developed based on thorough research into real world portable computing environments Exhaustive pursuit of usability and reliability under harsh conditions led to innovations such as the magnesium alloy exterior and flexible internal connections The CF P1 s outstanding engineering has been tested using the stiff MIL STD 810F for vibration and sh...

Page 6: ...To do this set Charging mode in Settings System tab Panasonic Settings to High Temperature In the high temperature mode the full charge capacity of battery becomes approximately 80 Battery Pack Care should be exercised with regard to the following in order to avoid the possibility of over heating fire or damage Do Not Disassemble Do not insert sharp objects into the battery pack expose it to bumps...

Page 7: ...e computer on when the AC adaptor is not connected will exhaust the remaining battery capacity When Using Peripheral Devices Pay strict attention to the following points to avoid damage to the computer peripheral de vices cables etc Also in addition to following this manual carefully read the instruction manuals for the peripheral devices being used Use only peripheral devices that conform to the ...

Page 8: ... Therefore be sure that the strap does not carry a weight that exceeds the weight of the computer The strap may accidentally come loose from the computer Do not use a strap that is damaged or about to tear CAUTION 1 2 You can use the Companion CD to install various software including Microsoft Outlook 2000 and Microsoft ActiveSync 3 5 page 31 Model No CF AA1527 AC Adaptor 1 AC Cord 1 Cradle 1 Batt...

Page 9: ...The illustrations shown may differ from the actual physical appearances Numeric key lock Caps lock page 19 page 28 page 20 page 33 Some models have built in cards e g barcode scanner and RF module For such models refer to the attached Supplementary Instruc tions These cards cannot be changed LED Indicators Power Switch SD Memory Card MultiMedia Card Slot LED Indicators Available depending on model...

Page 10: ... or a selected icon For example after an item within a menu is selected the cursor control can be pushed to execute this selected item MoveUp DownRight Left Operations Performs the same function as the up down left right cur sor keys For example the Move Up operation can be performed to select an item towards the top within a menu Changing the Cursor Control Settings The cursor control settings al...

Page 11: ...the DC IN jack Removing the Cradle 1 Press the release lever 2 While firmly holding the cradle and pressing down on the release lever with one hand lift the computer up with the other hand The AC adaptor is connected to the position shown by the arrow in the figure RELEASE CF V EBP1A RELEASE CF V EBP1A Release Lever DC IN Jack DC IN Jack Cover 1 2 ...

Page 12: ...press the battery pack cover and then slide the latch and remove the battery pack cover 3 Set the arrow mark of the battery in the direction shown in the figure and then insert the battery pack into the battery pack compartment 4 Align the projecting part of the cover with the hole at tach the cover at an angle and then set the cover on the body Press position A to depress the battery pack cover a...

Page 13: ...ed data will be deleted and the computer will be re turned to the condition at the time of purchase After the cover is closed press down firmly on the cover and confirm that the cover is locked HandlingtheACadaptor Do not twist or pull the AC power cord forcefully Doing so may damage the connections Use only the specified AC adaptor with your computer Using an AC adaptor other than the one supplie...

Page 14: ...wer right and upper right portions of the screen in that order Each time the mark is displayed tap the center of the mark with the stylus 4 At stylus read the on screen instructions and tap Next 5 At pop up menus follow the on screen instructions 6 After Congratulations is displayed tap Next 7 At location select the time zone and tap Next 8 At complete tap the screen to begin using CF P1 4 Set the...

Page 15: ...wer Switch Power Switch To turn the backlights on off Press the power switch until the LCD backlight and keyboard backlight go on off and release the switch To turn the keyboard backlight on refer to page 21 When the backlight is on more power is consumed and the shortening of the operating time is accelerated NOTE Lightly press the power switch within 0 5 sec onds OFF ON ...

Page 16: ...amplefor Notes Tap to quickly select a program you have recently used Tap to select a program Tap to see additional programs Tap to customize CF P1 page 34 36 Following are some of the status icons you may see Starting Up Shutting Down Turn all sounds on and off Backup battery is low Main battery is charging Main battery is very low Main battery is low Main battery is full Status Icon Meaning Sync...

Page 17: ... You can also display it by tapping Today On the Today screen you can see at a glance important information for the day To change the setting tap Settings Personal tab Today Items tab Tap to switch to a program Tap to create a new item Tap to change date and time Tap to open an item Your day at a glance Tap to view connection status ...

Page 18: ...card is being accessed the data stored on the card may be damaged and the computer may stop working properly CAUTION Pop up Menus With pop up menus you can quickly choose an action for an item For example you can use the pop up menu in the contact list to quickly delete a contact make a copy of a contact or send an e mail message to a contact The actions in the pop up menus vary from program to pr...

Page 19: ...ng You can drag on item on the screen by holding the stylus down over the item and then moving the stylus This operation is called a drag Clean the stylus tip and screen prior to operation Foreign particles can scratch the screen and impede the operation of the stylus Use the provided stylus only on the screen Using it for any other purpose may damage the stylus and scratch the screen Handling the...

Page 20: ... with CF P1 Do not use an implement other than the stylus that comes with the computer Do not place any object on the surface or press down forcefully with sharp pointed ob jects e g nails or hard objects that can leave marks e g pencils and ball point pens Do not operate the computer when such things as dust are on the LCD Do not allow substances such as oil to contact the LCD The cursor may not ...

Page 21: ...se setting Tap the Battery Power tab AC adaptor use setting Tap the External Power tab Adjust the LCD Brightness Screen brightness can be adjusted in accordance with the usage conditions 1 Tap Settings System tab Backlight 2 Tap the Brightness tab and adjust the brightness with the slider 3 Tap ok Backlight Setting 3 Tap ok Add a check mark so that when the device is not oper ated the LCD backligh...

Page 22: ...puter page 31 1 Only for the CF P1S3 series 2 For more information tap Help Settings Input To type with the soft keyboard 1 Tap the arrow next to the input panel button and then Keyboard 2 On the soft keyboard that is displayed tap the keys with your stylus Select an input method Input Panel Button Tap to see your choice Use the input panel to enter information in any program on CF P1 You can eith...

Page 23: ... A B C M D E F M NUM Shift Key Each time the Mode key NUM key are pressed the mode changes from the alphabet input mode default to the symbol numeral input mode and vice versa In the symbol numeral input mode numeric key lock indicator on the symbols and numerals on the key top can be inputted continuously To exit the symbol numeral input mode you can also choose to press only the NUM key Pressing...

Page 24: ...mbol numeral input mode Inputting non capital characters in the caps lock mode Press an alphabet while also holding down on the NUM key Pressing this key alone is the same as pressing the Shift key of a computer like the NUM key DEL Delete Key This key works the same as the Delete key of a computer Enter Key This key works the same as the Enter key of a computer e g line feed in a document and to ...

Page 25: ... number key press twice To use the function key mode continuously Press twice to lock the function key mode then press the number keys Press once to unlock the function key mode CANCEL Key BS Backspace Key Minus Key A Key PF Key B Key ENT Enter Key Number Keys PF Key indicator CLR Clear Key SOFT Key Minus Key Press this to input a CLR Clear Key The function differently depending on the application...

Page 26: ...the program buttons at the time of purchase F1 Calendar F2 Contacts F3 Tasks Option button Start Menu You can change the assignment of the program buttons following the procedure Resuming with a Program Button You can resume the computer with one of the F1 F2 F3 and Option buttons 1 Tap Settings System tab Panasonic Settings Wakeups tab 2 Add a check mark to resume when the program button is press...

Page 27: ...n properly if the contacts are dirty or damaged Do not expose the battery pack to water or allow it to become wet The battery pack is not charged when CF P1 is first purchased Be sure to charge it before using it for the first time When the AC adaptor is connected to CF P1 charging begins automatically Use only the specified battery pack CF VZSU28 with CF P1 Do not install or remove the battery pa...

Page 28: ...card at an angle Insert the card all the way into the slot Removing 1 Press the card It will come out slightly 2 Remove the card 3 Close the SD memory card MultiMedia Card slot cover NOTE Software e g drivers required to exchange data with these devices Refer to the instructions manual provided with each SD compatible peripheral device Use as a memory card e g use as a storage unit on which files ...

Page 29: ... Programs SD Backup 4 Tap Restore Follow the on screen instructions and tap Yes 5 Select the Restore folder in the SD memory card and tap OK Follow the on screen instructions Restore successful will be displayed when the restore is complete Tap ok to reset the CF P1 6 Set the time and date and password if required page 37 Step 10 Backup Restore CAUTION Do not do the following during the procedure ...

Page 30: ...rder 2 Select Internet Settings from the first drop down menu and tap Modify 3 Tap Modem tab New 4 Enter the necessary user information The settings will vary for different network environments For more details ask your system administrator or the person in charge of the network For details tap Help To run Pocket Internet Explorer Tap Internet Explorer Pocket Internet Explorer Hide Pictures Button...

Page 31: ...reference 2 Select button 3 Select Start Here 4 Select Install ActiveSync 3 5 and read the on screen instructions and select Install 5 At Installation Message select OK File Download will be displayed This screen varies depending on the host computer s software e g Internet Explorer version If Open is displayed on File Download select Open If Run this program from its current location is displayed...

Page 32: ...avoid the following Connect disconnect the cable Turn on off the computer 9 At Found New Hardware Wizard select Next to install driver An example of the procedure 1 Select Install from a list or specific location Advanced then select Next 2 Select Search for the best driver in these locations and add a check mark to Include this location in the search and select Browse 3 Select drive of the Compan...

Page 33: ...nfrared port of the CF P1 face the infrared communication port of a host computer We recommend a port to port distance of 30 cm 11 8 or less Infrared Communication Port When Connecting the CF P1 Directly with a Computer Expansion Connector of the Cradle When Connecting the CF P1 with a Computer via the Cradle or Removing Using a Connector Protector optional CF VCCP11U is recommended to connect CF ...

Page 34: ...splayed in New in the Today screen Owner Information Registration or changing of the user s owner s personal information You can choose to display the registered owner information on the screen when CF P1 is turned on Password Password enable disable setting If a password is set it has to be inputted in order to open the password screen Sounds Notifications Volume setting and operation sound setti...

Page 35: ...led Activate or stop the running programs OptionDevices Add a check mark in a box to activate CF card or RF serial when the power is off Available depending on models Panasonic Settings Display of ROM version Microphone gain level page 9 charging mode page 6 and program button resume settings page 26 Power Current battery charge status automatic power off time setting Regional Settings Display met...

Page 36: ...AvantGo Web site Beam Enable or disable the function for receiving data via infrared communica tion Connections Internet connection and Intranet connection settings NetworkAdapters Information input for discriminating the computer on a network such as a network adaptor installed in the computer Customizing the Computer ...

Page 37: ...blem 1 Using the provided stylus push the center of the reset switch straight in for 1 second while holding down on the power switch 2 At the confirmation message press For the CF P1S3 series press For the CF P1S1 series 3 Tap the screen to set up your Pocket PC The Windows alignment screen is displayed 4 Align the touchscreen page 20 step 3 5 At stylus read the on screen instructions and tap Next...

Page 38: ...ll not correctly recognize the date and time starting from the year 2085 A D The battery level may be too low If the battery level goes below a certain threshold CF P1 automatically shuts down In such cases connect the AC adaptor and charge the battery The computer may have entered a locked state If this is the case connect the AC adaptor and push the reset switch Check the remaining battery level...

Page 39: ...Check to see if a fully charged battery pack is properly installed to CF P1 If a modem card has been inserted disconnect these devices and check the communication status again Confirm that CF P1 s power is on Push the reset switch to restart If a cable or cradle is being used for the connection recheck the connection to the host computer Peripheralisnotrecognized evenafterdriverisinstalled Cannot ...

Page 40: ...uid enters the inside of the computer it may cause the computer to work improperly or be damaged When cleaning dust dirt Avoid rubbing off dust dirt with cloth since it may leave scratch on the screen Sweep dust dirt with fine brush then wipe it with dry soft cloth used for cleaning glasses When cleaning oily surface Apply camera lens cleaner on a soft gauze and clean it with gentle force Then wip...

Page 41: ...00 V 240 V AC 50 Hz 60 Hz Output 15 1 V DC 2 6 A Approx 17 W 4 Approx 40 W maximum when re charging in the ON state Microsoft Windows Powered Pocket PC 2002 1 Varies depending on the usage conditions frontlight on off etc 2 The AC adaptor is compatible with power sources up to 240 V AC adaptor This computer is supplied with a 125 V AC compatible AC cord 3 Approx 0 95 W at 120 V AC and approx 1 7 W...

Page 42: ...and Windows XP only One CD ROM drive VGA graphics card or compatible video graphics adapter at 256 color or later Keyboard Microsoft Mouse or compatible input device Outlook 2000 System Requirements PC with a Pentium 75 MHz or higher processor Microsoft Windows 95 or later operating system or Microsoft Windows NT Workstation operating system version 4 0 with Service Pack 3 or later For Windows 95 ...

Page 43: ... Programs to such other party At the time of such a transfer you must also transfer all copies whether in printed or machine readable form of every Program and the related documentation to the same party or destroy any such copies not so transferred F You may not remove any copyright trademark or other notice or product identification from the Programs and you must reproduce and include any such n...

Page 44: ...vez assembler en sens inverse compiler en sens inverse ni retracer les Logiciels ni aucune de leurs copies de façon électronique ou mécanique en tout ou en partie Vous ne pouvez utiliser copier modifier altérer ni céder les Logiciels ni aucune de leurs copies en tout ou en partie à l exception de ce qui est expressément stipulé dans ce contrat Si vous cédez la possession de toute copie ou de tout ...

Page 45: ...from the date of delivery thereof to you as evidenced by your purchase receipt This is the only warranty Panasonic makes to you Panasonic does not warrant that the functions contained in the Programs will meet your requirements or that the operation of the Programs will be uninterrupted or error free Panasonic s entire liability and your exclusive remedy under this warranty shall be limited to the...

Page 46: ...Claim Procedure In the event of a defect in material or workmanship in the media during the sixty 60 day warranty period and you return it transportation costs prepaid to Panasonic Canada Inc Computer Products Marketing at the above address within the warranty period together with a copy of your purchase receipt and an explanation of the suspected defect PCI will replace in Canada the defective di...

Page 47: ...Co Ltd All Rights Reserved Disclaimer Computer specifications and manuals are subject to change without notice Matsushita Electric Industrial Co Ltd assumes no liability for damage incurred directly or indirectly from errors omissions or discrepancies between the computer and the manuals Trademarks Microsoft Windows Outlook and ActiveSync are registered trademarks of Microsoft Corporation of the U...

Page 48: ... Company 50 Meadowlands Parkway Panazip 2F 5 Secaucus NJ 07094 Panasonic Canada Inc 5770 Ambler Drive Mississauga Ontario L4W 2T3 2003 Matsushita Electric Industrial Co Ltd All Rights Reserved Printed in Japan SS0203 0 DFQX5388ZA ...

Reviews: