background image

ACC

BATTERY 15A

(

)

(

)

ACC

BATTERY 15A

ACC

BATTERY 15A

(    )

(    )

(    )

(    )

L

R

Preamp Out Connector 

(

Rear

)

Vorverstärker-Ausgang 

(Rückseite)

Connecteur de sortie de préamplificateur 

(arrière)

Uitgangsaansluiting voorversterker 

(achter)

ISO Antenna Adapter 

(

If needed

)

ISO-Antennenadapter

(falls erfor derlich)

Adaptateur d'antenne ISO 

(si nécessaire)

ISO antenne-adapter 

(Indien nodig)

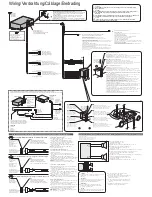
Wiring/Verdrahtung/Câblage/Bedrading

      Caution 
To prevent damage to the unit, do not connect the power connector until the whole 
wiring is completed.
      Vorsicht 
Um Beschädigung des Gerätes zu vermeiden, schließen Sie den Versorgungsstecker 
erst an, nachdem die gesamte Verdrahtung vollständig beendet wurde.
      Attention 
Ne pas introduire la prise d'alimentation secteur dans l'appareil tant que le câblage n'est 
pas complètement terminé afin de ne pas risquer d'endommager l'appareil.
      Let op  
Om schade aan het toestel te voorkomen mag u de stroomstekker pas aansluiten 
wanneer de bedrading volledig is aangesloten.

ACC

BATTERY 15A

A

C1 :

External Mute Lead

To the Navi Mute lead of the Panasonic car navigation system
or car telephone mute lead.

Externe-Stummschaltungskabel 

An das Navigationssystem-Stummschaltungskabel des
Panasonic Navigationssystems oder an das
Autotelefon-Stummschaltungskabel.

Fil de Mise en sourdine extérieure

A raccorder au fil Navi Mute du système de navigation automobile de 
Panasonic ou au fil de mise en sourdine du téléphone pour véhicule.

Externe-geluiddempingsdraad

Naar de Navi Mute draad van een Panasonic auto-navigatiesysteem 
of naar de dempingsdraad voor deautotelefoon.

B

C3 : 

(Brown w/black stripe)/(Braun mit schwarzem Streifen)/
(Brun à rayures noires)/(Bruin met zwarte streep)

External Remote Control Lead

When using a non-Panasonic external remote control,
refer to the manufacture for their product before connecting.

Leitungsdraht für externe Fernbedienung

Wenn Sie eine externe Fernbedienung verwenden, die nicht von Panasonic 
hergestellt wurde, wenden Sie sich vor dem Anschluss an den Hersteller
des Produktes.

Fil de la télécommande extérieure

En cas d’utilisation d’une télécommande extérieure non-Panasonic, se 
référer aux conseils du fabricant concerné pour les connexions électriques.

Externe afstandsbedieningsdraad

Bij gebruik van een externe afstandsbediening die niet van Panasonic is, 
dient u voor aansluiting de handleiding of de fabrikant van het product in 
kwestie te raadplegen.

ISO Connector

A

ISO-Stecker

A

Connecteur ISO

A

ISO aansluiting

A

A7 :

Power Lead 

(

ACC or IGN

To ACC power, +12 V DC.

Versorgungskabel 

(ACC oder IGN)


An die ACC-Stromklemme, +12  V Gleichspannung.

Fil d’alimentation 

(ACC ou IGN) A l’alimentation ACC, +12 V CC.

Stroomdraad 

(ACC of IGN) Naar ACC stroomvoorziening, + 12 V gelijkstroom.

A8 :

Ground Lead 

To a clean, bare metallic part of the car chassis.

Massekabel 

An ein sauberes, metallisches Teil des Fahrzeugchassis.

Fil de mise à la masse 

A une partie métallique propre découverte du châssis de voiture.

Aarding 

Naar een schoon, bloot metalen onderdeel van het chassis.

A4 :

Battery Lead 

To the car battery, cont12 V DC.

Batteriekabel 

An die Batterie des Fahrzeuges, kontinui12 V Gleichspannung.

Fil de batterie 

A la batterie de voiture, alimentation continue de +12 V CC.

Accudraad 

Naar de accu van de auto, doorlopende stroomvoorz 12 V gelijkstroom.

A5 :

A

A5 

(Orange)/(Orange)/(Orange)/(Oranje)

(Red)/(Rot)/(Rouge)/(Rood)

(Black)/(Schwarz)

/

(Noir)/(Zwart)

(Yellow)/(Gelb)

/

(Jaune)

/

(Geel)

Fuse (15 A)  

Refer fuse replacement to your nearest authorized Panasonic 

Service Centre. Do not try fuse replacement by yourself.

Sicherung (15 A) 

Wenden Sie sich zum Austausch der Sicherung an eine autorisierte 

Panasonic-Kundendienststelle in Ihrer Nähe. Versuchen Sie nicht, den Austausch 
selbst vorzunehmen. 

Fusible (15 A) 

Confier le remplacement de fusible au centre de service de 

service après-vente Panasonic agréé le plus proche. Ne pas essayer de 
remplacer le fusible tout(e) seul(e).

Zekering (15 A) 

Laat het vervangen van de zekering over aan uw dichtstbijzijnde 

Panasonic service-centrum. Probeer in geen geval zelf de zekering te vervangen.

(

R

)/(

R

)/(D)/(

R

)

(Red)/(Rot)/(Rouge)/(Rood)

Antenna
Antenne
Antenne
Antenne

Motor Antenna Relay Control Lead  

To Motor Antenna. (Max. 100 mA) (This lead is not 

intended for use with a switch actuated power antenna)

Amp·Relay Control Power Lead  

To Panasonic power amplifier. (Max. 100 mA) 

(synchronized with the power on/off of amplifier)

Steuerkabel für Relais der motorbetriebenen Antenne 

Zu motorbetriebenen Antenne 

(Max. 100 mA) (Dieses Kabel dient nicht für die Verwendung mit einer über einen 
Schalter aktivierten motorbetriebenen Antenne.)

Stromversorgungskabel für Verstärkerrelaissteuerung 

an den Panasonic 

Leistungsverstärker. (Max. 100 mA) (synchronisiert mit dem Ein/Ausschalten der 
Stromversorgung des Verstärkers)

Fil de commande de relais d’antenne motorisée 

A l’antenne motorisée (100 mA maxi.) 

(Ce fil n’est pas conçu pour l’usage avec l’antenne commandée par interrupteur.)

Fil d'alimentation de commande de relais d'amplificateur 

à amplificateur de puissance 

Panasonic. (100 mA maxi.) 
(synchronisé à l'application ou la coupure d'alimentation de l'amplificateur)

Stuurdraad relais gemotoriseerde antenne  

Naar de gemotoriseerde antenne. (Max. 100 

mA) (Deze draad is niet bedoeld voor een gemotoriseerde antenne die met een 
schakelaar wordt ingeschakeld.)

Versterker-relais Stuurstroomdraad 

naar Panasonic eindversterker. (Max. 100 mA) 

(gesynchroniseerd met de eindversterker aan/uit)

PRE-OUT REAR

PRE-OUT FRONT

AUX1-IN

AUX Input Connector
AUX-Eingangsstecker
Connecteur d'entrée AUX
AUX-ingangsaansluiting 

Preamp Out Connector 

(

Front

)

Vorverstärker-Ausgang 

(Vorderseite)

Connecteur de sortie de préamplificateur 

(avant)

Uitgangsaansluiting voorversterker 

(voor)

(

L

)/(

L

)/(G)/(L)

(White)/(Weiß)/(Blanc)/(Wit)

(

L

)/(

L

)/(G)/(L)

(White)/(Weiß)/(Blanc)/(Wit)

(

L

)/(

L

)/(G)/(L)

(White)/(Weiß)/(Blanc)/(Wit)

(

R

)/(

R

)/(D)/(

R

)

(Red)/(Rot)/(Rouge)/(Rood)

(

R

)/(

R

)/(D)/(

R

)

(Red)/(Rot)/(Rouge)/(Rood)

System-up Connector
System-Upgrade-Stecker
Connecteur d'amélioration de système
Systeemuitbreidingsaansluiting

(Blue w/white stripe)/(Blau mit weißem Streifen)/(Bleu à rayures blanches)/(Blauw 
met witte streep)

+

B7

-

B8

+

B1

-

B2

+

B3

-

B4

+

B5

-

B6

B7 : 

Rear Left + (Green)
Hinten Links + (Grün)
Arrière (Vert)
Links (Groen) 

B5 : 

Front Left + (White)
Vorne Links + (Weiß)
Avant (Blanc)
Links voor + (Wit)

B3 : 

Front Right + (Gray)
Vorne (Grau)
Avant droit + (Gris)
Rechts voor + (Grijs)

B1 : 

Rear Right + (Violet)
Hinten (Violett)
Arrière droit + (Violet)
Rechts (Paars) 

B2 : 

Rear Right – (Violet w/black stripe)
Hinten Rechts – (Violett mit schwarzem Streifen)  
Arrière droit – (Violet à rayures noires)
Rechts achter – (Paars met zwarte streep)

B4 : 

Front Right – (Gray w/black stripe)
Vorne Rechts – (Grau mit schwarzem Streifen) 
Avant droit – (Gris à rayures noires)
Rechts voor – (Grijs met zwarte streep)

B6 : 

Front Left – (White w/black stripe)
Vorne Links – (Weiß mit schwarzem Streifen)  
Avant gauche – (Blanc à rayures noires)
Links voor – (Wit met zwarte streep) 

+

-

ISO Connector
ISO-Stecker
Connecteur ISO
ISO aansluiting

B
B
B
B

B8 : 

Rear Left – (Green w/black stripe)
Hinten Links – (Grün mit schwarzem Streifen)  
Arrière gauche – (Vert à rayures noires)
Links achter – (Groen met zwarte streep) 

B

CX-DP880N

CQ-C5303N

System Upgrade Example: Connecting with the CD changer/Beispiel für ein System-Upgrade: Anschluss an den CD-Wechsler
/Exemple de mise à niveau de système: Raccordement à un changeur de disque CD/Voorbeeld systeemuitbreiding: Aansluiten van een CD-wisselaar

CA-CC30N

CHANGER IN

System-up Connector

System-Upgrade-
Stecker

Connecteur 
d’amélioration de 
système

Systeemuitbreidings-
aansluiting

(Optional)
(Option)
(Optionnel)
(Optioneel)

(Optional)
(Option)
(Optionnel)
(Optioneel)

(

L

)/(

L

)/(G)/(L)

(White)/(Weiß)/(Blanc)/(Wit)

(

R

)/(

R

)/(D)/(

R

)

(Red)/(Rot)/(Rouge)/(Rood)

DIN Cord
DIN-Kabel
Cordon DIN
DIN snoer

RCA Cord
Cinchkabel
Cordon RCA
RCA (tulpstekker) snoer

Ground Lead
Massekabel
Fil de mise à la masse
Aarding

Battery Lead
Batteriekabel
Fil de batterie
Accudraad

Conversion Cable for DVD/CD Changer
Umwandlungskabel für DVD/CD-Wechsler
Câble de conversion de changeur DVD/CD
Conversiekabel voor DVD/CD-wisselaar

The pin arrangement of the power connector

   conforms to ISO standard.

Please check that the pin arrangement of the

   connector in your car conforms to ISO standard.

For car types A and B, change the wiring of the

   red and yellow leads as shown at below.

After connection, insulate the portions marked (

)

   with insulating tape.

Note: 

For cars other than types A and B, please 

consult your local car shop.

Precautions (ISO Connector)

Die Stiftbelegung des Versorgungssteckers entspricht

   dem ISO-Standard.

Bitte stellen Sie sicher, dass die Stiftbelegung

   des Steckers in Ihrem Fahrzeug dem ISO-Standard
   entspricht.

Für Fahrzeuge der Typen A und B, ändern Sie die

   Verdrahtung der roten und gelben Leiter gemäß Abbildung.

Nach dem Anschluss isolieren Sie die mit (

) markierten

   Abschnitte mit Isolierband.

Hinweis: 

Für andere Fahrzeuge als Typ A und B, 

wenden Sie sich bitte an eine örtliche Pkw-Werkstatt.

Vorsichtsmaßregeln (ISO-Stecker)

La disposition des broches du connecteur d'alimentation 

   est conforme à la norme ISO.

Veuillez vérifier si que la disposition des broches du 

   connecteur d'alimentation dans votre voiture est conforme 
   à la norme ISO.

Pour les types de voiture A et B, changer le câblage des 

   fils rouge et jaune comme indiqué ci-dessous.

Après avoir fait les connexions, isoler les sections 

   marquées (

) avec de la bande isolante.

Remarque: 

Pour les voitures autres que des types A et B, 

veuillez consulter votre magasin de matériel automobile local.

Précautions (Connecteur ISO)

De pen-configuratie van de stroomstekker voldoet aan de 

   ISO standaard.

Controleer of de pen-configuratie van de stekker in uw 

   auto eveneens voldoet aan de ISO standaard.

Voor auto's van type A en B, dient u de bedrading voor de rode 

   en gele draden te wijzigen zoals hieronder staat aangegeven.

Na het aansluiten dient u de gedeelten die met (

   gemarkeerd zijn met isolatieband af te plakken.

Opmerking: 

Voor andere auto's dan die van type A en B 

dient u uw garage te raadplegen.

Voorzorgen (ISO stekker)

Standard ISO/ISO-Standard/Normes ISO/Standaard ISO

IGN or ACC 12 V supply
12 V-Versorgung 
(IGN/ACC)
Alimentation 12 V en 
IGN ou ACC
IGN of ACC 12 V 
stroomvoorziening

Car-side connector
Steckverbinder am Fahrzeug 
Connecteur côté voiture 
Stekker aan autozijde

Car-side connector
Steckverbinder am Fahrzeug 
Connecteur côté voiture 
Stekker aan autozijde

Car-side connector
Steckverbinder am Fahrzeug 
Connecteur côté voiture 
Stekker aan autozijde

12 V Batteries (Continuous supply)
12 V-Batterie (Dauerversorgung)
Batterie de 12 V (alimentation continue)
12 V accu (doorlopende stroomvoorziening)

Car Type A/Kraftfahrzeug des Typs A/Type de voiture A/Autotype A

Car Type B/Kraftfahrzeug des Typs B/Type de voiture B/Autotype B

A7

A4

IGN or ACC 12 V supply
12 V-Versorgung
 (IGN/ACC)
Alimentation 12 V en 
IGN ou ACC
IGN of ACC 12 V 
stroomvoorziening

A4

12 V Batteries (Continuous supply)
12 V-Batterie (Dauerversorgung)
Batterie de 12 V (alimentation continue)
12 V accu (doorlopende stroomvoorziening)

A7

No connection
Kein Anschluss
Aucune connexion
Geen aansluiting

A4

12 V Batteries (Continuous supply)
12 V-Batterie (Dauerversorgung)
Batterie de 12 V (alimentation continue)
12 V accu (doorlopende stroomvoorziening)

A7

Power connector/Versorgungsstecker/Connecteur d’alimentation/Stroomstekker

Connect as follows.
Nehmen Sie den Anschluss wie folgt vor.
Branchez les haut-parleurs comme suit.
Sluit de luidsprekers als volgt aan.

Use ungrounded speakers only.

   Allowable input : 50 W or more
   Impedance : 4 – 8 

Distance between speaker and amplifier: 30 cm or more

Verwenden Sie nicht geerdete Lautsprecher.

   Zulässige Belastbarkeit: 50 W oder mehr
   Impedanz : 4 – 8 

Entfernung zwischen Lautsprecher und Verstärker: 30 cm oder mehr

Utilisez uniquement des haut-parleurs non reliés à la masse.

   Puissance d'entrée admissible: 50 W ou davantage 
   Impédance: 4 – 8 

Distance entre le haut-parleur et l'amplificateur: 30 cm ou davantage 

Gebruik uitsluitend ongeaarde luidsprekers.

   Toegestaan ingangsvermogen: 50 W of hoger
   Impedantie: 4 – 8 

Afstand tussen luidspreker en versterker: 30 cm of meer

Speaker Connection/Anschluss der Lautsprecher/Branchement avec les haut-parleurs/Aansluiten van de luidsprekers

Do not use a 3-wire type speaker system 

   having a common earth lead.

Verwenden Sie niemals Lautsprechersysteme mit 

   Dreierverkabelung, die einen gemeinsamen 
   Erdungsleiter aufweist.

Ne pas utiliser pas de système de haut-parleur 

   de type à 3 fils ayant un fil de mise à la masse 
   commun.

Gebruik geen luidsprekersysteem met drie 

   draden en een gedeelde aarddraad.

     Caution

Do not connect more than one speaker to one set of 

   speaker leads. (except for connecting to 
   a tweeter)

     Vorsicht

Schließen Sie niemals mehr als einen Lautsprecher

   an einen Satz Lautsprecherleiter an. (außer bei 
   Anschluss eines Hochtonlautsprechers)

     Attention

Ne raccorder pas plus d'un haut-parleur à un 

   ensemble de fils de haut-parleur. (Sauf lors du 
   raccordement à un tweeter)

     Let op

Sluit niet meer dan één luidspreker aan op één paar 

   luidsprekerdraden. (Behalve bij aansluiting op een 
   tweeter.)

Summary of Contents for CQ-C5303N

Page 1: ...t u deze instructie alstublieft zorgvuldig door voor u dit product in gebruik neemt en bewaar deze handleiding voor later gebruik Läs igenom denna bruksanvisning noga innan produkten tas i bruk Spara bruksanvisningen för framtida behov Si prega di leggere attentamente queste istruzioni prima di usare questo prodotto e di conservare questo manuale per usi futuri Lea con atención estas instrucciones...

Page 2: ...INTENDED ACTIVATION OF THE ELECTRICAL SAFETY SYSTEM RESULTING IN DAMAGE TO THE VEHICLE AND PERSONAL INJURY OR DEATH Never use safety related components for installa tion grounding and other such functions Do not use safety related vehicle components fuel tank brake suspension steering wheel pedals airbag etc for wiring or fixing the product or its accessories Installing the product on the air bag ...

Page 3: ...s for installation Use the supplied or designated parts and appropriate tools to install the product The use of parts other than those sup plied or designated may result in internal damage to the unit Faulty installation may lead to an accident a malfunction or fire Do not block the air vent or the cooling plate of the unit Blocking these parts will cause the interior of the unit to overheat and w...

Page 4: ...TOUTE EXPOSITION AU FAISCEAU ADVARSEL LASER UDSENDES NÅR DER ER ÅBNET UNDGÅ UDSÆTTELSE FOR STRÅLER This symbol on the products and or accompanying documents means that used electrical and elec tronic products should not be mixed with general household waste For proper treatment recovery and recycling please take these products to designated collection points where they will be accepted on a free o...

Page 5: ...ule Fully Motorized Face Plate A touch is all it takes to slide the face plate down for access to the disc slot A three stage tilt function permits viewing angle to be adjusted to 15 25 or 35 degrees for optimum display visibility SQ Sound Quality You have 6 preset modes FLAT ROCK POP VOCAL JAZZ CLUB You can customize your setting for these except FLAT and save them for instant recall SQ3 3 Band S...

Page 6: ...A131839 Q ty 1 Trim Plate YEFC051010 Q ty 1 Accessories Lock Cancel Plate Q ty 2 Mounting Bolt Q ty 1 ISO Antenna Adapter Q ty 1 Installation kit YEP0FZ5699 SEL SEL SRC SRC BAND BAND MUTE MUTE 2 3 1 5 8 0 6 4 9 7 VOL VOL DISP DISP CAR AUDIO MENU SEL POWER SOURCE SRC SET BAND MUTE 2 3 1 5 8 0 6 4 9 7 VOL RANDOM NUMBER TUNE TUNE SCAN REPEAT DISP This instruction manual explains operations for use wi...

Page 7: ... dead Cancellation of Demonstration ACC Setting Warning Keep a battery away from children to avoid the risk of accidents If an infant ingests a battery please seek immediate medical attention Caution Remove and dispose of an old battery immediately Do not disassemble heat or short a battery Do not throw a battery into a fire or water Follow local regulations when disposing of a battery Improper us...

Page 8: ... Page 34 about Security Function setting Volume Note The volume level can be set independently for each source For radio one volume setting for AM LW MW one volume setting for all FMs Mute Attenuation ON Press MUTE OFF Press MUTE again You can select mute or attenuation a Page 32 indicator Up Down Default 18 Setting range 0 to 40 8 7 E N G L I S H CQ C5303N General D DISP Display MUTE Mute attenua...

Page 9: ...wide ranged and deep sound slightly emphasizes bass and treble VOCAL clear sound emphasizes middle tone and slightly emphasizes treble JAZZ jazz specific deep sound sound with emphasis on sharpness of high hat and echo of saxophone CLUB club and disco specific sound reproduction of realism being in a club Press D DISP to return to the regular mode Note After pressing MUTE SQ for more than 1 second...

Page 10: ...ess and hold u TILT until you hear a beep approxi mately 1 second from the speaker output then release it Set the face plate to the position at which it is easy to read what is on the display Each time the above operation is repeated the face plate angle changes in the sequence shown below Note The positions specified at Face Plate Angle Tilt are memorized even after the following operations Open ...

Page 11: ...ock Note Adjust the clock when NO CT appears on the screen Select the radio AM LW MW mode a Page 12 Frequency Press and hold D DISP for more than 2 seconds Hour blinks Adjust the hour put forward hour put back hour Hour entered Press D DISP Minute blinks Adjust the minute put forward minute put back minute Minute entered Press D DISP Completed Note When a broadcast of FM Radio Data System is recei...

Page 12: ...ducing noise when a receiving FM stereo wave is weak set FM MONO to ON a Page 30 Display Change Press D DISP to change the display as follows 3AM LW MW 3FM non RDS Adjust the clock when NO CT appears on the screen Clock setting a Page 11 12 11 E N G L I S H CQ C5303N Radio Band Frequency Clock Time CT Frequency Display Off PS Programme Service Name Clock Time CT Frequency Display Off Preset number...

Page 13: ...will be saved at default setting AF ON To select non RDS stations set AF to OFF a Page 15 Manual Preset Memory With this operation a station can be manually stored in the preset memory q Select a band and frequency a Previous page w Press and hold one of the preset buttons from 1 to 6 until the display blinks once Preset number 12 Station Preset Up to 6 stations can be stored in each of the FM1 FM...

Page 14: ...ly Traffic Programme TP Some RDS FM stations periodically provide a traffic announcement Stations which broadcast the traffic announcement are called Traffic Programme TP Traffic Announcement TA Radio announcements on traffic conditions Clock Time CT Service When receiving an RDS station the CT service automatical ly adjusts the time NO CT is displayed in areas where CT service is not avail able a...

Page 15: ...D DISP to change the display as follows Preset Memory AF ON Setting Preset Station Calling Best Station Research AF self tuning allows you to select a station with good reception from the same network when the preset tuning is activated For Poor Reception PI Seek If reception becomes poor when tuning in a preset station press the same preset number button The same station with better reception wil...

Page 16: ...g seek tuning or APM only TP stations are selected a Page 13 for Auto Preset Memory Setting to TA on with the unit in another mode it will automatically switch to radio mode and a traffic announcement is broadcast on the radio when the traf fic announcement begins The traffic announcement having finished the unit will return to the previous mode TA standby mode Traffic information only TA mute Whi...

Page 17: ...the next page To tune in a desired programme type press any of preset buttons from 1 to 6 Preset PTY Search q Select a programme type by pressing the preset button The preset programme type appears on the display for 5 seconds Example Press preset button 1 w Press the same preset button again or press BAND to tune in the desired programme type station Example Press preset button 1 again Press BAND...

Page 18: ...ELIGION PHONE_IN TRAVEL LEISURE DOCUMENT 3 SPORT SPORT 4 POP_M POP_M 5 CLASSICS CLASSICS 6 MUSIC ROCK_M EASY_M LIGHT_M OTHER_M JAZZ COUNTRY NATION_M OLDIES FOLK_M Radio Data System RDS continued Programme Type PTY Reception continued Use the table below to note changes in preset stations Preset No FM1 FM2 FM3 1 2 3 4 5 6 Other PTY functions PTY Language Selection The language displayed on the scre...

Page 19: ...ently tuned in to For exam ple if you preset a station far from home you will later be able to receive the same station at an alternative frequency or another station serving the same programme EON also keeps track of locally available TP stations for quick recep tion Emergency Announcement Reception When an emergency announcement is broadcast the unit is automatically switched to receiving that b...

Page 20: ...a disc is loaded at ACC on A disc which has both CD DA data and MP3 WMA data on it may not be reproduced normally Disc Insert q Press u OPEN When a disc is already loaded lights the disc will be ejected after the face plate fully opens w Insert a disc Note It may take some time to start playing Playback will start automatically after recognizing the data of the loaded disc OR a Page 22 about MP3 W...

Page 21: ...ase them to resume normal playback Pause y 5 Press BAND y 5 Press BAND y 5 again to cancel Random Play All the available tracks are played in a random sequence Press 4 RANDOM lights Press 4 RANDOM again to cancel Scan Play The first 10 seconds of each track is played in sequence Press 5 SCAN Press 5 SCAN again to cancel Repeat Play The current track is repeated Press 6 REPEAT lights Press 6 REPEAT...

Page 22: ...o not scroll ID3 WMA Tag Setting Press and hold 3 SCROLL for more than 2 seconds Default When a folder name is displayed TAG ON The album title is displayed TAG OFF The folder name is displayed When a file name is displayed TAG ON The title artist name is displayed TAG OFF The file name is displayed Folder Selection Next folder Previous folder File Selection d Next file s Beginning of the current ...

Page 23: ...layed in sequence Press and hold 5 SCAN for more than 2 seconds lights Press and hold 5 SCAN again for more than 2 sec onds to cancel Repeat Play The current file is repeated Press 6 REPEAT lights Press 6 REPEAT again to cancel Folder Repeat Play The current folder is repeated Press and hold 6 REPEAT for more than 2 seconds light Press and hold 6 REPEAT again for more than 2 sec onds to cancel Dir...

Page 24: ... not set the copy protection on the WMA file to enable this unit to play back Display Information Displayed items Displayable characters Displayable length of file name folder name within 64 charac ters Unicoded file and folder names are reduced by half in the number of displayable characters Name files and folders in accordance with the standard of each file system Refer to the instructions of wr...

Page 25: ...Folder selection order file playback order Maximum number of files folders Maximum number of files folders 511 files folders Maximum number of files in one folder 255 Maximum depth of trees 8 Maximum number of folders 255 Root folder is included Note You can shorten the duration between data read and playback by decreasing the quantity of files or folders or the depth of the hierar chy This unit c...

Page 26: ...en the menu SRS TruBass Default OFF TruBass TruBass is an audio technology to which the technique of bass sound reproduction used in pipe organs is electrically applied and in which an equalizer is not used at all and bass sound from the speakers to be used is richly reproduced Press VOLUME PUSH SEL Page 28 D DISP Return to the regular mode SRS TruBass indicator Press VOLUME PUSH SEL select Press ...

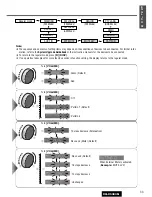
Page 27: ... System Upgrade Guidebook or the instruction manuals for the devices to be connected To return to the regular mode press D DISP If no operation takes place for more than 5 seconds 2 seconds in the volume adjustment in audio setting the display returns to the regular mode The volume can also be adjusted directly using VOLUME on the main unit a Page 8 q w Turn VOLUME q ON lights w OFF Default VOLUME...

Page 28: ... SQ Low Bass 12 dB at 60 Hz 80 Hz 100 Hz 200 Hz SQ Mid 12 dB at 500 Hz 1 kHz 2 kHz 3 kHz SQ High Treble 12 dB at 10 kHz 12 kHz 15 kHz 18 kHz The bass treble control level of each frequency is fixed to the frequency that has been selected for SQ FTo return an adjusted SQ to the default setting q Press and hold MUTE SQ for more than 1 second and select the SQ which is to be returned to the default s...

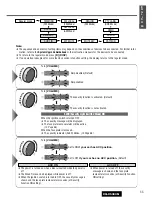
Page 29: ...of the selected button and return to the regular mode resumes When you suspend the SQ preset adjustment each level remains your recent adjustment until a new SQ presetting operation is performed or you call up the SQ preset Level The selected frequency band blinks Frequency Note The sequence and contents of setting items may depend on the conditions of devices to be connected For further informati...

Page 30: ...o ON or vice versa AF mode turns on automatically Press VOLUME PUSH SEL Local Tuning Radio mode Only stations with good reception are detected in seek tuning Default OFF Press VOLUME PUSH SEL Page 32 D DISP Return to the regular mode Press and hold VOLUME PUSH SEL select for more than 2 seconds Press and hold SEL MENU for more than 2 seconds on the remote control unit PTY Language Selection RDS mo...

Page 31: ...k or the instruction manuals for the devices to be connected To return to the regular mode press D DISP If no operation takes place for more than 5 seconds in function setting the display returns to the regular mode FM MONO FM LOCAL AUX1 IN EXT MUTE MUTE KEY PTY LANG ACC SET SECURITY Regular mode REGION DEMO PATTERN FM Mode FM Mode RDS Mode AM LOCAL AM Mode FM Mode COLOR Turn VOLUME q English Defa...

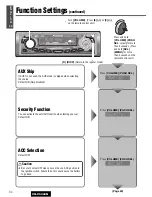
Page 32: ...ce guidance or car telephone conversa tion is in progress Default 0 Setting range 0 to 2 OFF Press VOLUME PUSH SEL Function Settings continued Page 34 D DISP Return to the regular mode Press and hold VOLUME PUSH SEL select for more than 2 seconds Press and hold SEL MENU for more than 2 seconds on the remote control unit Change in Luminescent Color of Buttons You can select luminescent color of but...

Page 33: ...e conditions of devices to be connected For further infor mation refer to the System Upgrade Guidebook or the instruction manuals for the devices to be connected To return to the regular mode press D DISP If no operation takes place for more than 5 seconds in function setting the display returns to the regular mode Turn VOLUME q Green Default w Red FM MONO FM LOCAL AUX1 IN EXT MUTE MUTE KEY PTY LA...

Page 34: ... leaving your car Default ON Press VOLUME PUSH SEL ACC Selection Default OFF Caution Be sure to select OFF when your car has no ACC position in the ignition switch Failure to do this could cause the battery to go dead Press VOLUME PUSH SEL Page 30 AUX Skip If AUX1 is not used the AUX mode is skipped when selecting the source Default ON Skip disabled Press VOLUME PUSH SEL D DISP Return to the regul...

Page 35: ...oval alarm will be active a Page 36 When the face plate is removed The security indicator SLED blinks a Page 36 ACC ON The power is turned on when a disc is inserted while the power is off The Clock Time can be displayed while power is off When the ignition switch is turned to OFF the security message is shown and the face plate removal alarm sounds at Security Function ON setting ACC OFF When pow...

Page 36: ...n the face plate is removed from the unit This function is activated when the Security Function is ON a Page 34 Face Plate Removal Alarm This alarm sounds to warn you not to forget to remove the face plate before leaving your car This function is activated when the Security Function is ON a Page 34 Anti Theft System SLED 1 2 This unit is equipped with a removable face plate Removing this face plat...

Page 37: ...inside a car for extended periods may damage and make playback impossible Some CD R RW discs cannot be played back successfully due to incompatibility among writing software a CD recorder CD R RW drive and the discs This player cannot play the CD R RW discs if the session is not closed This player cannot play the CD R RW discs which contain other than CD DA or MP3 WMA data Be sure to observe the i...

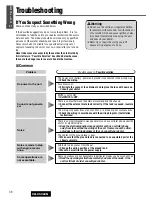
Page 38: ... unit is still out of order consult your dealer Some operations are not executable Alternator noise comes from the car aChange the wiring position of the ground lead aMount a noise filter on the power supply Noise is made in step with engine revolu tions There is an electromagnetic wave generator such as a cellular phone near the unit or its electrical lines aKeep the electromagnetic wave generato...

Page 39: ...ossible cause a Possible solution Radio The contact of the battery lead is poor or the battery lead is not always pow ered aMake sure that the battery lead is connected securely and preset sta tions again Preset stations cannot be stored The number of receivable stations is less than 6 aMove to an area where receivable stations number is maximum and try presetting The number of auto preset station...

Page 40: ...tions between the current station and AF stations Update of AF list ended in failure aWait until the AF list is successfully updated For unstable reception tune in to a stable station by the hand An AF station cannot be received even if AF indicator lights The unit received a station broadcasting time that is not appropriate for you or the unit is receiving a station that does not broadcast time a...

Page 41: ...ayable on this unit The disc has unplayable formatted data aRefer to the description about MP3 WMA for playable sound data except CD DA i e music CD No playback or disc ejected Problem Possible cause a Possible solution Note Refer to Notes on MP3 WMA a Page 24 The battery is inserted in the wrong direction A wrong battery is inserted aInsert a correct battery in the correct direction The battery i...

Page 42: ... a Page 24 Display The disc is dirty or upside down a Check the disc a Page 37 The disc has scratches a Check the disc a Page 37 No operation by some cause a Unplug the power cord and plug it again In case the unit is still out of order consult your dealer a Installation Instructions After 5 seconds Error Display Messages CD MP3 WMA A WMA file can be copyrighted a The file protected by copyright i...

Page 43: ...e for further details Specifications Power supply DC 12 V 11 V 16 V Test Voltage 14 4 V negative Ground Current consumption Less than 2 1 A CD mode 0 5 W 4 channels Maximum power output 50 W x 4 at 4 Ω Power output 22 W x 4 DIN 45 324 at 4 Ω Speaker impedance 4 8 Ω Tone SQ adjustment range SQ Low Bass 12 dB at 60 Hz 80 Hz 100 Hz 200 Hz SQ Mid 12 dB at 500 Hz 1 kHz 2 kHz 3 kHz SQ High Treble 12 dB ...

Page 44: ...YEFM285753B NT1105 2125 Printed in China Matsushita Electric Industrial Co Ltd Web Site http www panasonic co jp global ...

Page 45: ...port Bracket supplied with car Einbauleiste vorhanden im Fahrzeug Support arrière fourni avec votre voiture Achter steunbeugel behorend bij de auto Rubber Bushing Option Gummibuchse Option Bague en caoutchouc Option Rubber stootkussen optioneel To the unit An das Gerät Côté appareil Naar het toestel English Deutsch Français Nederlands Installation Instructions Einbauanleitung Instructions d instal...

Page 46: ...Violet w black stripe Hinten Rechts Violett mit schwarzem Streifen Arrière droit Violet à rayures noires Rechts achter Paars met zwarte streep B4 Front Right Gray w black stripe Vorne Rechts Grau mit schwarzem Streifen Avant droit Gris à rayures noires Rechts voor Grijs met zwarte streep B6 Front Left White w black stripe Vorne Links Weiß mit schwarzem Streifen Avant gauche Blanc à rayures noires ...

Page 47: ...bruik zodat u er later nog eens iets in op kunt zoeken Vid uppgradering av systemet läs igenom denna manual innan det tas i bruk Spara denna manual för framtida referens efter genomläsning Per potenziare il proprio sistema leggere attentamente questo manuale prima dell utilizzo Questo manuale deve essere conservato per poterlo consultare in futuro dopo la lettura Para efectuar la mejora de su sist...

Page 48: ...r If the unit is out of order no power no sound or in an abnormal state has foreign objects in it is exposed to water is smoking or smells turn it off immediately and consult your dealer The remote control unit should not lie about in the car If the remote control unit lies about it could fall on the floor while driving get wedged under the brake pedal and lead to a traffic accident Refer fuse rep...

Page 49: ...ed or designated parts and appropriate tools to install the product The use of parts other than those sup plied or designated may result in internal damage to the unit Faulty installation may lead to an accident a malfunction or fire Do not block the air vent or the cooling plate of the unit Blocking these parts will cause the interior of the unit to overheat and will result in fire or other damag...

Page 50: ...leted with software available at the end of October 2005 We do not guar antee the operation with our future products or upgraded software iPod is a trademark of Apple Computer Inc registered in the U S and other countries Hands Free Phone System You can connect the optional Bluetooth hands free kit hands free phone system Hands Free Kit featurimg Bluetooth technology CY BT100N For details refer to...

Page 51: ...14 Expansion Module CY EM100N option CD Changer CX DP880N option Conversion Cable for DVD CD Changer CA CC30N option System up Connector Direct Cable for iPod CA DC300N option Hands Free Kit featurimg Bluetooth technology CY BT100N option iPod Cellular Phone Only 1 unit Up to 4 units CY BT100U CY BT100U Note Refer to individual instruction and installation manuals for each device for detailed inst...

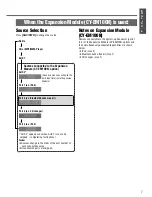
Page 52: ...d by receiving an incoming call Expansion Module hub unit CY EM100N Source Selection Press SRC PWR to change the source Radio CD Player MP3 WMA Player AUX 1 An optional unit ex CD changer Sound source connected to the System up Connector of this unit directly Sound source connecting to the AUX input terminal a Operating Instructions OR a Page 7 a Page 12 a Page 10 a Page 8 General ...

Page 53: ... a Operating Instructions Note Sources change in the order of the port number of each connected source Unconnected ports are skipped Notes on Expansion Module CY EM100N Devices connectable to the System up Connector ports 1 to 4 of the Expansion Module CY EM100N option and their simultaneously connectable quantities are shown below iPod max 2 Bluetooth hands free kit max 1 CD changer max 1 Sound s...

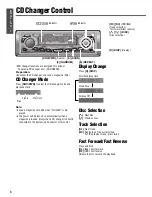
Page 54: ...lly when a magazine is loaded Only when a CD changer is directly connected to the System up Connector of this unit Display Change Press D DISP Disc Selection Next disc Previous disc Track Selection d Next track s Beginning of the current track For the previous track press twice Fast Forward Fast Reverse Press and hold d f Fast forward s a Fast reverse Release them to resume the playback CD Changer...

Page 55: ... than 2 sec onds to cancel Repeat Play The current track is repeated Press 6 REPEAT lights Press 6 REPEAT again to cancel Disc Repeat Play The current disc is repeated Press and hold 6 REPEAT for more than 2 seconds blinks Press and hold 6 REPEAT again for more than 2 sec onds to cancel Direct Disc Selection Only for remote control unit Example Disc number 5 q Press w Press 5 e Press BAND SET Note...

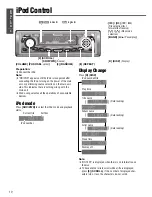
Page 56: ... is nothing wrong with the main unit We do not guarantee all the operations of connectable devices iPod mode Press SRC PWR to select the iPod mode and playback starts Display Change Press D DISP Note NO TEXT is displayed when there is no information on the disc To have another circle scroll while a title is displayed press 3 SCROLL If the number of displayed char acters is 8 or less the characters...

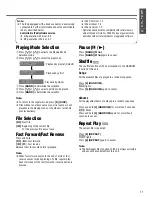
Page 57: ...ause y 5 Press BAND y 5 Press BAND y 5 again to cancel Shuffle The shuffle function of iPod corresponds to the RANDOM function of this unit Songs All the available files are played in a random sequence Press 4 RANDOM lights Press 4 RANDOM again to cancel Albums All the playable albums are played in a random sequence Press and hold 4 RANDOM for more than 2 seconds blinks Press and hold 4 RANDOM aga...

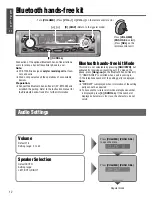
Page 58: ...o not guarantee all the operations of connectable devices Preparation Connect the Bluetooth hands free kit CY BT100N and establish the pairing Refer to the instruction manual for the Bluetooth hands free kit for further information Bluetooth hands free kit Mode This mode is not selectable by pressing SRC PWR but activated by receiving an incoming call To pick up the phone press Hang on on the Blue...

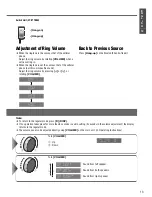
Page 59: ...gular mode The volume can also be adjusted directly using VOLUME on the main unit a Operating Instructions q w Adjustment of Ring Volume When the ringtone is the same as that of the cellular phone Adjust the ring volume by rotating VOLUME when a call is coming in When the ringtone is not the same as that of the cellular phone but this unit specific sound Adjust the ring volume by pressing or or ro...

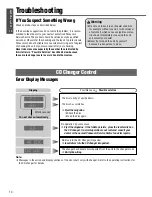
Page 60: ...ul smell which can cause ignition or elec tric shock Immediately stop using the unit and consult your dealer Never try to repair the unit by yourself because it is dangerous to do so CD Changer Control Display The disc is dirty or upside down The disc has scratches a Eject the magazine Check the disc Load the disc again To next disc automatically No operation by some cause a Eject the magazine If ...

Page 61: ...od Control Display The iPod cable was disconnected in the iPod mode a Reconnect the iPod cable Possible cause a Possible solution Your iPod has no playable music a Download playable music to your iPod Error Display Messages ...

Page 62: ...YEFM262693A NT1105 1125 Printed in China System Upgrade Guidebook Matsushita Electric Industrial Co Ltd Web Site http www panasonic co jp global ...

Reviews: