background image

CQ-C7305N Installation Instructions 

(1-1)

YFM294C094CA

0 – 

30

°

53 mm

182 mm

4.5 mm – 6.0 mm

4

Please read these instructions carefully before using this product and keep this manual for future reference.

Bitte lesen Sie diese Bedienungsanleitung vor der Verwendung dieses Produktes aufmerksam durch und bewahren

   Sie sie danach für spätere Nachschlagzwecke sorgfältig auf.

Prière de lire ces instructions attentivement avant d’utiliser le produit et garder ce manuel pour l’utilisation ultérieure.

Leest u deze instructie alstublieft zorgvuldig door voor u dit product in gebruik neemt en bewaar deze handleiding voor later gebruik.

Matsushita Electric Industrial Co., Ltd.

Web Site : http://panasonic.net

Consult a professional for installation.

Verify the radio using the antenna and speakers before installation.

Wenden Sie sich zum Einbau an einen Fachmann.

Probieren Sie den Radiobetrieb vor dem Einbau mit Antenne
und Lautsprechern aus.

Prenez contact avec un spécialiste pour le montage.

Vérifiez l’autoradio avant de procéder au montage.

Vraag een vakman voor de installatie.

Controleer voor de installatie of de radio werkt met de antenne en 

de luidsprekers.

Mounting angle  side to side   : horizontal

                              front to rear  : 0 – 30

°

Montagewinkel seitlich            : horizontal

                              vorne-hinten : 0 – 30

°

Angle de montage latéral        : horizontal

                              longitudinal   : 0 – 30

°

Bevestigingshoek links/rechts : horizontaal

                              voor/achter   : 0 – 30

°

Mounting space

Einbauöffnung

Espace nécessaire pour le montage

Benodigde ruimte

Before Installation/Vor dem Einbau/

Avant l’installation/Voor de installatie

Before Wiring/Vor der Verdrahtung/

Avant le câblage/Voor het aansluiten van de bedrading

How to install the unit/Einbau des Gerätes/Mode de montage de l’appareil/Installeren van het toestel

Supplied Hardware/Mitgeliefertes Zubehö

r

/Matériel d’installation/Meegeleverde onderdelen

Installation/Einbau/Montage/Installatie

Mounting collar 

q

 insertion


Bend mounting tabs.

Einsetzen der Einbauhalterung 

q


Biegen Sie die Einbaulaschen ab.

Insertion du cadre de montage 

q


Replier les languettes de fixation.

Inbrengen bevestigingskraag 

q

Buig bevestigingslipjes om.

Connection of power connector 

e

Anschluss des Versorgungssteckers 

e

Raccordement du connecteur d'alimentation 

e

Aansluiten van de stroomstekker 

e

5

Trim plate 

r

 mounting

Anbringen der Abdeckplatte 

r


Installation de la plaque de garniture 

r


Bevestigen van de afwerkingsrand 

r


6

Battery Cable reconnection
Wiederanschließen des Kabels
Rebranchement du câble
Opnieuw aansluiten kabel

Remove the face plate.

Nehmen Sie das 

Bedienteil ab.

Retirer le plaque de 

façade.

Verwijder de voorplaat.

1

Remove the trim plate 

r

.

Entfernen Sie die 
Abdeckplatte 

r

.

Enlevez la plaque de 
garniture 

r

.

Verwijder de 

afwerkingsrand 

r

.

2

3

Pull out the unit with
both hands.

Ziehen Sie das Gerät mit
beiden Händen heraus.

Retirez l’appareil à deux 
mains.

Trek het toestel met beide 
handen naar buiten.

4

How to remove the unit/Ausbau des Gerätes/

Dépose de l’appareil/Verwijderen van het toestel

Caution 


 Wear gloves for safety.


 Make sure that wiring is completed 

before installation.


Vorsicht 


 Tragen Sie Handschuhe, um sich  

vor Verletzungen zu schützen.


 Achten Sie vor dem Einbau darauf, 

dass die Verdrahtung fertiggestellt ist.


Attention


Porter des gants à des fins de sécurité.


 S'assurer que le câblage est terminé avant 

l'installation.


Let op


 Draag handschoenen voor uw veiligheid.


 Controleer of de bedrading correct is aangelegd 

voor u gaat installeren.

Remove the cable from the battery negative terminal.

Trennen Sie das Kabel von der negativen Batterieklemme ab.

Retirer le câble de la borne négative de la batterie.

Koppel de kabel van de negatieve aansluiting van de accu los.

Bend appropriate tabs to secure the unit 
without backlash.
Die entsprechenden Einbaulaschen so 
umbiegen, dass das Gerät ohne Spielraum 
fest sitzt.
Replier les languettes 
de fixation appropriées 
pour immobiliser 
l'appareil sans 
contrecoup.
Buig de juiste lipjes om 
zodat het toestel vast 
zit zonder speling.

q


Screw the mounting bolt 

w

 into the main unit.

w


Securing to the fire wall.

e


Snap the right and left springs into each hole.

q


Schrauben Sie die Befestigungsschraube


w


in das Hauptgerät.

w


An der Feuerschutzwand sichern.

e


Lassen Sie die rechten und linken Federn in den 

Löchern einschnappen.

q


Visser le boulon de fixation 

w

 dans l'appareil 

principal.

w


Saisissage du pare-feu.

e


Bouteroller les ressorts droit et gauche dans chaque trou.

q


Draai de bevestigingsbout 

w

 in het hoofdtoestel.

w


Vastzetten aan het brandschot.

e


Zet de achterkant van het hoofdtoestel vast.

4

Securing to the fire wall
Befestigung an Brandschutzwand
Obtenir un pare-feu
Vastzetten aan het brandschot

Using the rear support strap (Option)

Using the Rubber bushing (Option)

Verwendung der Einbauleiste (Option)

Verwendung der Gummibuchse (Option)

Utiliser de la barrette de support arrière (en option)

Utiliser la bague d'amortisseur en caoutchouc (en option)

Gebruik van de achter-steunstrip (

optioneel

)

Gebruik van het rubber stootkussen (optioneel)

3 mm

Tapping Screw (Option)
Blechschraube (Option)
Vis taraudeuse (en option)
Zelftappende schroef
(optioneel)

To the unit
An das Gerät
Côté appareil
Naar het toestel

Rear Support Strap (Option)
Hinterer Stützstreifen
(Option)
Barrette d'appui arrière (en option)
Steunstrip achter (optioneel)

Hexagonal nut (Option)
Sechskantmutter (Option)
Ecrou hexagonal (en option)
Zeskantige moer (optioneel)

Rear Support Bracket
(supplied with car)
Einbauleiste (vorhanden im
Fahrzeug)
Support arrière 
(fourni avec votre voiture)
Achter-steunbeugel 
(behorend bij de auto)

Rubber Bushing (Option)
Gummibuchse (Option)
Bague en caoutchouc (en option)
Rubber stootkussen (optioneel)

To the unit
An das Gerät
Côté appareil
Naar het toestel

English

Deutsc

h

Français

Nederlands

Installation Instructions

Einbauanleitung

Instructions d’installation

Installatiehandleiding

Installation Instructions

Einbauanleitung

Instructions d’installation

Installatiehandleiding

   Caution

When this unit is installed in dashboard, 
ensure that there is sufficient air flow 
around the unit to prevent damage from 
overheating, do not block any ventilation 
holes on the unit.

   Vorsicht

Bei Einbau des Geräts im Armaturenbrett 
sollte darauf geachtet werden, dass der 
Luftstrom um das Gerät nicht behindert ist, 
um Beschädigung durch Überhitzen zu 
verhindern, und die Belüftungsöffnungen 
des Geräts nicht blockiert sind.

   Attention

Lorsque cet appareil est installé dans le 
tableau de bord, assurez-vous qu'il y a une 
circulation d'air suffisante autour de 
l'appareil afin d'éviter tout endommagement 
provoqué par une surchauffe et qu'aucun 
trou d'aération de l'appareil n'est obturé.

   Let op

Wanneer dit toestel in het dashboard wordt 
geïnstalleerd, moet u ervoor zorgen dat er 
voldoende ventilatie is rond het toestel. Om 
oververhitting te voorkomen mogen de 
ventilatie-openingen in het toestel niet 
afgedekt worden.

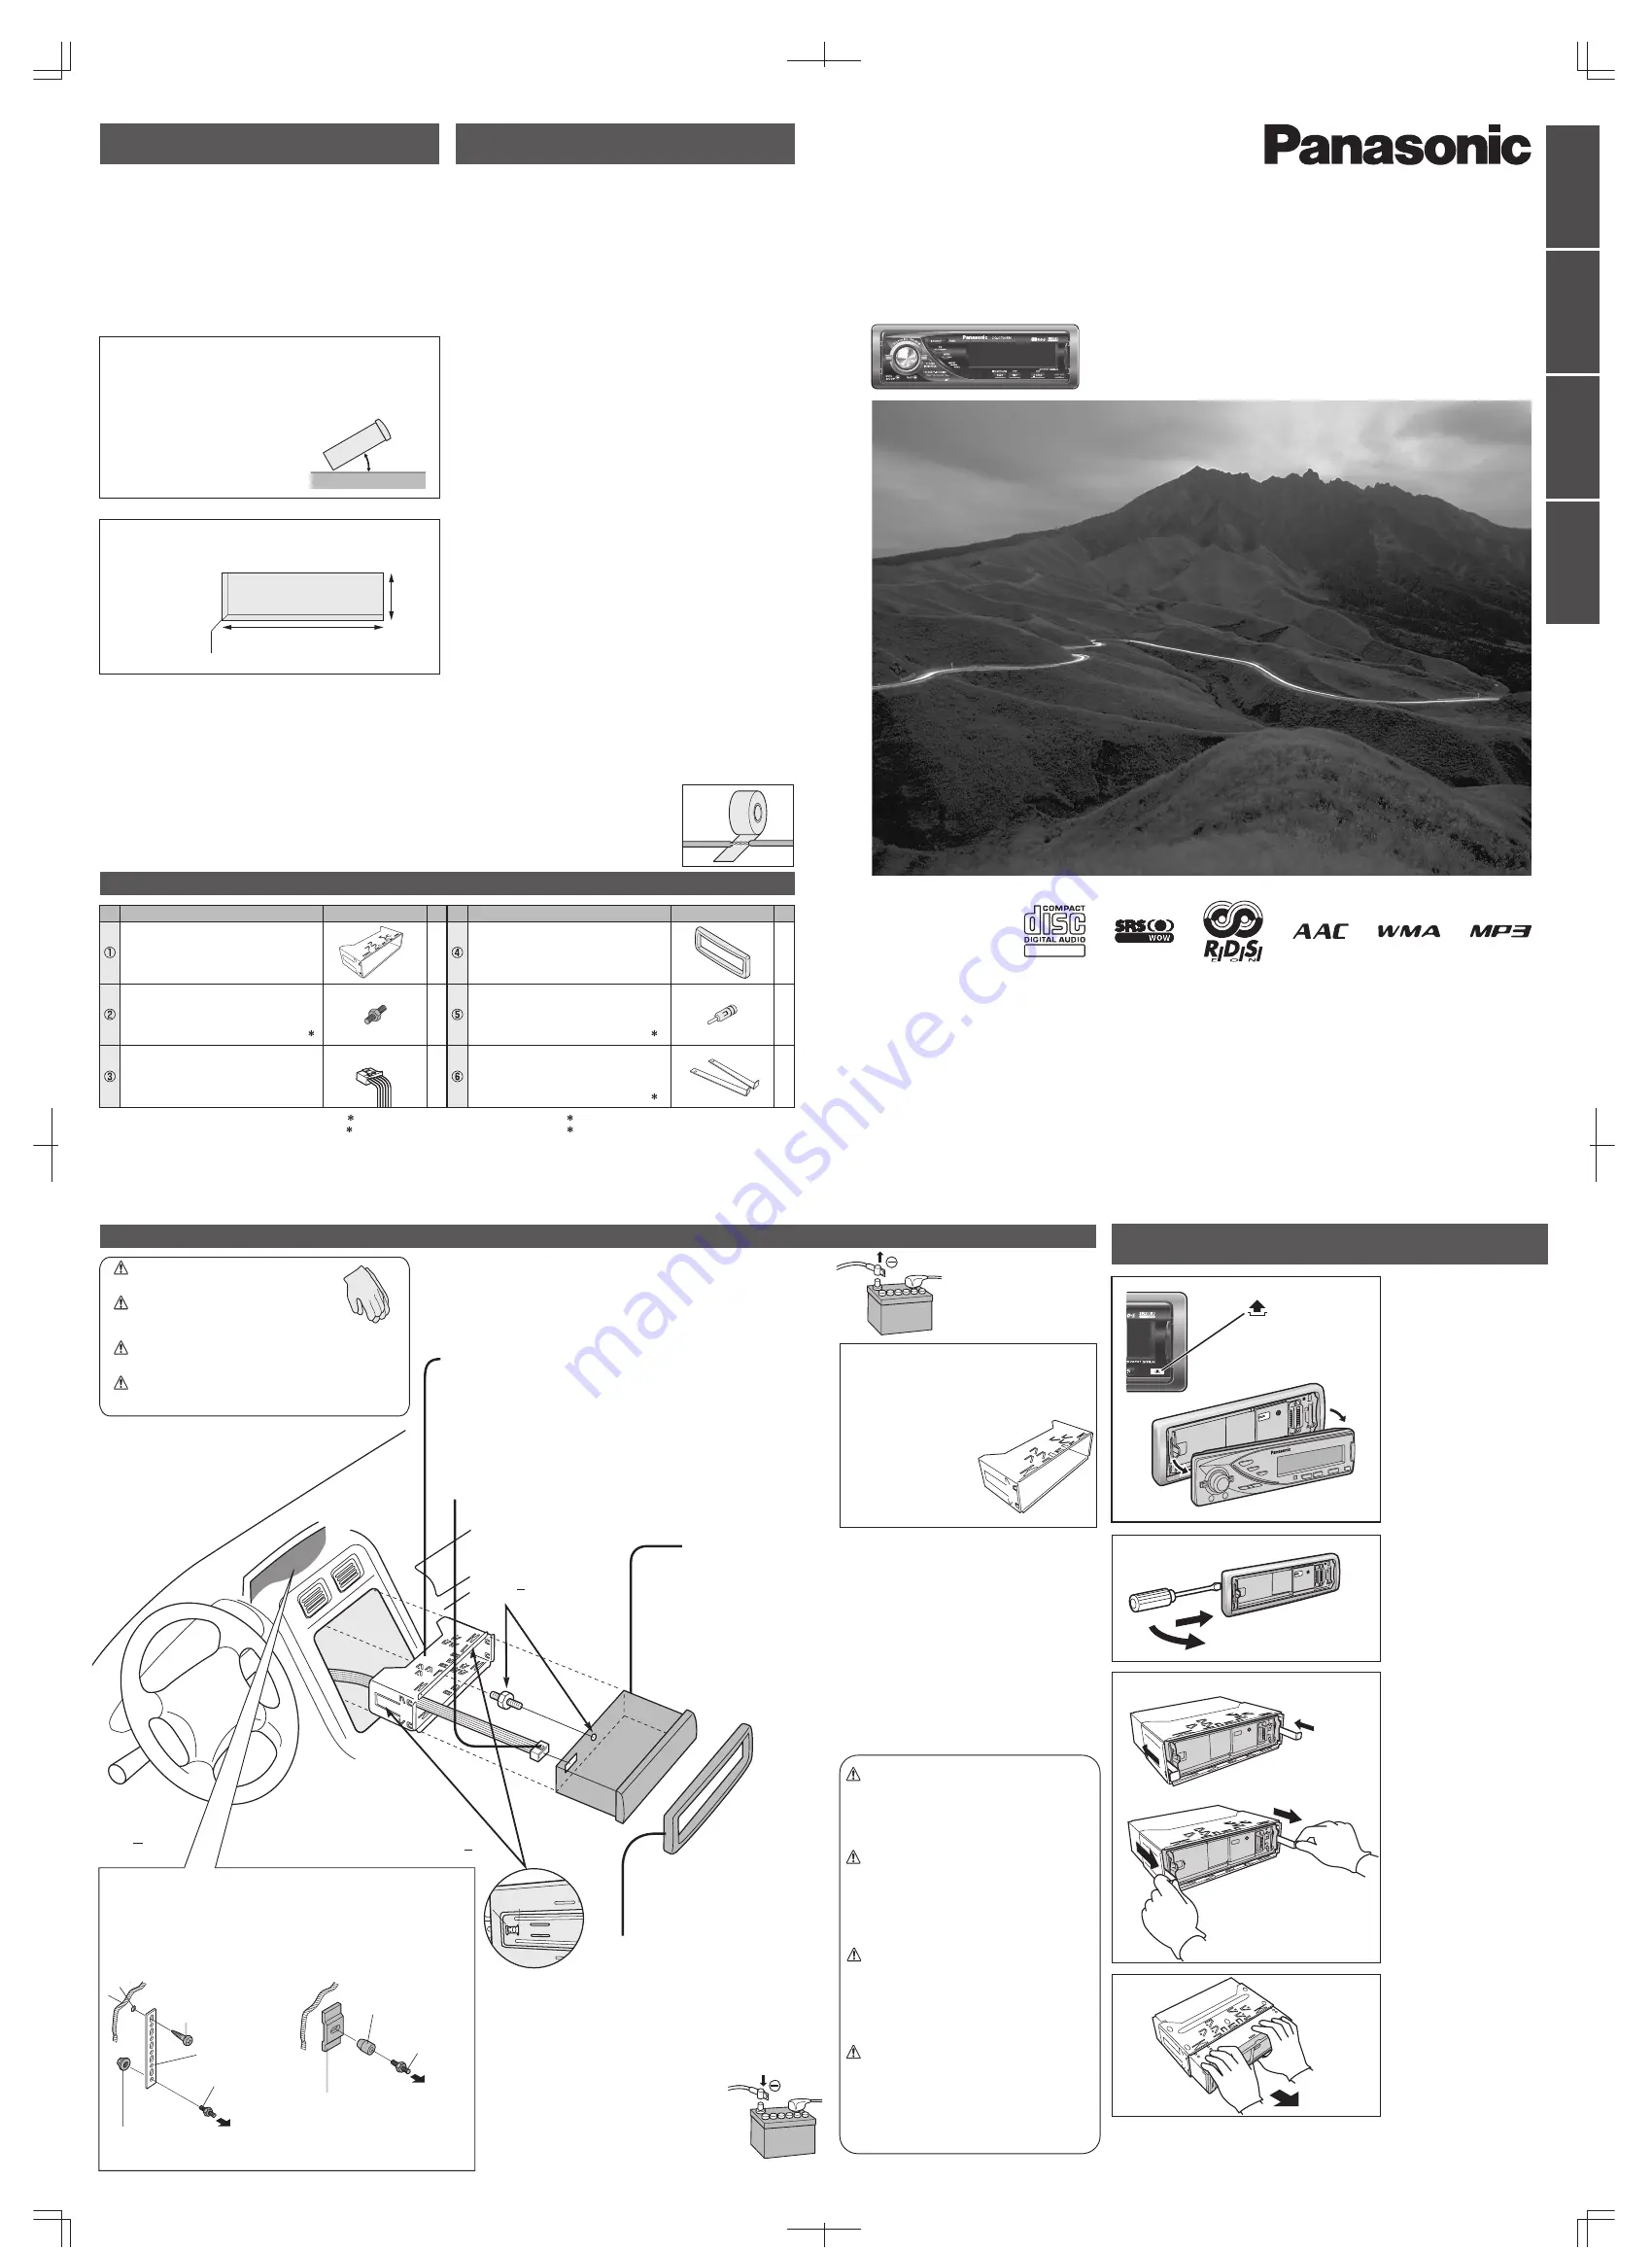
Remove Mounting Collar 

q


and Trim Plate 

r

 from the main

unit temporarily, which are already mounted at shipment.

Die bei der Lieferung montierte Einbauhalterung 

q

 und 

Abdeckplatte 

r

 vorübergehend vom Gerät abmontieren.

Démontez provisoirement le cadre de montage 

q

 et la 

plaque de garniture 

r

 de l’appareil principal, qui sont déjà 

mis en place lors de l’expédition.

Verwijder de Bevestigingskraag 

q

 en de Afwerkingsrand 

r

die bij het verlaten van de fabriek gemonteerd zijn, 
tijdelijk van het hoofdtoestel.

1

2

3

4

4

4

5

6

q

4

e

w

Snapping point
Einschnapppunkt
Position de rupture 
Breekpunt

Mounting Bolt 

w

Befestigungsschraube 

w

Boulon de fixation  

w

Bevestigingsbout 

w

Mounting Bolt 

w

Befestigungsschraube 

w

Boulon de fixation  

w

Bevestigingsbout 

w

Lock release

q


Insert the lock cancel plate 

y

 until you hear a click.

w


Pull the main unit.

Verriegelungsfreigabe

q


Setzen Sie die 
Verriegelungsfreigabeplatte 

y


ein, bis Sie ein Klickgeräusch 
vernehmen können. 

w


Ziehen Sie an dem Hauptgerät. 

Libération du verrouillage

q


Introduisez la plaque anti-
blocage 

y

 jusqu’à entendre 

un clic.

w


Dégager l'appareil principal.

Ontgrendeling

q


Steek de 
ontgrendelingsplaat 

y

 naar 

binnen tot u een klik hoort.

w


Trek het hoofdtoestel naar 
buiten.

Exclusively operated with 12 V battery with negative (–)  ground.
Connect the power lead (red) last. 

(for non-ISO connector)

Connect the battery lead (yellow) to the positive (+) terminal of 
the battery or fuse block terminal (BAT). 

(for non-ISO connector)

Strip about 5 mm of the lead ends for connection.

(for non-ISO connector)

Apply insulating tape to bare leads.
Secure loosened leads.

Dieses Gerät ist ausschließlich für den Anschluss
an Bordnetze mit 12 V Batterie und negativer (–) Klemme
an Masse bestimmt.
Schließen Sie den Versorgungsleiter (rot) zum Schluss an.

(wenn kein ISO-Stecker verwendet wird)

Schließen Sie das Batteriekabel (gelb) an die positive (+) 
Klemme der Batterie oder an die (BAT) Klemme des 
Sicherungsblocks an. 

(wenn kein ISO-Stecker verwendet wird)

Entfernen Sie etwa 5 mm der Isolierung von den Kabelenden 
für den Anschluss. 

(wenn kein ISO-Stecker verwendet wird)

Isolieren Sie alle freiliegenden Leiter.
Sichern Sie alle losen Leiter.

Alimentez l’appareil absolument par la batterie de 12 V avec 
sa polarité négative (–) mise à la masse.
Raccorder le fil d'alimentation (rouge) en dernier.

(pour un connecteur non-ISO)

Connectez le fil (jaune) à la borne positive (+) de la batterie ou 
à la borne (BAT) de la boîte à fusibles. 

(pour un connecteur non-ISO)

Dénudez les extrémités de fil de 5 mm environ pour la connexion. 

(pour un connecteur non-ISO)

Recouvrez les fils nus d’un ruban isolant.
Resserrez les connexions de fils.

Uitsluitend voor gebruik met een 12 V accusysteem 
met negatieve (–) aarding.
Sluit de stroomdraad (rood) pas het allerlaatst aan. 

(voor een niet-ISO aansluiting)

Sluit de accudraad (geel) aan op de positieve (+) aansluiting van de 
accu of van het zekeringenblok (BAT). 

(voor een niet-ISO aansluiting)

Strip ongeveer 5 mm van de uiteinden van de draden om de 
verbinding tot stand te kunnen brengen. 

(voor een niet-ISO aansluiting)

Isoleer blote draadeinden met isolatieband.
Zet loshangende draden vast.

Clank!

Fixation de l'appareil
principal

Vastzetten hoofdtoestel

Befestigung des
Hauptgerätes

Main unit securing

1

1

1

1

2

1

No.

Diagram

Q’ty

Item

No.

Diagram

Q’ty

Item

Mounting Collar
Einbauhalterung
Cadre de montage
Bevestigingskraag

Mounting Bolt (5 mmø)
Befestigungsschraube (5 mmø)
Boulon de fixation (5 mmø)
Bevestigingsbout (5 mmø)

ISO Antenna Adapter
ISO-Antennenadapter
Adaptateur d’antenne ISO
ISO antenne-adapter

Lock Cancel Plate
Verriegelungsfreigabeplatte
Plaque anti-blocage
Ontgrendelingsplaat

Power Connector
Versorgungsstecker
Connecteur d’alimentation
Stroomstekker

Trim Plate
Abdeckplatte
Plaque de garniture
Afwerkingsrand

FX0214C384ZB

YGAJ021010


w

t

 and 

y

 consist of a set. (YEP0FZ5740)      

w

t

 und 

y

 bestehen als Satz. (YEP0FZ5740)


w

t

 et 

y

 constituent un jeu. (YEP0FZ5740)      

w

t

 en 

y

 bestaan uit een set. (YEP0FZ5740)

q

w

q

w

AAC WMA MP3 CD Player/Receiver

Model: 

CQ-C7305N

YFM294C094CA  NY1006-1126        Printed in China

YEFC051013

q

e

w

TEXT

Summary of Contents for CQ-C7305N

Page 1: ...f ltig auf Pri re de lire ces instructions attentivement avant d utiliser le produit et garder ce manuel pour l utilisation ult rieure Leest u deze instructie alstublieft zorgvuldig door voor u dit pr...

Page 2: ...ECTRICAL SAFETY SYSTEM RESULTING IN DAMAGE TO THE VEHICLE AND PERSONAL INJURY OR DEATH Never use safety related components for installa tion grounding and other such functions Do not use safety relate...

Page 3: ...on Use the supplied or designated parts and appropriate tools to install the product The use of parts other than those sup plied or designated may result in internal damage to the unit Faulty installa...

Page 4: ...TAESSA VARO ALTISTUMISTA S TEELLE F RSIKTIGHET LASERSTR LNING I PPNAT L GE UNDVIK ATT UTS TTAS F R STR LEN ADVARSEL LASER STR LING UNNG EKSPONERING FOR STR LEN VED PNING CAUTION LASER RA DIATION WHEN...

Page 5: ...olt 5 mm ISO Antenna Adapter YEP0FZ5740 Q ty 1 set Notes The number in parenthesis underneath each accessory part name is the part number for maintenance and service Accessories and their parts number...

Page 6: ...L JAZZ CLUB You can customize your settings for these and save them for instant recall SQ7 This is 7 band equalizer with 60 160 400 1 k 3 k 6 k and 16 kHz Each band is adjustable between 12 dB and 12...

Page 7: ...AC Player 26 Audio Setting 30 Function Setting Security Function Setting etc 31 Display Setting 32 Customize the Display Customize Function 34 Troubleshooting 36 Error Display Messages 41 Notes on Dis...

Page 8: ...U a page 31 32 P SET Preset a page 19 DISC a System Upgrade Guidebook page 8 10 FOLDER a page 26 LIST a System Upgrade Guidebook page 12 DISP Display a page 15 PTY Programme Type a page 23 Release a p...

Page 9: ...on CDs a page 25 27 Random and repeat play with one touch operation a page 25 27 Scan playback a page 25 27 PI seek a page 21 Controls Layout Remote Control Unit Operations executable only with main...

Page 10: ...e backside of remote control gently Battery Replacement q w q Remove the battery holder with the remote control unit placed on a flat surface q Stick your thumbnail into the groove and push the holder...

Page 11: ...onnected Using Subwoofer Subwoofer level adjustment a page 30 Subwoofer low pass filter a page 30 The following functions are activated when the Security Function is ON a page 31 The security indicato...

Page 12: ...face plate until click is heard Cautions It is recommended to remove or mount the face plate when the plate is at the closed position Do not remove or mount the face plate when the plate is in motion...

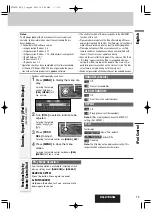
Page 13: ...opriately to prevent large volume fluctuation when the source is changed q Up w Down Setting Range 0 to 40 Default 18 Volume off down Press MUTE Cancel Press MUTE again Note Volume down range can be s...

Page 14: ...up Connector of this unit When optional devices are connected Shift to connected devices When an expansion module is connected The devices connected to the ports 1 to 4 are activated in sequence afte...

Page 15: ...isplay default Mode Folder hierarchy Compressed Audio Player mode only Ordinary display graphic pattern Ordinary display still image Ordinary display clock Display OFF All displays disappear in 5 seco...

Page 16: ...le SRS WOW the following functions are automatically disabled SQ BASS TREBLE BALANCE FADER HPF SBC SW Lights when SRS WOW is activated You can make a fine adjustment to SRS WOW 1 Set the SRS WOW mode...

Page 17: ...160 400 1 k 3 k 6 k 16 k Hz Band selection q w Level up down USER appears in the category name after adjust ment Note If PUSH SEL is held down for 2 sec or more on the SQ ADJUSTMENT display the preset...

Page 18: ...5 sec or more and release for station search Preset station selection P SET PRESET Lower preset number P SET PRESET Higher preset number Notes Direct selection can be executed with 1 to 6 buttons on r...

Page 19: ...egistered by holding down the numeric button 1 to 6 for 2 sec or more To stop presetting stations press DISP DISPLAY The operation above allows users to replace the cur rent station with the station p...

Page 20: ...active a page 22 A TP Traffic program station is automatically searched for and received at the instant of toggling the TA mode on if you are receiving a non TP station When executing station search...

Page 21: ...etter reception will be searched for Press the same preset number button again to cancel Note For PI Seek cancel the TA mode first then execute PI Seek RDS mode display AF AF ALTERNATIVE FREQUENCY SEL...

Page 22: ...st For using the remote control use BAND SET 4 Press MENU to close the menu screen For using the remote control hold down SEL MENU for 2 sec or more AF Adjusting the AF sensitivity Switching immediate...

Page 23: ...t ting a page 18 PTY language selection Note The PTY language is selectable only when the PTY display is activated 1 Press MENU to display the menu dis play For using the remote control hold down SEL...

Page 24: ...lect the CD mode 1 Press uOPEN to open the face plate When a disc is already loaded lights the disc will automatically be ejected 2 Load a disc with the printed side facing up The face plate closes au...

Page 25: ...ult Playing the current track repeatedly TEXT CD TEXT Enabled default Disabled Play Mode Selection One touch operation is available for selecting a track playing style by use of RANDOM or REPEAT RANDO...

Page 26: ...selection FOLDER Next folder FOLDER Preceding folder File selection 7 TRACK Next file 6 TRACK Preceding file press twice Note Hold down for fast forward reverse Pause Press BAND h 5 Press again to ca...

Page 27: ...h MP3 WMA AAC compression is reproduced to more closely recreate the pre compressed sound Notes At high bit rates the Re master function may have little effect The Re master function is only effective...

Page 28: ...s recommended to set the bit rate to 128 kbps or more and fixed WMA It is recommended to set the bit rate to 64 kbps or more and fixed Do not set the copy protect attribute on the WMA file to enable t...

Page 29: ...lder is included Notes This unit counts the number of folders irrespective of the presence or absence of a compressed audio file If the selected folder does not contain any com pressed audio file the...

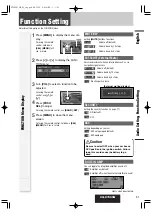
Page 30: ...el adjustment Setting range mute 6 dB to 6 dB 2 dB Step Default 0 dB q Up w Down LPF Subwoofer Low Pass Filter Setting range 80 Hz 120 Hz 160 Hz Default 80 Hz q Up w Down HPF High Pass Filter Setting...

Page 31: ...ns functions Volume off default Volume down by 10 steps Volume down by 5 steps EXT MUTE External Mute Volume adjustment when an interruption such as car navigation signal occurs Volume off default Vol...

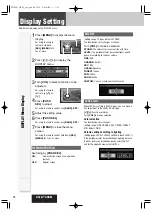
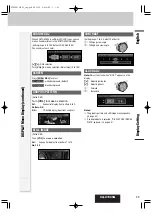
Page 32: ...M The color varies in conjunction with time LEVEL The peripheral color decoration lights up and goes out according to the bass volume FIRE Red ORANGE Amber SKY Blue OCEAN Aquablue FOREST Green SUN Yel...

Page 33: ...to make a selection Adjustment 0 to 100 SCREEN Press PUSH SEL to select white background default black background STILL IMAGE Default All Turn VOL to make a selection All Sequential display from patte...

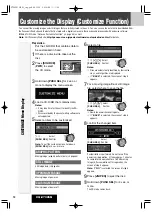
Page 34: ...ized q w Select PUSH SEL Confirm Note To exit the customize menu hold down PUSH SEL for 4 sec or more GRAPHIC PATTERN Moving image graphic pattern data a page 33 STILL IMAGE Still image data a page 33...

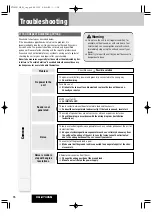
Page 35: ...root directory Files contained in a folder cannot be recognized Follow the table below with regard to the number of files that are saved to a disc Files beyond the speci fied capacity are not readabl...

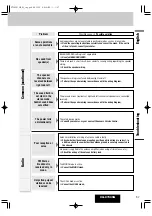
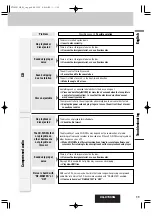
Page 36: ...The power cord battery power and ground is connected in the wrong way a Check the wiring Fuse blows out a Eliminate the cause of fuse blowout and replace the fuse with new one Consult your dealer Sou...

Page 37: ...s not clear in the stereo mode Central sound does not settled The plus and minus terminals at right and left channels of speakers are connected reversely a Perform the speaker wiring in accordance wit...

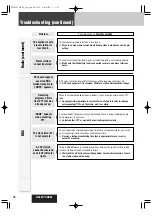
Page 38: ...en programs the unit could not receive the PTY code a An appropriate programme is searched for and tuned in to after receiving a corresponding PTY code Therefore wait for a while NONE appears when sel...

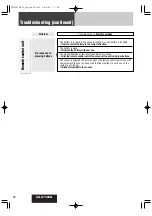
Page 39: ...w or foreign material on the disc a Remove the foreign material or use a flawless disc Sound skipping or noise There is a flaw or foreign material on the disc a Remove the foreign material or use a fl...

Page 40: ...e battery with new one The aiming direction of the remote control unit is wrong aAim the remote control unit at the sensor of the unit and press buttons The sensor is exposed to direct sunlight The re...

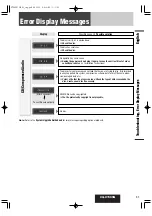
Page 41: ...ecessary After 5 seconds To next file automatically No operation by some cause a Unplug the power cord and plug it again In case the unit is still out of order consult your dealer a Installation Instr...

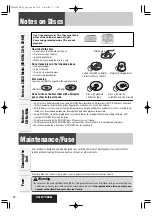
Page 42: ...to ensure the minimum of maintenance Use a soft cloth for routine exterior cleaning Never use benzine thinner or other solvents Notes on CD Rs RWs Maintenance Fuse Cleaning the Unit Fuse If the fuse...

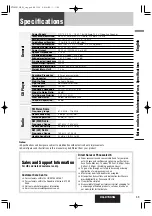
Page 43: ...Current Consumption Less than 2 2 A CD mode 0 5 W 4 Speaker Maximum Power Output 50 W x 4 at 1 kHz Power Output 23 W x 4 DIN 45 324 at 4 Speaker Impedance 4 8 Pre amp output voltage 2 5 V CD mode 1 k...

Page 44: ...na Matsushita Electric Industrial Co Ltd Web Site http panasonic net 6 56 5 Tento v robek je shodn s typem schv len m Ministerstvem dopravy a spoj esk republiky pod slem 2131 j 1964 2004 150 SCH2 C730...

Page 45: ...antige moer optioneel Rear Support Bracket supplied with car Einbauleiste vorhanden im Fahrzeug Support arri re fourni avec votre voiture Achter steunbeugel behorend bij de auto Rubber Bushing Option...

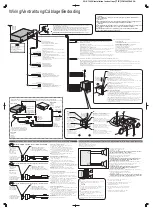
Page 46: ...ard Normes ISO Standaard ISO IGN or ACC 12 V supply 12 V Versorgung IGN ACC Alimentation 12 V en IGN ou ACC IGN of ACC 12 V stroomvoorziening Car side connector Steckverbinder am Fahrzeug Connecteur c...

Page 47: ...ter nog eens iets in op kunt zoeken Vid uppgradering av systemet l s igenom denna manual innan det tas i bruk Spara denna manual f r framtida referens efter genoml sning Per potenziare il proprio sist...

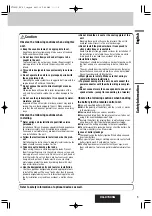
Page 48: ...ound or in an abnormal state has foreign objects in it is exposed to water is smoking or smells turn it off immediately and consult your dealer The remote control unit should not lie about in the car...

Page 49: ...gnated parts and appropriate tools to install the product The use of parts other than those sup plied or designated may result in internal damage to the unit Faulty installation may lead to an acciden...

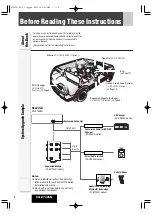
Page 50: ...H801N Option a Page 8 Head Unit CQ C7305N Monitor CY VM1500EX Option iPod a Page 12 Expansion Module CY EM100N option CD Changer CX DP880N option Conversion Cable for DVD CD Changer CA CC30N option Sy...

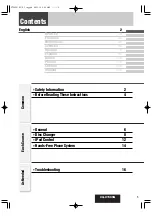
Page 51: ...System 14 Common Each Source Troubleshooting 16 As Needed English 2 Deutsch 18 Fran ais 33 Nederlands 48 Svenska 63 Italiano 78 Espa ol 93 Dansk 108 Polska 123 e tina 138 Magyar 153 Safety Information...

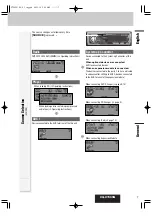
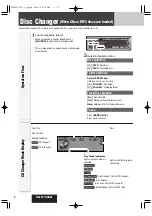
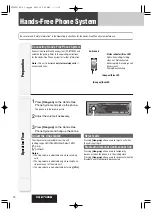
Page 52: ...ber 2006 We do not guar antee the operation with our future products or upgrad ed software iPod is a trademark of Apple Computer Inc registered in the U S and other countries Hands Free Phone System Y...

Page 53: ...e this unit System up Connector Device connected to the System up Connector of this unit When optional devices are connected Shift to connected devices When an expansion module is connected The device...

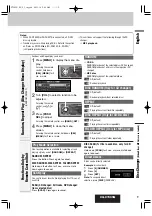
Page 54: ...Down Only for DVD Changer Hold down for 2 sec or more FOLDER Next folder FOLDER Preceding folder Track File selection 7 Next track file 6 Preceding track file press twice Note Hold down for fast forw...

Page 55: ...NDOM Only for CD changer Off default Random playback from selected disc REPEAT Off default Playing the current track file repeatedly DISC REPEAT Only for CD DA disc Off default Playing the current dis...

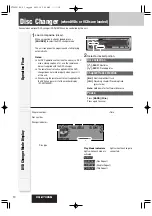
Page 56: ...oes not work properly when you aim it at this unit When using the remote control unit supplied with the DVD changer aim it at the monitor display CY VM1500EX 2 Select a desired portion Disc selection...

Page 57: ...perate for some DVDs For a VCD insertion REPEAT Off default Playing the current track repeatedly DISC REPEAT Off default Playing the current disc repeatedly Notes The unit may not operate for some VCD...

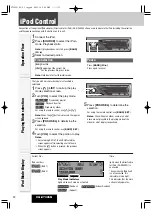
Page 58: ...each mode is activated iPod number Operation Flow Playing Mode selection iPod Mode Display The type with which playback data is classified is selectable 1 Press LIST to call up the play mode selectio...

Page 59: ...REPEAT Notes The iPod equipped with a dock connector is exclusively con nectable Further information about the controllable iPod is described below Controllable iPod software version 3rd generation iP...

Page 60: ...e ring volume is adjustable only when receiving calls The ring volume is adjustable only when the phone ring comes out of the main unit The ring volume is also adjustable by turning VOL Reject calls P...

Page 61: ...tem Menu Display Note Speaker output is adjustable only when receiving calls 1 Press PUSH SEL Select to display the AUDIO menu display For using the remote control use BAND SET 2 Press PUSH SEL Select...

Page 62: ...using the unit and consult your dealer Never try to repair the unit by yourself because it is dangerous to do so Display Possible cause a Possible solution The disc is dirty or is upside down The dis...

Page 63: ...d Control Your iPod has no playable music a Download playable music to your iPod The iPod cable was disconnected in the iPod mode a Reconnect the iPod cable Display Possible cause a Possible solution...

Page 64: ...178 Memorandum CQ C7305N C7305N SU 003 memo qxd 06 11 14 9 03 AM 178...

Page 65: ...179 Memorandum CQ C7305N C7305N SU 003 memo qxd 06 11 14 9 03 AM 179...

Page 66: ...YFM284C669CA NY1006 1126 Printed in China Matsushita Electric Industrial Co Ltd Web Site http panasonic net C7305N SU 001 cover qxd 06 11 14 9 00 AM 1...

Reviews: