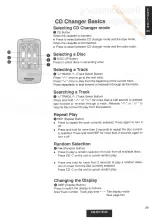
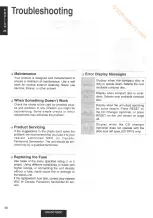
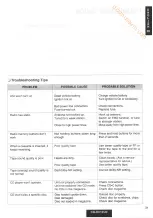
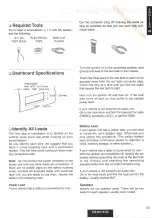
background image

dccmuseum.com

Summary of Contents for CQ-DC1 EUC

Page 1: ...ctes DCC avec plaque amovible et contr6leur de changeur de disques ce DCl euc Operating Instructions Manuel d utilisation Please read these instructions completely before operating this unit ll est recommand6 de lire attentivement ce manuel avant d utiliser l appareil 90 DAY WAHhANTY USA ONUT d c c m u s e u m c o m ...

Page 2: ...ve the interior a chance to cool down before switching the unit on Use the Proper Power Supply This equipment is designed to operate off a 12 volt negative ground battery system the normalsystem in a Nofth American car Protect the Tape Mechanism Keep magnets screwdrivers or other metallic objects away from the tape mechanism and tape head to prevent poor performance or malfunctions Use Authorized ...

Page 3: ...to units with optional CD changer unit sold separately trTitlelnputFeature 21 How to input ctear rhe rites I S IHR llr tr Clock Basics 25 Clock display calendar time setting tr Wireless Remote Control Basics 27 ___ Common operation radio cas ette tape and CD changer t I z tr Troubleshooting 30 Error messages troubleshooting tips where to get service help t l t ll l u l_il_t 2222t ooooo tl lnstalla...

Page 4: ...s6e au soleil toutes vitres ferm6es devient rapidement trds chaud Laisser rafraichir l int6rieur du v6hicule avant d utiliser l appareil Source d alimentation Cet appareil est congu pour fonctionner sur un systdme d alimentation avec batterie de 12V avec n6gatif ir la masse systCme standard sur les voitures de construction nord am6ricaine M6canisme de d6filement Ne pas approcher d aimants de tourn...

Page 5: ...ur de disques ne s appliquent qu aux autoradios auxquels un lecteur changeur vendu s6par6ment est raccord6 trEntr6edestitres 61 Entr6e modification des noms 1es disques I E tnn lt tr Fonctionnement de l horloge Affichage de l horloge r6glage de I horodateur 65 t_ll lt l t_t t_ilJ tr T6 6commande Fonctions de base fonctionnenment de la radio du lecteur de cassettes et du lecteur changeur audionum6r...

Page 6: ... I EL ro l l l I 80 to 0 VolumeLevel Attenuator Press ATT LOUD to immediately decrease volume to about 1 10 of its previous level Press ATT LOUD again to deactivate when listen ing at normal volume ATT Tone Enhancement Press and hold ATT LOUD for more than 2 seconds to enhance bass and treble tones when listening at low or medium volume Press and hold ATT LOUD for more than 2 seconds again to deac...

Page 7: ... on the display r5 FEd F 15 FBdF I I Ito l5 o Press A or for more than a half second change numeric levels on the display Selecting AUX lnput Mode Connect the auxiliary equipment an optional poftable CD player or any other appropriate equipment to the RCA connectors Press AUX to select AUX input mode AUX will be displayed To resume other modes press TUNER TAPE or CD C Note When a control mode BAS ...

Page 8: ...ade Failure to do this will cause the unit to resume to the previous mode o When the memory setting has been completed each BASS and TRE setting will blink by twice Note The following shows the initial set values of this unit o SOUND I emphasizes bass by 9 dB and treble by 6 dB o SOUND2 emphasizes bass by 3 dB 3 Reca ing Sound Memory Press SOUND to select SOUND1 or SOUND2 SOUND1 or SOUND2 indicato...

Page 9: ...reo Manual Tuning plsss V or A to move to a lower or higher frequency Seek Tuning Press and hold V or A for more than a half second then release The radio automatically stops on the next station FM Optimizer Press FMO to reduce or eliminate static noise on weak or fringe area FM stations FMO indicator will light when this function is on To turn it off press FMO again E 9 DiSP C BS1 Ft O CLOCK SOUN...

Page 10: ...pro gram into memory 3 Press and hold one of the station selector buttons 1 through 6 until the display blinks Beep sound confirms that the memory is now set for that button on the band you have selected Repeat the process to set other stations for the FM1 to AM bands Note You can change the memory setting by repeating the above procedure Tuning in a Preset Station Press any of the buttons 1 throu...

Page 11: ... number for that frequency Press the appropriate station selector button for the sta tion you want to hear Preset Scan Press P SET to scan each preset station lor 5 seconds To select station simply press P SET again to cancel the scanning process Note FM1 FM2 and FM3 cannot be scanned continuously Changing the Display O Press DISP to switch the display as follows Station Frequency Title display mo...

Page 12: ...ing to the right until the mechanism captures it and playback starts For DCC tape always insert with the label side facing up TAPE EJECT Button t I ooo I f pRoGRAM rNDrcAToR ffi PL E9 Note When the cassette has been inserted close the front panel immediately The alarm will sound for 15 seconds if the panel left open for more than 15 seconds Selecting Tape Mode When the cassette has been inserted i...

Page 13: ... side of the tape The display changes to indicate which program is playing TOP SIDE PLAYING BOTTOM SIDE PLAYING o When the tape comes to the end the play will switch to other side automatically Auto reverse system For DCC tape if there is a reverse marker recorded on it the unit will change the tape to other side before it reaches to the end Stopping the Tape Once inserted into the unit your tape ...

Page 14: ...omatically fed fast fonruard Notes o lf REP and SKIP are pressed at the same time Repeat play has priority over that of the Blank skip function o B SKIP may not function when the blank space is less than 15 sec onds Dolby Noise Reduction Only for analog tapes Press EE when playing Dotby B NR Recording tapes To turn it otf press I again I ttrB i Note Playing non Dolby NR tapes in Dolby NR mode caus...

Page 15: ...cted decreases until it reaches 1 EXl To select the current program again press TPS once and Press EX1 3 EX2 To select the 2nd program back ward of the current one Press TPS three times and press To select the next program Press TPS once and press EX4 To select the 3rd program forward of the current one Press TPS three times and press I EX2 4 TPs l a 3 1 Note The TPS mode may not work correctly in...

Page 16: ...O woRKS J TRACK When the track title is MOON LIGHT I ARTIST When the artist name is BEETHOVEN ffi0 PLF9 0 Uu PIBNO l IOFh5 IE M00N g6Hr XEE IHO EN IE When the display shows the play counter press C RST The counter will change to 0000 CAUTION for analog tapes To maintain your cassette player in top condition avoid using tapes that are longer than g0 minutes C 90 Text lnformation Display o Commercia...

Page 17: ...ith the first track l U l 0 l0 ln the following states pressing CD C will not start the CD play o When there is no disc in the magaztne t t0 x I5t The above display appears and the play does not start o When there is no magazine in the CD changer IIO IlFGHI IIJE The above display appears for 2 seconds and the unit will return to the radio mode o When no CD changer connected IJB tBNNEt I The above ...

Page 18: ...arch in operation ln the normal play mode play will resume automatically when the search reaches the beginning of the first track of nent disc ln the random play mode play will resume automatically when the search reaches the end of current track o When the reverse search in operation ln the normal play mode play will resume automatically when the search reaches the beginning of the first track of...

Page 19: ...of music is played only from the disc currently selected To turn it off press CD C Scan Selection O Scan play Press SCAN Track No will blink once The scan play begins immediately from the next track The first 10 seconds of each track on the discs will be played in sequence To stop scanning and continue with the current track press SCAN again Note lf the unit is left in the scan function normal pla...

Page 20: ...econds to switch to the Title input mode See page 23 Dual CD Changer Selection This feature is available only when connected two CD changers with the optional DualCD Changer Selector CA CDSSEUC Press CD Ctrtr repeatedly to select the CD changer E or E When the CD resumes played from other mode play starts with the CD changer previously selected Selecting Radio Mode Press TUNER to select the radio ...

Page 21: ... played next time until the change is made Title lnput For Input characters o A character can be input to a space where the _ is blinking on the display o The following characters are available for title input Press A or V to select a character in ascending or descending order ABCDEFGHIJKLMN OPQRSTUVWXYZ 0123456789 21 l blankspace CAUTION For safety reasons never attempt to input the title while d...

Page 22: ...mode is displayed and the 1st blinks Press A or W to select a desired character Press DISP for next character selection The next starts to blink Repeat and for tne remaining characters of the title Wnen all characters are selected press and hold DISP for more than 2 seconds to store the title in memory The unit returns to the title display mode and the title will remain on display PflNESOIJIt l 22...

Page 23: ...d the 1st _ blinks O Press rz or V to select a desired character p Press DISP for next character selection The next starts to blink Repeat and for tne remaining characters of the title 9When all characters are selected press and hold DISP for more than 2 seconds to store the title in memory The unit returns to the title display mode and the title will remain on display IPHNF5IIIIt I ltErl Press an...

Page 24: ...ory The unit returns to the title display mode and the title will remain on display PHI IH5OIJ I t t Clearing Memory ln any mode except DCC lnput titles can be cleared by replacing all characters with _ Press and hold DISP for more than 2 seconds to switch to the title input mode The 1st character of the title blinks NE50NIt Press A or V to select Press DISP for next character selection The next c...

Page 25: ...orning A or the afternoon P correctly for the correct date setting o When the power connector is disconnected the memory will be entirely canceled ln this case reset the calendar time Clock Display o Press CLOCK repeatedly in the normaldisplay The display changes between the clock and the normal display 15 r 08 o When pressing CLOCK first time the display blinks as follows 25 d c c m u s e u m c o...

Page 26: ... day and press CLOCK again for setting ____ _____ I r tq ul lu0P setect from 1 to 31 L l r Press A or V to select hours of A AM or P PM and press CLOCK again for setting Select from 1 lo 12 of A AM or P PM Press n or iV to select minutes and press CLOCK again for setting l I f tS I tl0P _Select from o to 59 II _ ____________7 _rr When all the setting is completed after the minute setting clock sta...

Page 27: ...Manual Tuning Button Press A or W to move to a lower or higher frequency Seek Tuning o VTUNEA SeekTuning Button Press and hold A or V for more than a half second then re lease The radio automatically stops on the next station Auto Station Preset O P SET Auto Preset Button o Press and hold for more than 2 seconds to automatically set the six strongest available stations into the memory o Press to s...

Page 28: ...n O Rewind Fast Fonruard Button Press TPS to select the tape program number as follows TPS1 TPS9 OFF tt From the current selection decide which program you want to se lect Now press TPS several times forward up to g programs or back ward up to 8 to select the corresponding program number Press either to rewind or to fast fonlrrard the tape to the be ginning of the program that you want During the ...

Page 29: ...ivate fast forward or reverse through a track Release A or V to resume the normal CD play from that position Repeat Play REP Repeat Button o Press to repeat the track currently selected Press again to turn it off o Press and hold for more than 2 seconds to repeat the disc current ly selected Press and hold REP for more than 2 seconds again to turn it off Random Selection On RandomButton o Press to...

Page 30: ...fied technician r Replacing the Fuse Use fuses of the same specified rating 1 or 5 amps Using different substitutes or fuses with higher ratings or connecting the unit directly without a fuse could cause fire or damage to the stereo unit lf the replacement fuse fails contact your nearest MSC in Canada Panasonic Servicenter for ser vice c Error Display Messages lt Ll I I Display when the compact di...

Page 31: ...re than 2 seconds When a cassette is inserted it keeps reversing Poor quality tape Use better quality tape or FF or REW the tape to the end for a few times Tape sound quality is poor Heads are dirty Poor quality tape Clean heads Ask a service representative for advice Use better quality tape Tape analog sound quality is not normal Bad dolby NR setting Correct dolby N R setting CD player won t oper...

Page 32: ...ou begin installation look for the following items included in the packing with your unit o Warranty Card Fillthis out promptly o MSC in Ganada Panasonic Servicenter Directory Keep for future reference in case the unit needs servicing o lnstallation Hardware Needed for in dash installation s lnstallation Hardware No Item Diagram Qty e Mounting Collar N 1 Plain Washer 5 mm o 2 Spring Washer smmp a ...

Page 33: ...s a radio or is pre wired for one With the ignition and headlights off identify the car battery lead by grounding one lead of the test bulb to the chassis and checking the remaining exposed wires from the cut radio connector plug lf your vehicle is not wired for an audio unit Go to the fuse block and find the fuse port for the battery usually marked BAT Speakers ldentify the car speaker leads Ther...

Page 34: ...2 show the proper connections and color coding of the leads We strongly recommend that you test the unit before making a final installation You can set the unit on the floor and make tempo rary connections to test the unit Use electrical tape to cover all exposed wires IMPORTANT Connect the red power lead last after you have made and insulated all other con nections Ground Connect the black ground...

Page 35: ... unit Power Connect the red power lead to the correct vehicle radio wire or to the appropriate fuse port on the fuse block lf the stereo unit functions properly with all these connections made disconnect the wires and pro ceed to the final installation s Final lnstallation Lead Connections Connect all wires making sure that each connec tion is insulated and secure Bundle all loose wires and fasten...

Page 36: ... Mounting Tab 2 Secure the rear of the unit a Check the electrical connection by referring to this operating instructions b Connect the Mounting Bolt using a suitable wrench Mounting Bolt c lnsert the unit into Mounting Collar O and push it in until click is heard 36 d Secure the rear of the unit to the car by either of the two recommended methods on the next page E N G L I S H 31 s s d c c m u s ...

Page 37: ...ounting Collar I Using the Rubber Cushion Optional lf there is an existing Rear Support Bracket on the Fire Wall of Car Cover Mounting Bolt on the rear of the unit with Rubber Cushion Optional and mount it into the ex isting Rear Support Bracket Rear Suppoft Bracket existing on the car Rubber Cushion Optiona Mounting Bolt x o Fire Wall of Car O Toothed Lock Washer Mounting Collar 37 rlerfryegler d...

Page 38: ...when the vehicle is unattended the radio becomes totally inoperable The security indicator will blink when the car is turned off and will re main lit when the car is on tr To Remove the Removable Face ePress the OPEN 1 r4 1 oruon while the using the Panel opening pin switcn off the power Plate power is ON Otherwise the attached instruction HotO the removable face plate as shown in Fig 2 and pull i...

Page 39: ...te is not water proof Do not expose it to water or excessive moisture 2 Do not remove the removable face plate while driving your car 3 Do not place the removable face plate on the dashboard or nearby areas where the temperature rises to high levels 4 Do not touch the contacts on the removable face plate or on the main unit since this may result in poor electrical contacts 5 lf dirt or other forei...

Page 40: ...eO I pulling it out toward you as shown in the figure below 6 T im Ptaro Open the panel using Panel opening pin See How to Use Panel opening pin Panel opening pin Remove the unit by holding it as shown in the figure Mounting frame Lock lever ull out the unit while Forefinger pushing the lock lever with your forefinger Middle finger Hold the spring by your left hand the shaft by your right hand Tri...

Page 41: ...ation POWER LEAD 12V DC negative ground only GROUND LEAD Connect to a clean bare metallic part of your vehicle BATTERY LEAD Connect to car battery Fuse 5A Dark Blue Power Amp CY M652EU EC MOTOR ANTENNA RELAY CONTROL LEAD moves antenna up and down Relay Control Power Lead Optional To receiver s motor antenna relay control lead EIE RCA Extension Cord powerAmo Optional Cy M652EU EC Speaker Extens on ...

Page 42: ... EC Speaker Extension Lead Gray dBlack Stripe White Stripe L White AUx tN fi l 01 Power Connector Dual CD Changer Control Lead Brown Uwhite Stripe AUX lnput Cord co DclEUc Gray FRONT Red Dark Blue CD Changer Cord DlN Motor Antenna Relay Control Lead Heler to Previous Page Preamp Out Cord Black REAR R Red Power Amp cY M1 004EU EC Control Power Lead Optional To receiver s motor antenna relay conlrol...

Page 43: ... use different kind of batteries For example do not use regular battery and Alkaline battery to gether o Old batteries should be thrown out immediately o Do not disassemble or short the batteries Do not throw the batteries into the fireplace ln Case of Malfunction Switching Direct Output Direct output Selection Switch lnitially set to OFF DIRECT OUTPUT l l o Bottomside li ott Select the direct out...

Page 44: ...o not expose cassettes to direct sunlight o Avoid keeping cassettes in a hot humid place For DCC Tapes DCC tape is different from the analog cassette tape lt is completely sealed and it tape and hub holes are protected by the slider This design en sures that dust and dirt other than when loading will not enter the cassette housing and cause dropouts which can cause in poor quality of digital recor...

Page 45: ...e Ratio Total Harmonic Distortion Reproduction System Frequency Response Wow and Flutter Signalto Noise Ratio 87 9 107 9 MHz 13 2 dBf 1 25 pV 75 O 15 2 dBf 1 6 ttV 75 o 30 15 000 Hz t3 dB 1 5 dB 75 dB 42 dB at 1 kHz 65 dB 100 dB 70 dB Stationary head system DCC 2 program stereo 48 k z 4 1 xllz gz kHz automatic selection 16 bit linear PASC 20 22 OOO Hz 1 dB at 48 kHz 20 20 000 Hz 1 dB at 44 1 kHz 2...

Page 46: ...r Appuyer sur la touche ATT LOUD pour baisser le volume d environ 1 10e de son niveau initial Appuyer de nouveau sur ATT LOUD pour r6tablir le niveau normal d 6coute ATT Com pensateu r physiologique Enfoncer la touche ATT LOUD pendant plus de 2 secondes pour ac centuer les graves et les aigus lors d une 6coute d bas ou moyen vol ume Enfoncer de nouveau la touche ATT LOUD pendant plus de 2 secondes...

Page 47: ... Appuyer sur la touche SELECT pour s6lectionner le mode de r6glage de l 6quilibre avant arridre FADER Appuyer ensuite sur la touche A ou W pour r6gler le niveau de sortie sur le canal avant ou arridre G r_____ ___J la 15 o Enloncer la touche A ou V plus d une demi seoonde pour changer en s6quence les indications num6riques de la r6ponse atfich6e S6lection du mode entr6e AUX o Raccorder l appareil ...

Page 48: ...onction o Les r6glages termin6s l indicateur de niveau de la tonalit6 BASS et TRE clignote d deux reprises Nota Les valeurs de r6glages initiaux sont les suivants o SOUND1 accentue de 6 dB la r6ponse en haute fr6quence et de 9 dB la r6ponse basse fr6quence o SOUND2 accentue de 3 dB la r6ponse en basse fr6quence 3 Rappel des r6glages en m6moire Appuyer sur la touche SOUND pour s6lectionner I adress...

Page 49: ...ccord vers l extr6mit6 inf6rieure ou sup6rieure de la bande Accord par recherche Appuyer sur la touche V ou A pendant au moins une demi seconde puis relAcher L accord se fait automatiquement sur la premiBre station adjacente 6mettant un signal puissant Rehaut de sensibilit6 FM FMO Appuyer sur la touche FMO pour r6duire ou 6liminer l interf6rence lors de la r6ception FM dans des r6gions p6riph6riqu...

Page 50: ...Appuyer sur l une des touches de pr6syntonisation 1 a 6 jusqu ir ce que la fr6quence affich6e clignote Une tonalit6 confirme I assignation de la station mise en m6moire d la touche press6e Recommencer les 6tapes d6crites ci dessus pour chaque station des bandes FM1 et AM devant 6tre mise en m6moire Remarque ll est possible de changer un r6glage en r6p6tant les di rectives pr6c6dentes Syntonisation...

Page 51: ...es FM1 FM2 et FM3 ne peuvent faire I objet d un ba layage continu Balayage automatique Pendant le balayage le registre indique lb fr6quence syntonis6e la bande et le num6ro de l adresse m6moire Appuyer sur la touche de pr6syntonisation correspondant d la station d6sir6e lndicateur de l adresse m6moire Commutation du mode d affichage C Appuyer sur la touche DISP pour changer le mode d affichage de ...

Page 52: ...ur la droite jusqu d ce que le m6canisme la saisisse la lecture d6bute Toujours ins6rer une cassette DCC avec l 6tiquette sur le dessus Befermer le rabat de la bande Pour cassette DCC Un avertisseur se fait entendre pendant 15 secondes si le rabat est ouvert pendant plus de 15 secondes Mise en circuit du lecteur cassettes Si la cassette a 6t6 ins6r6e alors qu une autre source que le lecteur de cas...

Page 53: ...te c6t6 inverse de la cassette lnversion Appuyer sur la touche PRG pour inverser le d6filement de la bande et lire I autre c6t6 de la cassette L indicateur change pour confirmer quel c6t6 de la cassette est lu D6filement avant v C6t6 inverse e la lecture passe automatiquement sur l autre c0t6 Systdme d inversion automatique e cassette DCC munie d une repBre d inversion I in ant la fin de la bande ...

Page 54: ... FST FMO CLOCK SOUND o B KIP l Nota o Dans le cas oit les touches SKIP et REP seraient press6es simul tan6ment la lecture en reprise a priorit6 o L 6vitement ne peut fonctionner normalement si l intervalle vierge dure moins que 15 secondes R6ducteur de bruit Dolby cassettes analogiques seulement Appuyer sur la touche E pour faire la lecture de bandes enreg istr6es avec le r6ducteur de bruit Dolby ...

Page 55: ... atteigne 1 EXl Pour s6lectionner de nouveau le programme en cours appuyer une fois sur la touche TPS puis sur EX2 Pour s6lectionner le 2e programme pr6c6dent celui en cours appuyer sur la touche TPS a trois reprises purs appuyer sur EX3 Pour s6lectionner le programme suiv ant appuyer une fois sur la touche TPS puis sur EX4 Pour s6lectionner le 3e programme suivant celui en cours appuyer A trois r...

Page 56: ...te le tire PIANO woRKS I TRACK Plage Atfichage du titre de la pidce Dans I exem ple montrd ici la pidce s intitule MOON LTGHT I ARTIST Compositeur lB 0 0 u l a CI00 PL HU t t O IIOON L IEHT ffi Donne le nom du compositeur ou de l inter XEETHO EN I E prdte Dans l exemple montr6 ici le composi teur s appelle BEETHOVEN Lorsque le mode compte tours a 6t6 s6lectionn6 appuyer sur C RST L atfichage du co...

Page 57: ...I appareil se trouve dans les conditions suivantes la pres sion du s6lecteur CD C ne lance pas la lecture d un disque o Absence de disque dans le magastn NU XIst L affichage ci dessus apparait la lecture ne s amorce pas o Absence de magasin dans le changeur III I1HEHZINE Le message ci dessus est affich6 pendant 2 secondes puis I appareil revient en mode radio o Lorsqu aucun changeur de disques n e...

Page 58: ...che n LL D ou V plus d une demi seconde pour effectuer une recherche rapide dans un sens ou dans l autre au sein d une plage Reldcher la touche pour reprendre la lecture i partir de I endroit rep6r6 Lors d une recherche vers l avant En mode de lecture normal la lecture se poursuit i partir du d6but de la premidre plage du prochain disque En mode de lecture al6atoire la lecture se poursuit aprds la...

Page 59: ...n la lecture al6atoire ne peut fonctionner correctement en effet la lecture est interrompue lors de la s6lection des cases vides Lecture al6atoire du disque Maintenir la touche RANDOM enfonc6e plus de 2 secondes La s6quence de lecture des plages est alors d6finie de manidre al6atoire Pour interrompre la lecture al6atoire appuyer sur la touche CD C touche SCAN Nota Si I appareil est laiss6 en mode ...

Page 60: ...DISP pendant plus de 2 secondes pour changer au mode d entr6e de titres Voir page 63 S6lection du lecteur changeur Cette fonction ne peut 6tre utilis6e que si deux lecteurs changeurs sont utilis6s de pair avec le s6lecteur de lecteurs moddle CA CD 55EUC Appuyer sur la touche CD CEE a r6p6tition pour s6lectionner le lecteur changeur E ouE Aprds un chargement de mode la lecture s amorce sur le lecte...

Page 61: ...itres Saisie des caractEres o L emplacement du caractdre d ins6rer est identifi6 par le clignotement de o Le tableau suivant indique les divers caractdres pouvant 6tre entr6s en m6moire Appuyer sur A ou sur nV pour s6lectionner un caractdre dans I ordre croissant ou d6crois sant I ABCDEFGHIJKLMN OPQRSTUVWXYZ L 0t23456789 l k espace Attention Pour des raisons de s6curite ne pas tenter de programmer...

Page 62: ...fficheur et le premier tiret _ clignote Rppuyer sur la touche A ou V pour s6lectionner le caractdre Appuyer sur la touche DISP pour la s6lection du caractdre suivant Le tiret _ qui suit clignote R6p6ter les 6tapes et I pour chacun des autres caractdres Une fois tous les caractdres s6lectionn6s maintenir la touche DISP enfonc6e pendant plus de 2 secondes pour mettre le titre en m6moire L appareil r...

Page 63: ...ficheur et le premier tiret _ clignote fr T l t1 lml zt Appuyer sur la touche A ou V pour s6lectionner le caractdre Appuyer sur la touche DISP pour la s6lection du caractdre suivant Le tiret _ qui suit clignote R6p6ter les 6tapes O et pour chacun des autres caractdres Une fois tous les caractdres s6lectionn6s maintenir la touche DISP enfonc6e pendant plus de 2 secondes pour mettre le titre en m6mo...

Page 64: ...s pour mettre le titre en m6moire L appareil revient en mode affichage de titre et le nom entr6 est affich6 PFNH5BNIt t Suppression des donn6es en memotre Dans tous les modes sauf DCC ll est possible de supprimer les caractdres en les remplagant par un tiret Maintenir le touche DISP enfonc6e plus de 2 secondes pour pass er en mode entr6e de titre Le premier caractdre du titre clignote JH5BNIt nppu...

Page 65: ... AM ou PM appropri6e pour le r6glage de la date o Si la source d alimentation est d6branch6e les donndes en m6moire seront perdues ll sera alors n6cessaire de refaire les 169lages Affichage de l horloge Appuyer d r6p6tition sur la touche CLOCK pour faire apparaitre l af fichage de l heure L atficheur passe du mode horloge au mode normal 1 l I 0H Lors de la premidre pression sur la touche CLOCK les...

Page 66: ...uyer sur CLOCK pour confirmer le r6glage r l z tt 1 l5 0CI08P S6lectionner un nombre r r a Rppuyer sur A ou sur V pour s6lectionner les heures AM ou PM puis appuyer sur CLOCK pour confirmer le 16glage t I u S6lectionner un nombre de 1 d 12 de I r r r r uur IA AM ou P PM ____________r _t_r Appuyer sur A ou sur V pour r6gler les minutes puis appuyer sur CLOCK r ____ I t tS I 0P f Setectionner un nom...

Page 67: ...e la bande Accord par recherche O VfUUf n touche d accord par recherche Appuyer sur la touche uA ou V pendant au moins une demi seconde puis reldcher L accord se fait automatiquement sur la premidre station adjacente 6mettant un signal puissant Mise en m6moire automatique p Sgf touche de mise en m6moire automatique o Maintenir la touche enfonc6e plus de 2 secondes pour mettre automatiquement en m6...

Page 68: ...ositif m6moire O p louche de rebobinage avance acc6l6r6e Appuyer sur la touche TPS pour s6lectionner le num6ro de pidce dans l ordre suivant TPS1 TPS9 OFF Sur la base de la position du programme en cours d6terminer quel programme doit 6tre s6lectionn6 Appuyer ensuite d plusieurs repris es sur la touche TPS 9 vers l avant I vers le d6but de la bande pour s6lectionner le num6ro de programme correspo...

Page 69: ...reprise REP Lecture en reprise o Appuyer sur la touche REP pour r6p6ter la lecture de la plage en cours La lecture de la plage est r6p6t6e jusqu d ce que la touche REP soit press6e d nouveau o Maintenir la touche REP enfonc6e plus de 2 secondes pour ac tionner le lecture en reprise du disque en entier Pour interrompre la lecture en reprise appuyer d nouveau sur la touche REP et maintenir la touche...

Page 70: ...1A ou 5A L utilisation de substituts ou de fusibles d un amp6rage sup6rieur ou le raccordement de l appareil sans fusible en place peuvent entrainer un risque d incendie et endommager I appareil Si le fusible de remplacement saute communiquer avec un centre de service Panasonic ag166 tr Messages d erreur Ir LI lt l_t_ rI lndique que le disque est sale ou plac6 d l envers Commande la s6lection du d...

Page 71: ...e est continuellem6nt invers6e La bande est de mauvaise qua lit6 Utiliser une bande de meilleure qualit6 ou avancer ou reboniner jusqu A la fin d quelques reprises Le son est de pidtre qualit6 Les t6tes sont sales La bande est de mauvaise qualit6 Nettoyer les t6tes Demander conseil i un technicien de ser vice Utiliser une bande de meilleure qualit6 La qualit6 d la lecture avec cas sette analogique...

Page 72: ...enu de l emballage o Carte d homologation de la garantie La remplir sans d6lai o Liste des centres de service Panasonic agr66s Conserver cette liste pour consultation ult6 fleure o Quincaillerie pour I installation u Quincaillerie pour l installation NO Description Sch6ma Qt6 e Collier de montage N 1 Rondelle ordinaire 5mmC o 2 Rondelle d ressort 5mm G 2 Boulon hexagonal 5mmp 2 o Plaque de support...

Page 73: ...d la position OFF et s assurer que les phares sont 6teints Rep6rer le fil de la batterie Pour ce faire relier un fil du v6 rificateur de continuit6 au cadre du v6hicule et v6rifier les autres fils expos6s du connecteur au moyen de l autre fil du v6rificateur En l absence de cAblage pour l installation d une radio Enlever le couvercle du bloc fusibles et rep6rer le r6ceptacle du fusible de la batte...

Page 74: ...tre l appareil sur le plancher du v6hicule pour faire des raccordements provi soi res afin de v6rifier le fonctionnement de l ap pareil Recouvrir tous les fils expos6s avec du ruban d 6lectricien IMPORTANT Raccorder le fil d alimentation rouge en dernier lieu seulement apr6s avoir fait tous les autres raccordements et isole tous les fils Mise i la terre Raccorder le fil de mise i la terre noir du ...

Page 75: ...ntation Raccorder le fil d alimentation rouge au fil de radio d6jd en place ou au porte fusibles appropri6 du bloc fusibles Si l appareil fonctionne normalement avec tous les raccordements ainsi effectu6s d6brancher les fils et proc6der d l installation finale I lnstallation finale Raccordements des fils Raccorder tous les fils en prenant soin qu ils sont tous bien isol6s et que les raccordements ...

Page 76: ...tage Tournevis 2 Fixer I arriire de I appareil a V6rifier les raccordements pour ce faire se reporter au manuel d utilisation b lnstaller et serrer le boulon d assemblage Appareil c lns6rer l appareil dans le collier de montage e jusqu d ce qu un d6clic se fasse entendre Appareil 76 d Fixer l arridre de l appareil au v6hicule de l une des deux recommand6es d la page suivante F R A N a A I S 31 d c...

Page 77: ...net en caoutchouc facultatif En pr6sence d une plaque de fixation arridre d6jd en place sur la paroi ignifuge Recouvrir le boulon d assemblage d l arridre de l appareil avec le coussinet en caoutchouc facultatif puis le fixer sur la plaque de fixation d6jd en place Plaque de fixation support d6jd en place Coussinet en caoutchouc Itatif Bouton d assemblage l r 1 Paroi ignifuge de la voiture o Boulo...

Page 78: ...reil devient inutilisable L indicateur de s6curit6 clignote lorsque le contact est coup6 et demeure allum6 lorsQue le moteur est en marche tr Retrait du panneau avant OAppuyer sur la touche OPEN t i I de d6gagement lorsque le contact est 6tabli sur t appareil Sinon suivre les 6tapes pour l ouverture avec la ferrure d ouverture du panneau Couper le contact Tenir la plaque enjoliveuse de la maniBre ...

Page 79: ... jusqu it ce qu il s enclenche Fig 5 Mises en garde 1 Le panneau n est pas d l 6preuve de l eau Ne pas l exposer 2r la pluie d I eau ou a une humidit6 ex cesstve 2 Ne pas tenter de retirer le panneau en conduisant 3 Ne pas placer le panneau sur le tableau de bord ou dans un endroit susceptible de devenir exces sivement chaud 4 Ne pas toucher aux contacts du panneau ou de l appareil cela pourrait a...

Page 80: ...oits indiqu6s et la tirer vers soi comme illustr6 ci dessous uvrir le panneau avec la ferrure d ouverture du panneau voir la section sur la ferrure d ouverture du panneau Ferrure d ouverture ou p n u Retirer I appareil en proc6dant comme illustr6 ci dessous Support de montage Levier de bocage Tirer l appareil tout en appuyant sur le levier de blocage avec I index Tenir le ressort avec gauche etaqu...

Page 81: ...6gatil a la masse L Fit de tene Relier A une piece m6tallique du cadre de la voiture Fil de banerie Raccorder i la batterie Orange Bleu Fonc6 asite Noir Jaune FUSIBLE 5A FUS BLE Cible de sortie Pr6amPli Gris Avant FRONT EIE E Noir Arridre REAR Bouge D CAble RCA prolongateur Fil d alimentation de commande de relais de l amplificateur Vendu s6pa16ment A raccorder au lil de commande relais de I anten...

Page 82: ...er contre la poussidre o Ne pas exposer les cassettes aux rayons directs du soleil o Ne pas ranger les cassettes dans un endroit chaud et humide Cassettes num6riques compactes OCG Les cassetes DCC sont diff6rentes des cassettes analogiques leur m6canisme est en effet prot6g6 contre la poussidre et la salet6 par une plaque mo bile qui assure une meilleure qualit6 aux enreg istrements Orifice du m6c...

Page 83: ...tes DCC Syestdme de reproduction TOte de lecture fixe DCC Fr6quence d 6chantillonnage Nombre de bits de quantification Systdme de traitement des donn6es R6ponse de fr6quence Pleurage et scintillement Rapport signal bruit Distortion harmonique totale 48 kHz 44 1 kHz 32 k z s6lection automatique 16 bits lin6aire PASC 20 22 000 Hz 1 dB d a8 kHz 20 20 000 Hz t1 dB ir 44 1 kHz 20 14 500 Hz 1 dB d 32 kH...

Page 84: ...y West of America Panasonic Sales Company Division of Matsushita Electric Division of Matsushita Electric Corporation of America of Puerto Rico nc 6550 Katella Ave cypress cA 90630 san Gabriel lndustrial park 65th lnfantry Ave Km 9 5 Carolina Puerto Rico 00630 Matsushita Electrique du Canada Limit6e 5770 Ambler Drive Mississauga Ontario L4W 2T3 YEFM282151 80793 0 Printed in Japan d c c m u s e u m...

Reviews: