background image

YEM284C382ZA    TAMACO1202-0        Printed in China

Removable Front Panel 

Cassette Player/Receiver with Changer Control

CQ-RD243N

Operating Instructions

¡

Please read these instructions carefully before using this product and keep this manual for future reference.

¡

Bitte lesen Sie diese Bedienungsanleitung vor der Verwendung dieses Produktes aufmerksam durch und bewahren Sie sie danach
für spätere Nachschlagzwecke sorgfältig auf.

¡

Prière de lire ces instructions attentivement avant d’utiliser le produit et garder ce manuel pour l’utilisation ultérieure.

¡

Leest u deze instructie alstublieft zorgvuldig door voor u dit product in gebruik neemt en bewaar deze handleiding voor later gebruik.

¡

Läs igenom bruksanvisningen innan navigeringssystemet tas i bruk. Spara bruksanvisningen för framtida behov.

¡

Si prega di leggere attentamente queste istruzioni prima di usare questo prodotto e di conservare questo manuale per usi futuri.

¡

Lea con atención estas instrucciones antes de utilizar el producto y guarde este manual para poderlo consultar en el futuro.

¡

Przeczytaj uwazænie instrukcjeç obs¬ugi przed rozpoczeçciem uzæywania urzaçdzenia i zachowaj jaç do uzæytku w przysz¬oóci.

REG

MO

DE

DI

SP

TRACK

MONO/LOC

TUNE

LO

UD

T A

MUTE

MTL

NR

TPS

REP

B

S

DISC

SCAN

REPEAT

RANDOM

1

2

3

4

6

APM

BA

N

D

PW

R

VO

L / P

US

H

SE

L

CQ-RD243

CT

PTY

REMOTE

A F

5

Matsushita Electric Industrial Co., Ltd.

Web site : http://www.panasonic.co.jp/global/

Summary of Contents for CQ-RD243N

Page 1: ...dit product in gebruik neemt en bewaar deze handleiding voor later gebruik Läs igenom bruksanvisningen innan navigeringssystemet tas i bruk Spara bruksanvisningen för framtida behov Si prega di leggere attentamente queste istruzioni prima di usare questo prodotto e di conservare questo manuale per usi futuri Lea con atención estas instrucciones antes de utilizar el producto y guarde este manual pa...

Page 2: ...espeler radio met CD wisselaar bediening en afneem baar voorpaneel RDS Radio Data System 120 Regolazione dell orologio 123 Riproduttore a cassette 124 Controllo del cambia CD 126 Collegamenti elettrici 128 Installazione 130 Sistema antifurto 133 Collegamenti degli altoparlanti 134 Fusibile 134 Manutenzione 134 Dati tecnici 135 Indice 2 Precauzioni 114 Accessori 114 Telecomando Opzionale 115 Comand...

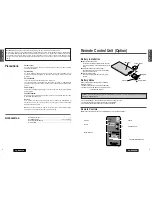
Page 3: ...djust any parts For repair please consult your nearest authorized Panasonic Service Centre Note The preset memory is cleared to return to the original factory setting when the power connector or battery is disconnected Accessories Operating Instructions 1 Supplied Hardware 1 set a page 20 Removable Face Plate Case 1 Warranty Card 1 Remote Control Unit Option Battery Installation q Remove the batte...

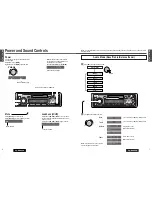
Page 4: ...ay press DISP Demonstration message Mute Press MUTE to mute the sound Press MUTE again or turn VOL to cancel MUTE indicator MUTE Loudness LOUD Press and hold MUTE LOUD for more than 2 seconds to enhance bass and treble tones at low or medium volume Press and hold MUTE LOUD again to cancel Loudness indicator LOUD Bass 12 to 12 dB by 3 dB step default 0 dB Treble 12 to 12 dB by 3 dB step default 0 d...

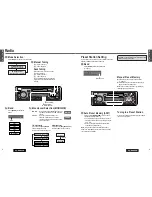
Page 5: ...LOCAL mode on and off Band ST Caution To ensure safety never attempt to preset stations while you are driving Tuning in a Preset Station Press the corresponding preset button 1 to 6 to tune in a preset station Preset Number MONO LOCAL ST q Mode Selection Press MODE to change to the radio mode MONO Noise is significantly decreased when weak signals are received from an FM broadcast station LOCAL On...

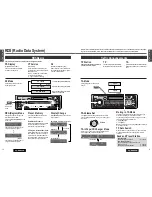
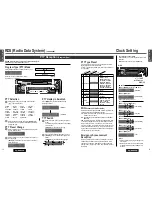
Page 6: ...select one of the following AF modes Low level AF operating sensitivity High level AF operating sensitivity When the AF network of an RDS station is not required AF 2 Mode AF OFF Mode PS Program Service Name default 3 seconds Frequency CT Clock Time ST TAon EON TP RDS AF TAon EON TP RDS AF ST AF Traffic Announcements TA Volume Set Turn VOL while receiving traffic announcements The TA volume differ...

Page 7: ...ffic information from the current and other network stations can be received AF The frequency list of preset RDS stations is updated by EON data EON enables the radio to make fuller use of RDS information It constantly updates the AF list of preset stations including that currently tuned in to For example if you preset a sta tion far from home you will later be able to receive the same station at ...

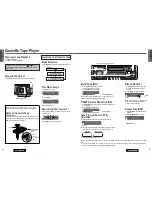
Page 8: ...l REP Source Radio Cassette Tape Player When a Tape is inserted CD changer control When a CD changer is connected Tape Program Search TPS Operation q Press 3 TPS to activate the Tape Program Search w To select a desired program press 6 or 7 correspon ding times to go forward up to 9 or backward up to 8 e Press 3 TPS again to cancel Fast forward 1 s9 Rewind 8t 0 Note The TPS and B S may not work co...

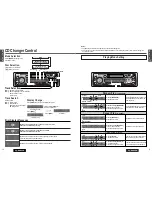
Page 9: ...Previous disc 2 DISC Next disc Playing Mode Setting R CH C Notes The CD Changer functions are designed for an optional CD changer unit This unit can not support the reproduction of MP3 and WMA and not display any CD Text even if the CD changer unit would support them Track Search Press and hold 7 Fast forward 6 Fast backward Release to resume the regular CD changer play Disc Track Number Track Pla...

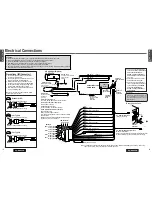
Page 10: ...ion to a CD changer refer to the operating instructions of the CD changer CX DP880N CX DP9061 DP9060EN CX DP88N CX DP801 DP803EN or CX DP601EN Fuse 15 A To remove the Fuse Precautions ISO Connector The pin arrangement of the power connector conforms to ISO standard The pin arrangement of ISO connectors in some cars may differ from the ISO standard Please check that the pin arrangement of the conne...

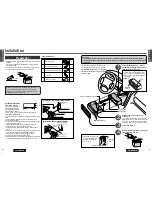
Page 11: ... Be sure to connect the battery lead yellow to the positive ter minal of the battery or fuse block BAT terminal 5 Insulate all exposed wires to prevent short circuiting 6 Secure all loose wires after installing the unit 7 Please carefully read the operating and installation instructions of the respective equipment before connecting it to this unit 182 mm 53 mm 30 or less Cautions We strongly recom...

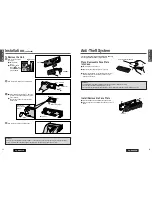
Page 12: ...e the face plate on the dashboard or nearby areas where the temperature rises to high levels To Remove the Unit q Remove the removable face plate q Switch off the power w Press the release button The removable face plate will be released w Remove the Trim Plate r with a screwdriver r Remove the unit pulling with both hands Installation continued CQ RD 243 DOLBY B NR Cautions Do not touch the conta...

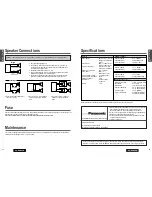
Page 13: ... authorized Panasonic Service Centre Maintenance Your product is designed and manufactured to ensure the minimum of maintenance Use a soft cloth for routine exterior cleaning Never use benzine thinner or other solvents L R L R L R L R Right Wrong White White w black stripe Chassis Gray w black stripe Gray Chassis Use ungrounded speaker only The maximum speaker input should be 50 W or more If used ...

Reviews: