background image

33

34

CQ-VW220W

English

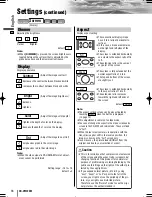
Settings 

(continued)

Radio

Disc

Sound

Screen

Basic Setting

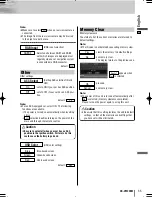
w

Touch and hold 

until “Completed!” is displayed.

The ID code cancelling procedure is completed. The unit
now works without an ID code.

Note: 

¡

Should your unit ever require service, cancel your ID
code before sending for repair.

¡

The ID code setting cannot be eliminated even by the
memory clear function.

¡

The inputted code is not displayed for your security.

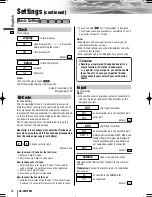
Clock

Clock setting

: clock display ON (“– –:– –” is displayed

before adjusting the clock.)

: clock display OFF

default: 

: Forward

: Backward

Note: 

¡

To start the clock, touch 

.

¡

Set the Daylight Saving Time manually.

default: Hour Adjust: 

0

0

Minute Adjust: 00

ID-Code

ID Code Setting

Prior to operating this unit, it is advisable to assign a 4-
digit ID code for security. Once the ID code has been set,
the unit cannot be operated if the main power supply is
disconnected then re-connected. It is electronically locked
so that a thief cannot use the stolen unit unless that per-
son knows the code you have set.
The ID code operation must be performed only by the
person to whom the unit belongs.

Generally, it is not necessary to enter the ID code each
time when using the unit if it has not been disconnected
from the main power supply (car battery).

to 

4 digits numeric code

default: none

How to set your ID code (for the first time)

q

Enter an 4 digit ID code.

w

Enter the same 4 digit ID code again.

How to change your ID code 

q

Enter the preset (old) 4 digit ID code. If the wrong ID
code is entered, a new ID code cannot be registered.

w

Enter a new 4 digit ID code.

e

Enter the new 4 digit ID code again.

How to cancel the known ID code 

q

Enter the preset (old) 4 digit ID code. If the wrong ID code
is entered, it is not possible to cancel the ID code function.

9

0

{

}

(Clock adjustment)

Adjust

Off

Off

On

(Clock display)

Display

Caution

¡

Record your registered ID code and keep it in a
secure location. (Fill in the ID code memo 
(

a

page 46).) If you forget it, you will be unable

to use the unit. In case you forget the ID code,
please consult your nearest Panasonic Service
Center.

Input

Input selection

Note: 

¡

If a non-Panasonic navigation system is connected to
this unit, we do not guarantee the operations of the
navigation system. 

: an external device is connected to AV1.

: skips AV1.

default: 

: an external device is connected to AV2.

: Select one from among NAV1, NAV2, and

NAV3 with which images are displayed
most beautifully when a non-Panasonic
car navigation system is connected. 

: skips AV2.

default: 

Selection of the terminal that connects to the rear view
camera.

Preparation:

Connect the reverse lead. (

a

Installation

Instructions)

: connected to the CAMERA IN

: unconnected

default: 

Off

Off

On

(Rear view camera set up)

Camera

AV2

Skip

NAV1-3

AV2

(AV2 input selection)

AV2

AV1

Skip

AV1

(AV1 input selection)

AV1

VW220W̲OI̲01̲eng.qxd  09.2.24  7:26 PM  ページ34

Summary of Contents for CQ-VW220W

Page 1: ...Model CQ VW220W MUTE VOL SRC PWR DIMMER MAP TUNE TRCK TILT CQ VW220W CAR AV MUTE ENT VOL SRC PWR DVD MENU RET RETURN TOP MENU ENTER BAND TEXT ...

Page 2: ...r If the unit is out of order no power no sound or in an abnormal state has foreign objects in it is exposed to water is smoking or smells turn it off immediately and consult your dealer The remote control unit should not lie about in the car If the remote control unit lies about it could fall on the floor while driving get wedged under the brake pedal and lead to a traffic accident Refer fuse rep...

Page 3: ... install the product The use of parts other than those supplied or designated may result in internal damage to the unit Faulty installation may lead to an accident a malfunc tion or fire Do not block the air vent or the cooling plate of the unit Blocking these parts will cause the interior of the unit to overheat and will result in fire or other damage Do not install the product where it is expose...

Page 4: ...E DO NOT OPEN COVERS AND DO NOT REPAIR BY YOUR SELF REFER SERVICING TO QUALIFIED PERSONNEL This system is designed so that you cannot see moving pictures while you are driving Park your car in a safe place and pull the side brake parking brake lever before watching the monitor A rear monitor option displays moving pic tures while driving Note Be sure to connect the side brake parking brake connect...

Page 5: ...ange 0 C to 40 C When the temperature is very cold or very hot the image may not appear clearly or may move slowly Also movement of the image may seem to be out of synchronization or the image quality may decline in such environments Note that this is not a malfunction or problem In order to protect the liquid crystal panel keep it out of direct sunlight while the unit is not in use Sudden changes...

Page 6: ...connector of this unit Do not connect with AV2 IN connector a Installation Instructions Integration of the monitor FM AM radio DVD Video Video CD player and CD MP3 DivX player Built in AV Input Output Terminals For more convenient connection and setup all termi nals are now provided on the unit itself Note If a non Panasonic product is connected to this unit we do not guarantee the operations of t...

Page 7: ...l Operation Overview 12 General 14 Power on power off display open close source selection volume mute tilt angle Before Disc Playback 16 Disc Player 18 Notes on MP3 DivX 22 Radio 24 USB Audio Device Control 26 USB iPod Control 28 AV1 AV2 30 Settings 32 Setup operation Basic setting screen sound disc radio About DivX VOD Content 40 Troubleshooting 41 Maintenance 47 Notes on Discs 48 Language Code L...

Page 8: ...use the battery to go dead Other Settings basic settings a page 34 clock ID code input other memory clear screen settings a page 36 dimmer display aspect sound settings a page 37 SQ3 bass treble balance fader disc settings a page 38 audio language subtitle language menu language video setting audio setting DivX registration radio settings a page 39 FM setup Note Refer to Settings a page 32 for fur...

Page 9: ...it is displayed 2 3 Lithium battery CR2025 Battery case Remote Control Unit Warning Keep batteries away from children to avoid the risk of accidents If an infant ingests a battery please seek immediate medical attention Caution Remove and dispose of an old battery immediately Do not disassemble heat or short a battery Do not throw a battery into a fire or water Follow local regulations when dispos...

Page 10: ... the RGB connector of this unit Switches on off the power Changes the modes such as sound and picture SRC PWR The screen brightness is toggled between the set level and maximum luminance DIMMER Adjusts the sound volume Mutes the sound temporarily y s d TUNE TRCK MUTE VOL SRC PWR DIMMER MAP TUNE TRCK TILT CQ VW220W Remote control sensor Reset switch e DIMMER w VOL q MUTE r SRC PWR SOURCE POWER t MA...

Page 11: ...s and memorizes them automatically Determines an operation or item ENT ENTER BAND Selects vertically or adjusts an operation or item Selects or searches for a station Selects horizontally or adjusts an opera tion or item Adjusts the sound volume VOL Mutes the sound temporarily MUTE Returns to the previous display Inputs the number again Displays the VCD s menu RET RETURN Selects or searches for a ...

Page 12: ...ying contents and their positions partly vary with each mode Refer to the description of each mode for details Prohibition Input is not possible because the user has attempted to perform an operation which is not supported by the disc contents Displays the Source Selection Screen Source Button Setup Button Displays the Setup Screen Disc indicator a page 17 Lights when a disc is loaded Clock time a...

Page 13: ...no operation takes place for more than 10 seconds when Operation Screen is ON Operation Screen is turned off Touch Touch Touch Touch Audio Source CD MP3 USB audio device iPod audio Example CD mode DVD DivX Operation Screen List Screen Touch Touch Touch Touch Touch Operation Screen 1 Operation Screen 2 Operation Screen 1 Operation Screen 2 List Screen Touch Operation Screen List Screen Video Source...

Page 14: ... page 34 u TILT Press once to open Press again to close Display Open Close SRC SRC SRC PWR Power OFF Touch Press and hold for more than 2 seconds Note The display automatically closes after a warning alarm sounds if no operation is per formed for approximately 30 seconds When a disc is already loaded the disc will be ejected SRC PWR SRC RADIO AM FM a page 24 DVD DVD VCD Video CD CD MP3 DivX a page...

Page 15: ... 40 default 18 Note The volume level can be set independently for each source and each disc format General Operations continued u TILT Note After adjusting its angle also adjust the brightness as well a page 36 The car model and installation conditions may impose some restrictions on the adjustment of the monitor s angle Warning Do not touch the unit while the display is moving Inserting hands fin...

Page 16: ...3 2 2 2 ALL 3 5 2 3 4 5 Playable Discs Notes on DVD Rs RWs Do not mix DVD Video formatted data and other format ted data on the same disc Discs in the video recording VR format are unplayable Unfinalized discs are unplayable Use disc at once recording for DVD R DL double layer Some discs are unplayable depending on the disc itself device drive and software that are used for disc recording Discs no...

Page 17: ...ct into the disc slot This unit does not support 8 cm disc In case of load such a disc eject and remove the disc from the slot immediately Caution When the disc is inserted or ejected to prevent disc scratches never exert any downward force on the disc Disc Insert Press u TILT to open the display The mode that supports the disc is selected and play back starts When a disc is in the player change t...

Page 18: ... DivX file Note s and d of the main unit can scroll up and down the file list by 1 page respectively too It is not possible to display the whole tree and file list in a folder The displayed contents on the touch panel vary with circumstances Note Touch to change the display a page 13 CD MP3 Operation Buttons Audio Mode Display List Folder File Track Selection Operation Buttons Source Button Playin...

Page 19: ... CD CD VCD VCD VCD DVD DVD DVD Slow Playback VCD VCD VCD DVD DVD DVD Repeat Play DivX DivX DivX MP3 MP3 MP3 CD CD CD VCD VCD VCD DVD DVD DVD Repeat Play within the Current Folder DivX DivX DivX MP3 MP3 MP3 To resume playback touch press again or touch press 5 Scan Play CD CD CD Random Play DivX DivX DivX MP3 MP3 MP3 CD CD CD Random Play within the Current Folder DivX DivX DivX MP3 MP3 MP3 d Next t...

Page 20: ...e num ber of the title chapter entered 1 VCD VCD VCD DVD DVD DVD Showing menu and selecting an item q Menu appears w Select the desired item Touch when the direction buttons shown at left are not displayed e Determine the setting d d d d Returns to the previous display q Toggles Chapter number input mode Title number input mode and Number input mode w Input desired number e Playback starts Startin...

Page 21: ...o change the subtitle language during play if multiple lan guages are recorded on the disc Note There may be a brief delay before the subtitles appear Touch during playback Touch during playback Touch during playback Audio Language It is possible to change the audio language during play if multiple audio lan guages are recorded on the disc It is possible to switch the audio between stereo sound an...

Page 22: ...having no index may not play properly on this unit This unit supports all resolutions up to maximum of 720 x 480 NTSC 720 x 576 PAL You can select up to 8 types of audios and subtitles on this unit GMC Global Motion Compensation is not supported DivX HD is not supported Display Information on the Main Unit Displayed items Displayable characters Displayable length of file name folder name within 64...

Page 23: ...MPEG 2 audio layer 3 MP3 32 44 1 48 kHz Yes 32 k 320 kbps MPEG 1 audio layer 3 MP3 Sampling frequency VBR Bit rate Compression method Audio compression formats Recommendation Points to remember when making MP3 DivX files on the previous page DivX video system MP2 MP3 Note VBR is not recommended Root Folder Root Directory Folder Selection Disc media File Selection Tree 1 Tree 2 Tree 3 Tree 4 Tree 8...

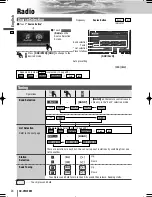
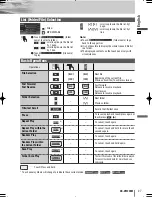
Page 24: ... SRC PWR SRC to change to the desired mode Operations Band Selection List Selection Refer to the next page Station Selection Seek Tuning Touch press and hold Touch press and hold for more than 0 5 second then release Seeking starts FM 1 FM 2 FM 3 AM BAND There are 6 stations in each list You can call up next 6 stations by switching from one list to another Up BAND on the remote control is avail ab...

Page 25: ...s Touch and hold for more than 2 seconds Once set the preset stations are sequentially scanned for 5 seconds each scanning New stations overwrite existing saved stations Touch and hold for more than 2 seconds Once set the preset stations are sequentially scanned for 5 seconds each scanning New stations overwrite existing saved stations In total 18 FM stations are automatically preset A station pre...

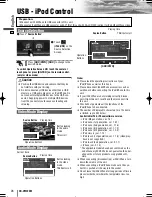
Page 26: ...es too high The USB devices that do not comply with the USB standard may not normally play with this unit Even mass storage class USB devices may not nor mally play with this unit The USB devices that contain other than MP3 WMA files may not normally play with this unit Caution Position the USB device and cable so that they do not interfere with your driving Do not connect any USB device other tha...

Page 27: ...he current file Previous track file Touch press twice Fast forward Release to resume playback Fast reverse Release to resume playback Next folder Scrolls the title text once Previous folder To cancel touch again To cancel touch and hold for more than 2 seconds again d s d s d s d s Random Play within the Current Folder To cancel touch again To cancel touch and hold again q Touch folder name to sel...

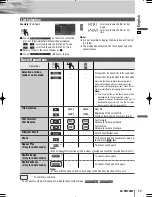
Page 28: ...ver 1 1 2 iPod touch 1st generation ver 1 1 4 video play back is not supported iPod touch 2nd generation ver 2 1 1 iPhone ver 2 1 0 The applicable models have been confirmed as the end of January 2009 We do not guarantee the oper ation with our future products or upgraded soft ware When connecting disconnecting a iPod iPhone turn down the volume of the unit When connecting a iPod iPhone make sure ...

Page 29: ...e Previous track file Touch press twice Fast forward Release to resume playback Fast reverse Release to resume playback Scrolls the title text once To cancel touch again d s Selection of video mode or audio mode Changes from the video mode to the audio mode Changes from the audio mode to the video mode d s d s d s Shuffle Albums Only for Audio mode To cancel touch again To cancel touch and hold ag...

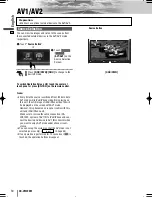
Page 30: ... the desired AV device to AV1 IN connector when you want to enjoy AV1 mode under above circum stance You can set up the system so that the AV mode is not selected source skip a page 34 If no operation is performed for 10 seconds or is touched the operation buttons disappear Input Preparation Connect an optional external device to the AV1 AV2 You can view the images and listen to the sounds from th...

Page 31: ...30 31 CQ VW220W English ...

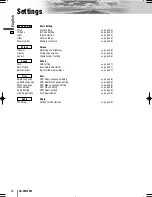
Page 32: ...ting a page 38 DVD Video Setting a page 38 DVD Menu Language Setting a page 38 DVD Subtitle Language Setting a page 38 DVD Audio Language Setting Disc Disc a page 37 Balance fader adjustment a page 37 Bass treble adjustment a page 37 SQ3 setting Sound Sound a page 36 Display aspect setting a page 36 Display appearance a page 36 Adjusting the brightness Screen Screen a page 35 Memory clearance a pa...

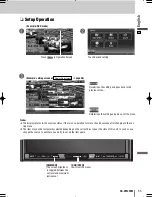
Page 33: ...ected depending on the current disc type or the state of this unit In such a case change the source to another one and try to set up the item again DIMMER The screen brightness is toggled between the set level and maximum luminance Setup Operation Example DVD mode Touch in Operation Screen Touch desired setting q w Example setting screen of a page 36 Display Adjustment Determines the setting and g...

Page 34: ... How to set your ID code for the first time q Enter an 4 digit ID code w Enter the same 4 digit ID code again How to change your ID code q Enter the preset old 4 digit ID code If the wrong ID code is entered a new ID code cannot be registered w Enter a new 4 digit ID code e Enter the new 4 digit ID code again How to cancel the known ID code q Enter the preset old 4 digit ID code If the wrong ID co...

Page 35: ... based screen Red based screen default Blue Red Green Blue OSD color setting OSD Color Off On Off On Setting ACC selection ON and OFF ACC Select Caution Be sure to select off when your car has no ACC position in the ignition switch Failure to do this could cause the battery to go dead Memory Clear Memory clearance The state of all of the current memories are returned to default settings Note The I...

Page 36: ...ional display image has a 4 to 3 ratio of horizontal to vertical In this case a blank area remains on the right and left sides of the display Normal Full The screen is extended horizontally as a whole to the aspect ratio of 16 to 9 The extension ratio is the same at any point of the screen Zoom The screen is fully extended at the normal aspect ratio of 4 to 3 The top and bottom of the screen are s...

Page 37: ...TRE e Touch or to adjust each frequency Adjustable range 12 dB to 12 dB Adjustable frequency BASS 60 Hz 80 Hz 100 Hz 200 Hz MID 500 Hz 1 kHz 2 kHz 3 kHz TRE 10 kHz 12 kHz 15 kHz 18 kHz Note The new level adjustment will overwrite the previous level adjustment For resuming the factory settings touch and hold for more than 2 seconds Bass Treble Bass treble adjustment more less more less Setting rang...

Page 38: ... jacket a page 16 DVD software mode setting is ignored if or is already set in the software Screen aspect of the display unit is changed according to the aspect ratio setting a page 36 and DVD soft ware s aspect sets PAL in accordance with the equip ment connected to VIDEO OUT sets NTSC in accordance with the equipment connected to VIDEO OUT default The angle mark is displayed to indicate the part...

Page 39: ...dable down mix Lt Left total Rt Right total simple stereo down mix Lo Left only Ro Right only Note This function is available only when Dolby Digital source is playing default DR COMP ON made with the greatest compression roughly equivalent to a TV broadcast DR COMP OFF Note This function is available only when Dolby Digital source is playing default Off Off MIN STD Dynamic Range Compression setti...

Page 40: ...content Authorization Error is dis played Regarding DivX content that can only be played a set num ber of times Some DivX VOD content can only be played a set number of times When you play this content the remaining num ber of plays is displayed You cannot play this content when the number of remaining plays is zero Rental Expired is displayed When playing this content The number of remaining play...

Page 41: ...et to ON aSet MUTE to OFF The wiring of speaker lines is not correct or a break or poor contact arises aCheck the wiring in accordance with the wiring diagram Installation Instructions Noise There is an electromagnetic wave generator such as a cellular phone near the unit or its electrical lines aKeep the electromagnetic wave generator such as a cellular phone away from the unit and the wiring of ...

Page 42: ... object on the disc aRemove the foreign object or use a flawless disc No playback or disc ejected The disc is inserted upside down aInsert a disc correctly There is a flaw or foreign object on the disc aRemove the foreign object or use a flawless disc Sound skipping due to vibration The unit is not sufficiently secured aSecure the unit to the console box The unit is tilted at over 30 in the front ...

Page 43: ...layback or disc ejected The disc has unplayable formatted data aRefer to the description about MP3 DivX for playable formats The CD Rs RWs DVD Rs RWs that are playable on other devices are not playable on this unit The playability of some CD Rs RWs DVD Rs RWs may depend on the combina tion of media recording software and recorder to be used even if these CD Rs RWs DVD Rs RWs are playable on other ...

Page 44: ...a page 40 The DivX VOD content has no available play count aPurchase again the content or play another content a page 40 No response to pressing buttons The battery is inserted in the wrong direction A wrong battery is inserted aInsert a correct battery in the correct direction The battery is weak aReplace the battery with new one The aiming direction of the remote control unit is wrong aAim the r...

Page 45: ... and plug it in again In case the unit is still out of order con sult your dealer a Installation Instructions Decode Error No operation by some cause aSwitch the power or ACC ON OFF If this does not solve the problem unplug the power cord and plug it in again In case the unit is still out of order con sult your dealer a Installation Instructions File Error The player for some reason cannot read th...

Page 46: ...perate with any buttons Stored settings and adjustments are not cleared If the unit fails to return to normal condition call the near est Panasonic Service Center and ask for repairs Note If the ID CODE has been already set you will be asked to enter the ID CODE right after the unit is restarted In case you forget the ID code In case you forget the ID code please consult your nearest Panasonic Ser...

Page 47: ...er to the surface Do not scratch the screen with your nails or other hard objects The resulting scratches or marks will obscure the images Cleaning this Unit Your product is designed and manufactured to ensure a minimum of maintenance Use a dry soft cloth for routine exterior cleaning Never use benzine thinner or other sol vents Alcohol Pesticide Wax Benzine Thinner Caution If water drops or simil...

Page 48: ...allel with the unit Otherwise the disc may be scratched or marked in the process When inserting a disc do not put one disc on anoth er Failure to observe this may cause the discs to be jammed Do not leave discs in the following places Direct sunlight Near car heaters Dirty dusty and damp areas On seats and dashboards Disc cleaning Use a dry soft cloth to wipe from the center outward Do not attach ...

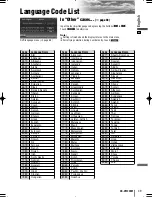
Page 49: ...ri 7775 Macedonian 7776 Malayalam 7778 Mongolian 7779 Moldavian 7782 Marathi 7783 Malay 7784 Maltese 7789 Burmese 7865 Nauru 7869 Nepali 7876 Dutch 7879 Norwegian 7982 Oriya 8065 Panjabi 8076 Polish 8083 Pashto Pushto 8084 Portuguese 8185 Quechua Code Language Name 6565 Afar 6566 Abkhazian 6570 Afrikaans 6577 Ameharic 6582 Arabic 6583 Assamese 6589 Aymara 6590 Azerbaijani 6665 Bashkir 6669 Byeloru...

Page 50: ...ith the screen by looking at the menu shown on the screen In these instructions playback using the menu screen is referred to as the menu play for video CDs This player supports Video CDs with playback control DivX DivX is a popular media technology created by DivX Inc DivX media files contain highly compressed video with high visual quality that maintains a rela tively small file size DivX files ...

Page 51: ...mum supply current 500 mA Playable audio format MP3 WMA Recommended capacity Less than 4 GB 1 partition Note Specifications and the design are subject to modification without notice due to improvements in technology Some figures and illustrations on this manual may be different from your product Playable region number This operating instruction manual is for 3 models CQ VW220W2 CQ VW220W3 and CQ V...

Page 52: ...102 CQ VW220W Memorandum ...

Page 53: ...103 CQ VW220W ...

Page 54: ...YFM264C159CA PTW1208 1029 Printed in China CQ VW220W Web Site http panasonic net ...

Reviews: