4
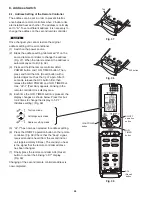
REMOTE CONTROLLER
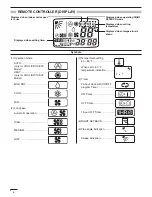
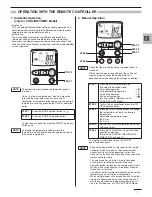
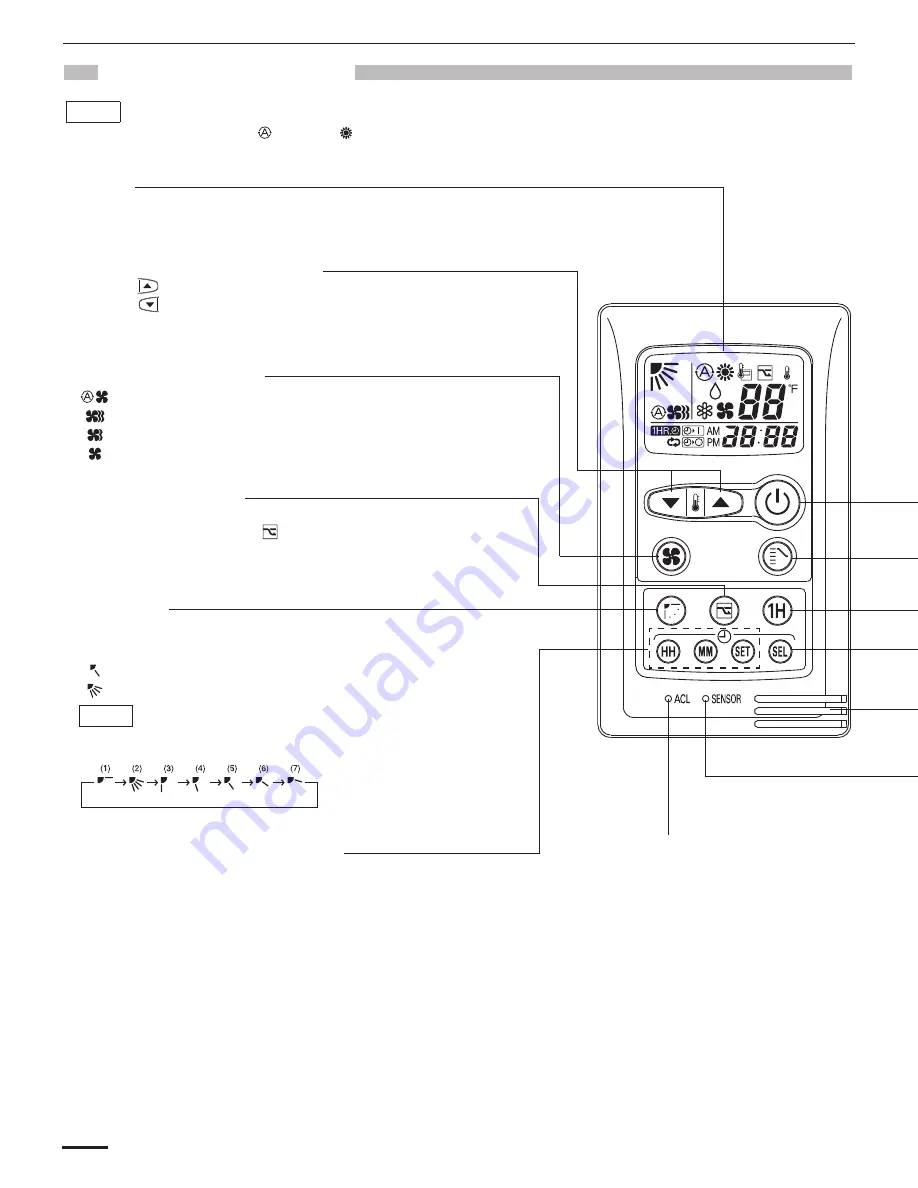
Display
Information on the operating conditions is displayed while the remote
controller is switched on. If the unit is turned off, only the mode that was set
previously is still displayed.
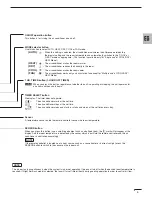
FAN SPEED selector button
: The air conditioner automatically decides the fan speeds.
: High fan speed
: Medium fan speed
: Low fan speed
FLAP button
Press this button either to select the setting of the airflow direction to one of
the six possible positions manually or to select the sweep function which
moves the flap up and down automatically.
: The airflow direction can be set manually. (six positions)
: The flap moves up and down automatically.
When you press the FLAP button, the air flow direction will be changed one by
one as follows.
NOTE
SWEEP
Temperature setting buttons (TEMP.)
Press the
button to increase the set temperature.
Press the
button to reduce the set temperature.
The temperature setting changes by 2 °F each time one of the TEMP. buttons
is pressed.
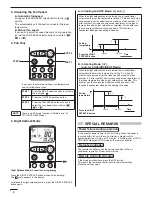
NIGHT SETBACK button
For details, see “5. Night Setback Mode”. When you press this button in the
HEAT, DRY or COOL mode, the
mark appears in the display, and the
remote controller will automatically adjust the set temperature to save energy.
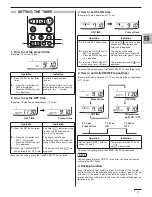
Timer and Present Time setting buttons
First, press the SET button to select the mode (ON, OFF and Present Time
settings) you want.
Each time you press the ‘‘HH’’ button, the hours advance by one.
(PM0, PM1.....PM11, AM0, AM1.....AM11)
Each time you press the ‘‘MM’’ button, the minutes advance by one when
setting Present Time and by ten when setting ON and OFF Time.
SET button
For details, see “SETTING THE TIMER”.
Press this button to select the mode you want to program.
ACL button (ALL CLEAR)
When you press the ACL button while the
operation button is ON, all settings are cleared.
Press the ACL button if the air conditioner is not
operating correctly.
The descriptions on the AUTO (
) or HEAT (
) operation mode are only for the “COOL/DRY/HEAT Model,” and not for the
“COOL/DRY Model.”
NOTE
Summary of Contents for CS-KS12NB41
Page 37: ...Outdoor Unit CU KS12NK1A 8FA2 5251 12300 2 37 ...
Page 69: ......
Page 117: ......
Page 118: ...Operating Instructions CZ RD515U 852 6 4181 230 00 1 APPENDIX C A 3 ...
Page 129: ......
Page 130: ...A 4 INSTALLATION INSTRUCTIONS CZ RD515U 852 6 4190 592 00 0 APPENDIX D ...
Page 135: ......
Page 136: ...DC1111 0 ...

