11
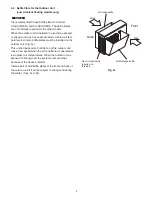
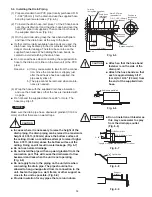
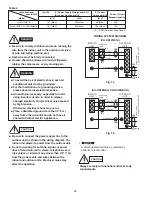
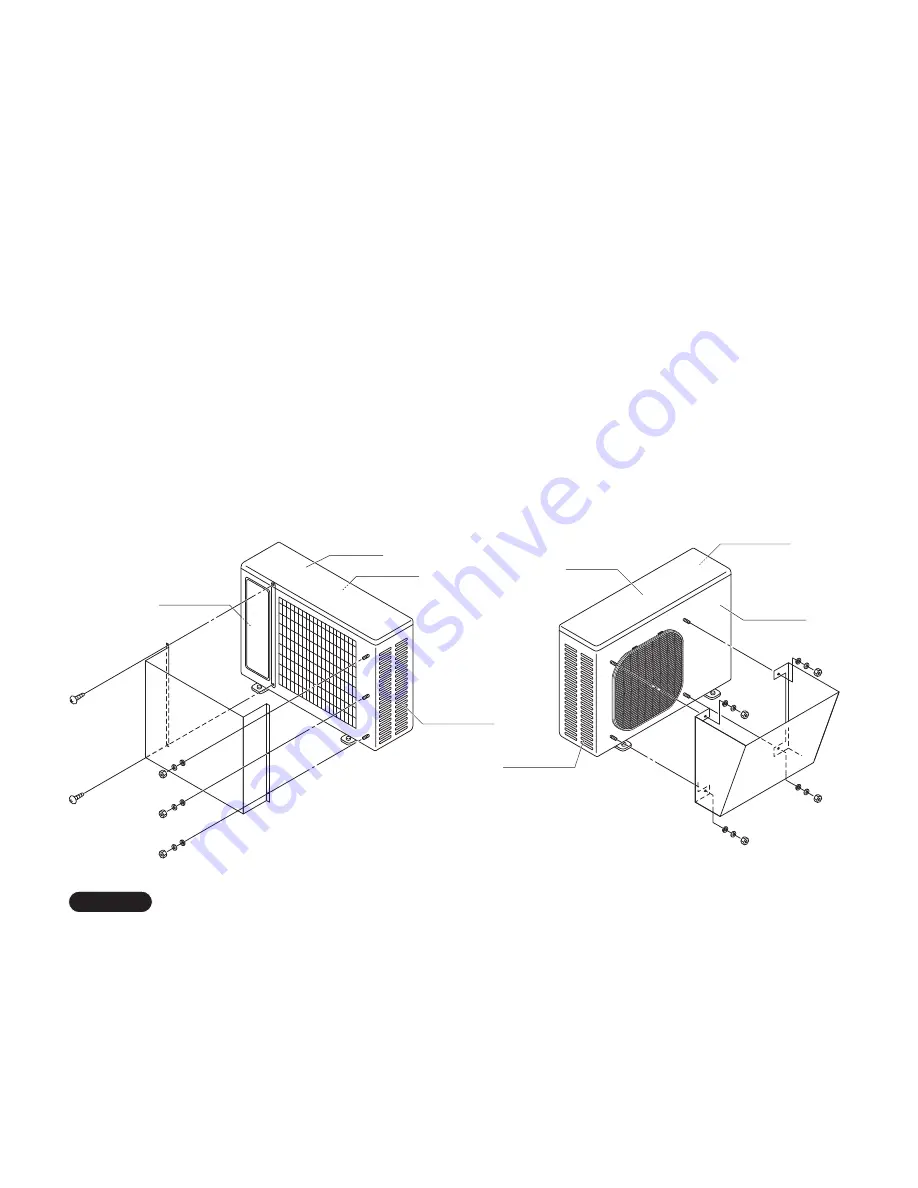
Panel top
Panel front
Panel side R
Panel side L
Fig. 5k
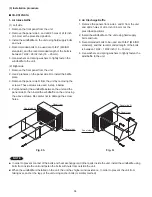
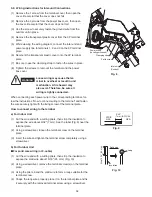
1. Air Intake Baffle
(1) Left side
1. Remove the top panel from the unit.
2. Remove the panel side L, and drill 3 holes of ø1/4 inch
(6.5 mm) at the prescribed positions.
3. Install the windbaffle on the unit using field supply bolts
and nuts.
4. Recommended bolts to be used are 15/64" (M6 ISO
standard), and the recommended length of the bolts is
between 19/32 – 25/32 inch (15 – 20 mm).
5. Use washers and spring washers to tightly fasten the
windbaffle to the unit.
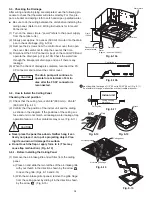
(2) Right side
1. Remove the top panel from the unit.
2. Use 2 preholes on the panel side R to install the baffle plate.
3. Remove the panel side R from the unit by removing the
screws. These screws are used in step 4 below.
4. Put (sandwich) the windbaffle between the unit and the
panel side R, then install the windbaffle on the unit using the
above screws. Be careful not to damage the screw holes.
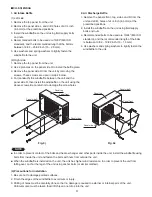
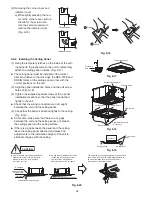
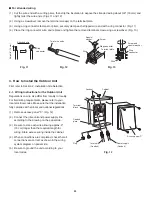
2. Air Discharge Baffle
1. Remove the panels front, top, side L and R from the
unit and drill 4 holes of ø1/4 inch (6.5 mm) at the
prescribed positions.
2. Install the windbaffle on the unit using field supply
bolts and nuts.
3. Recommended bolts to be used are 15/64" (M6 ISO
standard), and the recommended length of the bolts
is between 13/32 – 19/32 inch (10 – 15 mm).
4. Use washers and spring washers to tightly fasten the
windbaffle to the unit.
Fig. 5j
Panel side R
Panel top
Panel front
Panel side L
CU-KS18NKUA
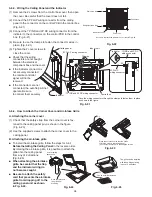
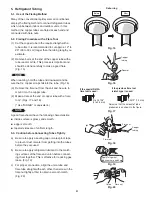
(4) Precautions for installation
1. Be sure not to damage painted surfaces.
2. Finish the edges of the windbaffle to avoid cuts or injury.
3. Drilling of holes must be carefully done so that no damage is caused to external or internal parts of the unit.
Particular care must be taken that drill chips do not drop into the unit.
In order to prevent contact of the bolts and heat exchanger and other parts inside the unit, install the windbaffle using
bolts from inside the unit and fasten the bolts with nuts from outside the unit.
When the windbaffle is installed on the unit, the unit has higher wind resistance. In order to prevent the unit from
falling over, anchor the legs of the unit using anchor bolts (or similar method).
NOTE
Summary of Contents for CS-KS12NB41
Page 37: ...Outdoor Unit CU KS12NK1A 8FA2 5251 12300 2 37 ...
Page 69: ......
Page 117: ......
Page 118: ...Operating Instructions CZ RD515U 852 6 4181 230 00 1 APPENDIX C A 3 ...
Page 129: ......
Page 130: ...A 4 INSTALLATION INSTRUCTIONS CZ RD515U 852 6 4190 592 00 0 APPENDIX D ...
Page 135: ......
Page 136: ...DC1111 0 ...

