- 27 -
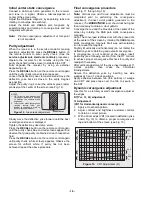
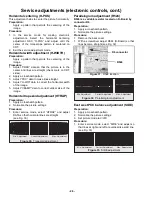
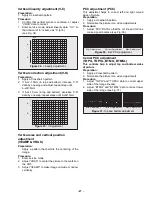
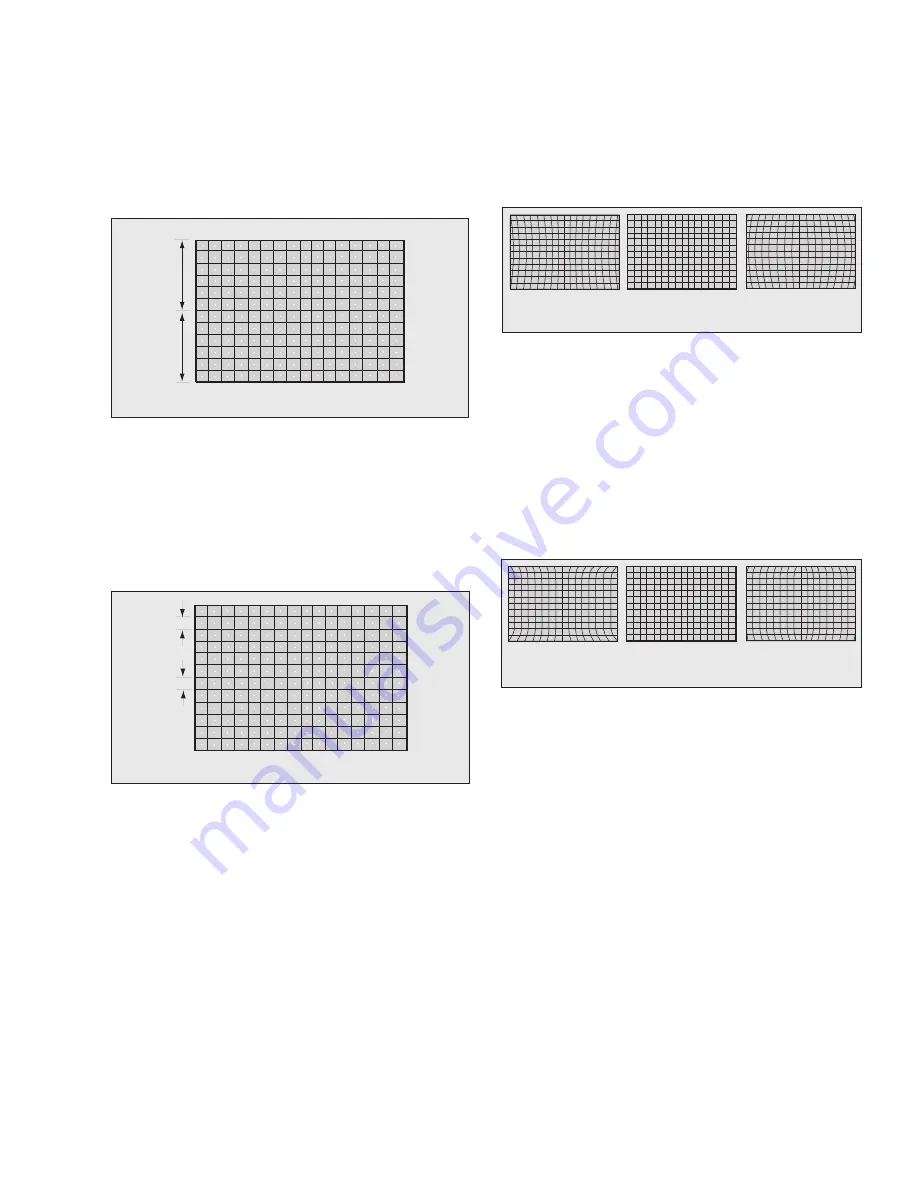
Vertical linearity adjustment (V-C)
Preparation:
1.
Apply a crosshatch pattern
Procedure:
1.
Confirm that vertical picture is centered, or adjust
“VRAS” data to correct.
1.
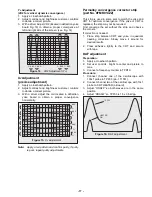
Enter service mode, adjust linearity data “V-C” so
that interval of “a” is same as “b” (a=b).
(see Fig. 34)
Vertical correction adjustment (V-S)
Preparation:
1.
Apply a Crosshatch pattern.
2.
If b-a<-1.5mm (in top and bottom), increase “V-S”
data by one step and adjust; repeat step until
b-a
≤
1.5mm
3.
If b-a>-1.5mm (in top and bottom), decrease “V-S”
data by one step; repeat steps until b-a
≤
1.5mm.
Vertical size and vertical position
adjustment
(VEAMP & VRAS)
Preparation:
Apply a pattern that permits the centering of the
image.
Procedure:
1.
Enter service mode
2.
Adjust “VRAS” to center the picture to the marks on
the CRT.
3.
Adjust “VEAMP” to make image not wide or narrow
vertically.
PCC adjustment (PCC)
This adjustmet helps to correct left and right curved
sides of picture.
Preparation:
1.
Apply a crosshatch pattern
2.
Normalize the picture icon video adjustments.
Procedure:
1.
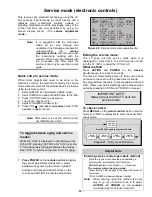
Adjust “PCC” DATA so that the 1st line and 3rd line
make a good balance (see Fig. 36).
Corner PCC adjustment
(TOPG, TOPSL, BTMG, BTMSL)
This controls help to adjust top and bottom sides
of picture
Preparation:
1.
Apply a Crosshatch pattern
2.
Normalize the picture icon video adjustments.
Procedure:
1.
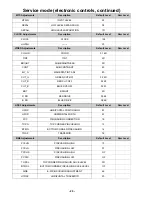
Adjust “TOPG” and “TOPSL” data to correct upper
side of the image linearity.
2.
Adjust “BTMG” and “BTMSL” data to correct lower
side of the image (see Fig. 37)
a
a=b
b
Figure 34. Linearity adjustment
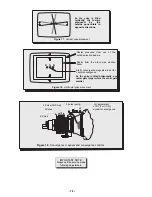
a
b
Figure 35. V-Adjustment
Min. Adjustment
Correct Adjustment
Max. Adjustment
Figure 36. E-W PCC adjustment
Min. Adjustment
Correct Adjustment
Max. Adjustment
Figure 37. Top and bottom adjustment
Summary of Contents for CT-32SC13-1G
Page 63: ... 50 A Board ...
Page 65: ... 52 ERJ6GEYJ183V NP2AH037AC ERENCES A Board ...
Page 66: ... 53 A Board ...
Page 69: ... 56 D Board ...
Page 70: ... 57 D Board ...
Page 71: ... 58 D Board ...
Page 74: ... 61 notes NOTES ...
Page 75: ... 62 G Board ...
Page 76: ... 63 G Board ...
Page 77: ... 64 G Board ...
Page 79: ... 66 L Board ...
Page 80: ... 67 L Board ...
Page 81: ... 68 A PCB ...
Page 82: ... 69 A PCB ...
Page 83: ... 70 D PCB ...
Page 84: ... 71 D PCB ...
Page 85: ... 72 G PCB ...
Page 86: ... 73 G PCB ...
Page 87: ... 74 L PCB ...
Page 88: ... 75 notes NOTES ...

