background image

English

3

Press the remote control’s button

1

TO TURN ON OR OFF THE UNIT

• Please be aware of the OFF indication on the 

remote control display to prevent the unit from 
starting/stopping improperly.

2

TO SET TEMPERATURE

• Selection range: 60°F ~ 86°F.

3

TO SELECT OPERATION MODE

AUTO mode - For your convenience

• Unit selects operation mode during startup 

according to temperature setting and room 
temperature.

HEAT mode - To enjoy warm air

• Unit takes a while to warm up. The power 

indicator blinks during this operation.

COOL mode - To enjoy cool air

• Use curtains to screen off sunlight and outdoor 

heat to reduce power consumption during cool 
mode.

DRY mode - To dehumidify the environment

• Unit operates at low fan speed to give a gentle 

cooling operation.

4

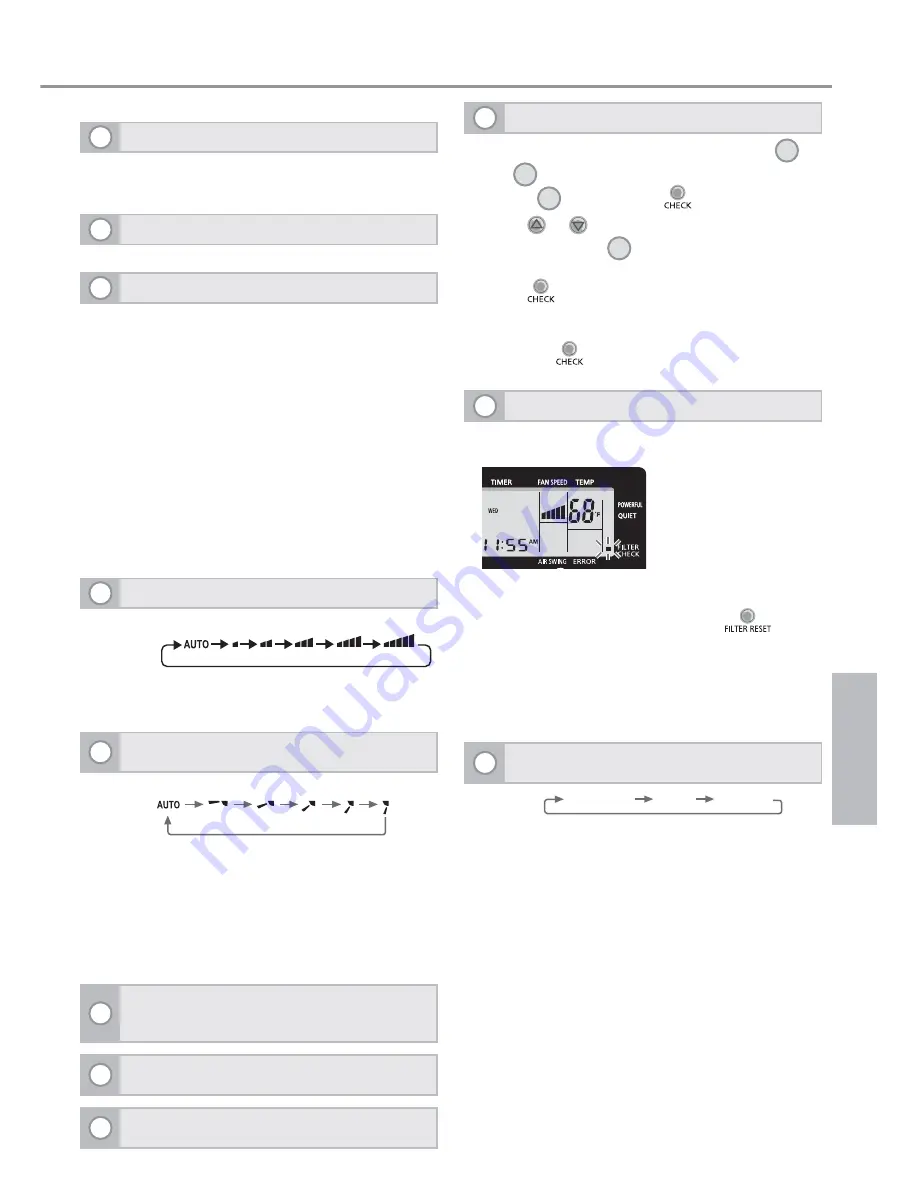
TO SELECT FAN SPEED

(Remote control display)

FAN SPEED

•  For AUTO, the indoor fan speed is 

automatically adjusted according to the 
operation mode.

5

TO ADJUST VERTICAL AIRFLOW
DIRECTION

(Remote control display)

AIR SWING

•  Keeps the room ventilated.
•  In COOL/DRY mode, if AUTO is set, the louver 

swing up/down automatically.

•  In HEAT mode, if AUTO is set, the horizontal 

louver fi xed at predetermined position. 

•  For Hide-Away models, AIR SWING buttons 

are not in use. Airfl ow direction can not be 
adjusted.

6

Press and hold for approximately 10 
seconds to show temperature setting in °C 
or °F.

7

Press and hold for 5 seconds to dim or 
restore the unit’s indicator brightness.

8

Press to restore the remote control’s 
default setting.

9

RETRIEVE ERROR CODE

•  During operation, the unit stops and both 

a


and 

b

 is OFF indicates abnormality occurs.

1. Ensure 

a

 is OFF, press 

 for 5 seconds.

2. Press 

 or 

 . If error code and abnormality 

can be identifi ed, 

a

 will be ON continuously, 

then write down the error code.

3. Press 

 for 5 seconds to quit checking.

4. Turn the unit off and reveal the error code to 

authorized dealer.

Note: Press 

 for 10 seconds to enter AC reset 

switch (Not used in normal operation).

10

AIR FILTER MAINTENANCE

Cleaning is needed when “FILTER CHECK” 
indicator is ON.

• lt is recommended to clean the air fi lter every 6 

weeks.

• After the air fi lter is cleaned, press 

 to 

reset.

• Do not operate without an air fi lter.
• Wash/rinse the fi lters gently with water to avoid 

damage to the fi lter surface.

• Do not dry the part with a hair dryer or a stove.
• Replace any damaged fi lters.

11

TO SWITCH BETWEEN POWERFUL & 
QUIET

POWERFUL/

QUIET

QUIET

POWERFUL

NORMAL

POWERFUL: To reach temperature quickly

•  This operation stops automatically after 20 

minutes.

QUIET: To enjoy quiet operation

•  This operation reduces airfl ow noise.

Summary of Contents for CZ-RD52CU

Page 1: ...User Manual Mode d emploi Wired Remote Control Télécommande câblée CZ RD52CU Français English F569894 User Manual Wired Remote Control 2 5 10 Mode d emploi Télécommande câblée 6 10 ...

Page 2: ...ELECTION INDICATOR d TIMER CLOCK SETTING DISPLAY Lights up if Timer operation is selected 6 different programmes can be set in a day 1 6 Time to be selected 10 minutes step ON Timer To automatically switch ON the unit OFF Timer To automatically switch OFF the unit Day to be selected Indicates the selected day Indicates the next timer operation day e FAN SPEED DISPLAY f TEMPERATURE SETTING DISPLAY ...

Page 3: ...els AIR SWING buttons are not in use Airflow direction can not be adjusted 6 Press and hold for approximately 10 seconds to show temperature setting in C or F 7 Press and hold for 5 seconds to dim or restore the unit s indicator brightness 8 Press to restore the remote control s default setting 9 RETRIEVE ERROR CODE During operation the unit stops and both a and b is OFF indicates abnormality occu...

Page 4: ...e time Promotes energy saving by allowing you to set up to 6 programmes in any given day 1 Press TIMER for 4 seconds to change display to weekly timer 2 Press TIMER or to select your desired day 3 Press to confirm your selection 4 1 will be blinking press to set programme 1 5 Press TIMER to select ON or OFF timer 6 Press TIMER or to select your desired time If you want to set the timer together wi...

Page 5: ...ay is shown 4 Perform steps 4 to 7 of WEEKLY TIMER SETTING to modify existing timer programme or add any timer programme Cancel Current Timer Programme Perform the step below to cancel the timer programme for a particular day 1 Press to enter day 2 Press TIMER or until your desired day is shown 3 Press to enter programme setting 4 Press TIMER or until your desired programme is shown Press to cance...

Page 6: ...ION DE MODE d AFFICHAGE DE RÉGLAGE HORLOGE MINUTERIE S allume si la minuterie est activée 6 programmes sur une période de 24 heures peuvent être réglés 1 6 Réglage de l heure palier de 10 minutes EN MARCHE Pour mettre l appareil en marche automatiquement HORS MARCHE Pour mettre l appareil hors marche automatiquement Jours parmi lesquels faire la sélection Indique le jour sélectionné Indique le jou...

Page 7: ... le bruit du flux d air Appuyer sur la touche de la télécommande 1 MISE EN HORS MARCHE DE L APPAREIL Prêter attention à l indication de mise hors marche OFF sur l affichage de la télécommande afin de prévenir le démarrage et l arrêt irrégulier de l appareil 2 RÉGLAGE DE LA TEMPÉRATURE Plage de réglage 60 F 86 F 3 SÉLECTION DU MODE DE FONCTIONNEMENT Mode AUTO Pour votre commodité L appareil sélecti...

Page 8: ...inuterie hebdomadaire ne peuvent être les mêmes Favorise la consommation d énergie en permettant jusqu à 6 programmes par jour 1 Appuyer sur TIMER de la minuterie pendant 4 secondes pour passer à l affichage de la minuterie hebdomadaire 2 Appuyer sur TIMER ou de réglage de la minuterie pour sélectionner le jour 3 Appuyer sur pour confirmer la sélection 4 L indication 1 clignote appuyer sur pour ré...

Page 9: ...ce que le jour voulu s affiche 4 Suivre les étapes 4 à 7 des réglages des minuteries quotidienne et hebdomadaire pour modifier un programme existant ou ajouter un programme Annulation d un programme Suivre les étapes décrites ci après pour annuler le programme de minuterie pour un jour donné 1 Appuyer sur pour entrer le jour 2 Appuyer sur TIMER ou de la minuterie jusqu à ce que le jour voulu s aff...

Page 10: ... Canadian ICES 003 Avis de la FCC Cet appareil est conforme à la section 15 des règlements de la FCC Le fonctionnement est soumis aux deux conditions suivantes 1 cet appareil ne doit pas émettre de brouillage nuisible et 2 cet appareil doit accepter toute interférence y compris toute interférence qui pourrait occasionner un fonctionnement inopportun Ce matériel a fait l objet de tests et il a été ...

Page 11: ...Français 11 Memo ...

Page 12: ...rporation 2014 Printed in China Imprimé en Chine F569894 SA1214 0 Panasonic Corporation Website http panasonic net Panasonic Canada Inc Website Site Web http www panasonic com For support http www panasonic ca english support Pour le soutien http panasonic ca french support ...

Reviews: