56
RQTV0134
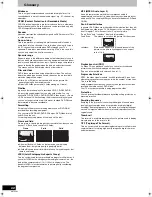
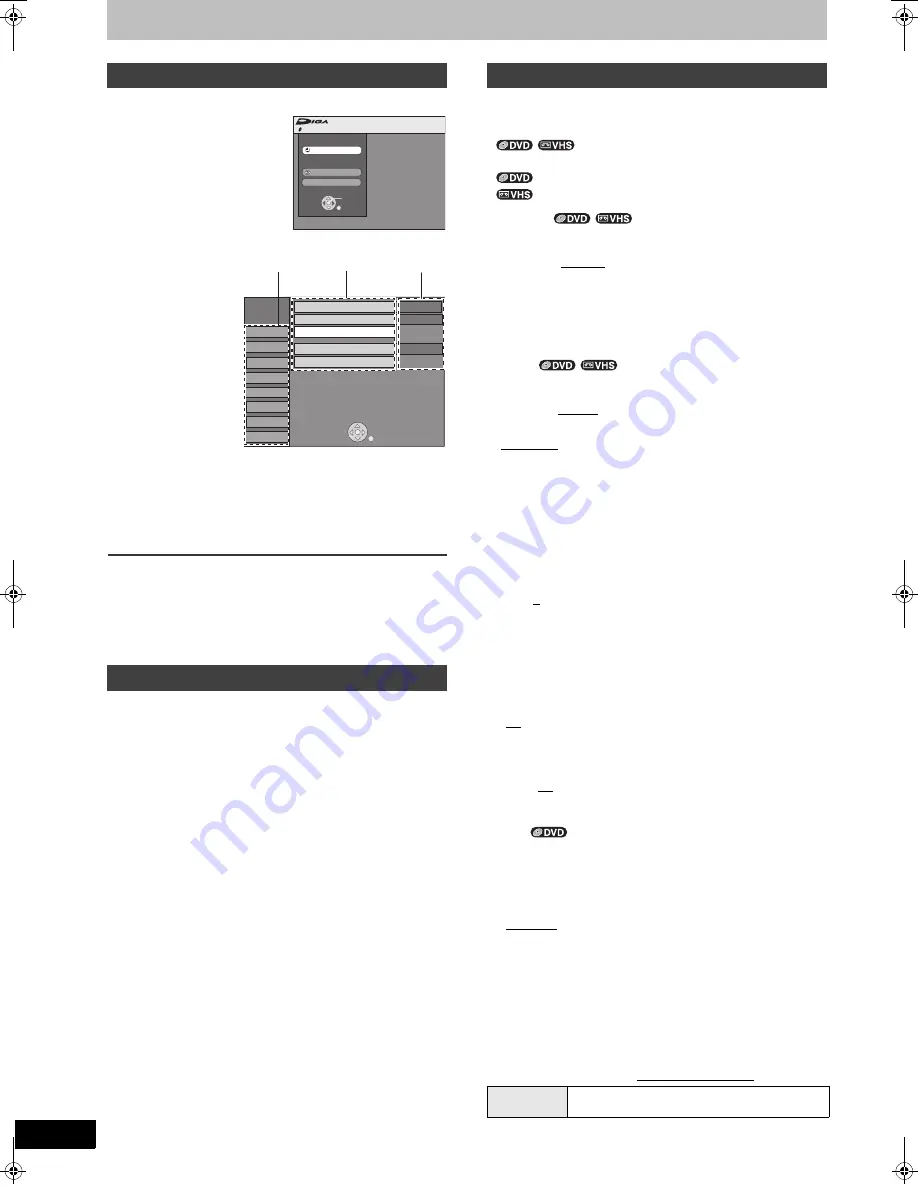
Changing the unit’s settings
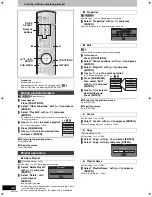
Use the following procedure to change the settings if necessary.
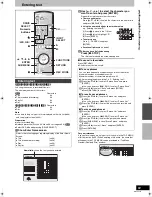
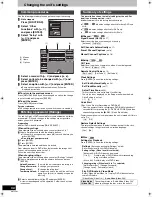
[1]
While stopped
Press [FUNCTIONS].
[2]
Select “Other
Functions”
with
[
3
,
4
]
and press
[ENTER].
[3]
Select “Setup” with
[
3
,
4
]
and press
[ENTER].
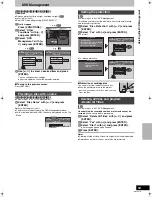
[4]
Select a menu with [
3
,
4
] and press [
2
,
1
].
[5]
Select an item to be changed with [
3
,
4
] and
press [ENTER]
.
[6]
Select an option with [
3
,
4
] and press [ENTER]
.
≥
Some options require different operations. Follow the
displayed instructions.
∫
To return to the previous screen
Press [RETURN]. Even if you have changed an option, the change
is not activated until you press [ENTER].
∫
To exit the screen
Press [RETURN] several times.
For your reference
≥
The settings remain intact even if you switch the unit to standby.
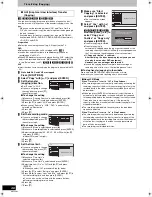
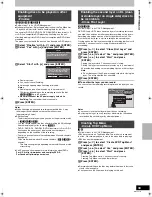
You can limit play of DVDs unsuitable for some audiences (children,
for example). Play and changes to the settings are not possible
unless you enter a password.
Preparation
≥
Select DVD side with pressing [DRIVE SELECT].
When setting ratings
The password screen is shown when you select levels 0 to 7.
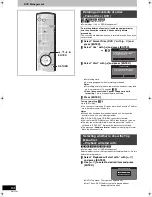
[1]
Input a 4-digit password with the numeric buttons.
≥
If you enter a wrong number, press
[
2
] to erase it before you
press [ENTER].
≥
Do not forget your password.
[2]
Press [ENTER].
[3]
Press [ENTER].
The password is entered and the unit is locked.
Now, when you insert a DVD-Video that exceeds the ratings limit
you set, a message appears on the TV.
Follow the on-screen instructions.
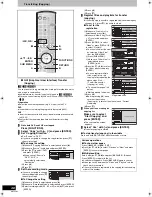
When changing ratings
The password screen is shown when you select “Ratings” (
l
right)
[1]
Input a 4-digit password with the numeric buttons and press
[ENTER].
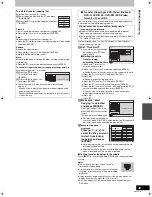
Unlock Recorder:
To unlock the unit and return the rating to 8
Change Password:
To change your password
Change Level:
To change the rating level
Temporary Unlock:
To temporarily unlock the unit (the unit locks
again if you switch it to standby or open the
disc tray)
[2]
Select a desired item with [
3
,
4
] and press [ENTER].
Actual screens depend on the operation. Follow the on-screen
instructions.
This description shows the initial settings for the unit. For
details on menu operation.
(
l
left)
≥
Underlined items are the factory default settings.
≥
indicates settings effective for both DVD and
VHS.
≥
indicates settings effective for DVD only.
≥
indicates settings effective for VHS only.
∫
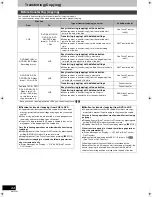
Channel
Signal Source (RF IN)
(
l
17)
Select to suit the type of antenna you are using.
[Antenna]
[CableTV]
Set Channels Automatically
(
l
17)
Preset Channel Captions
(
l
18)
Manual Channel Captions
(
l
18)
∫
Setup
Off Timer
Select how long the unit remains on when it is not being used.
[2 Hours]
[6 Hours]
[Off]
Remote Control Code
(
l
19)
[Set Code 1]
[Set Code 2]
[Set Code 3]
Clock Settings
Press [ENTER] to show the following settings.
Set Clock Automatically
(
l
20)
Set Clock Manually
(
l
17)
Adjust Time Zone
(
l
20)
This corrects the time set in Auto Clock Setting.
The status is not displayed on the Setup menu when the Auto
Clock Setting is not set.
[
j
1]
[0]
[
i
1]
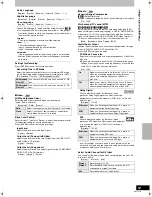
Quick Start
1 Sec. Quick Start for Recording on DVD-RAM
°
°
From the power off state, recording on DVD-RAM starts about 1
second after first pressing the [
Í
, DVD/VHS POWER] and then
sequentially pressing the [
¥
, REC] (Quick Start Mode).
Power consumption is also higher when the unit is turned off if this is
set to “On”.
[On]
[Off]
Restore Default Settings
This returns Setup menus to default settings, except for the clock,
channel settings, ratings level, and on-screen language.
[Yes]
[No]
∫
Disc
Settings for Playback
Press [ENTER] to show the following settings.
Ratings
(“Entering a password (Ratings)”
l
left)
Set a ratings level to limit DVD-Video play.
Setting ratings (When level 8 is selected)
[8 No Limit]: All DVD-Video can be played.
[1] to [7]:
Prohibits play of DVD-Video with corresponding
ratings recorded on them.
[0 Lock All]: Prohibits play of all DVD-Video.
Changing ratings (When level 0 to 7 is selected)
[Unlock Recorder]
[Change Password]
[Change Level]
[Temporary Unlock]
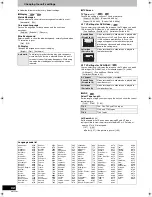
Play DVD-Audio in Video Mode
Select “Video Mode (Video On)” to play DVD-Video content on
some DVD-Audio.
[Video Mode (Video On)]
[Audio Mode (Video Off)]
Common procedures
Entering a password (Ratings)
No Disc
FUNCTIONS
No Disc
Program
Copy
Other Functions
ENTER
RETURN
(1)
(2)
(3)
Channel
Setup
Disc
Video
VHS
ENTER
Audio
Display
TV Screen
Setup
Off Timer
Remote Control Code
Clock Settings
Restore Default Settings
6 Hours
Set Code 1
Quick Start
On
(1) Menus
(2) Items
(3) Options
Summary of settings
Video Mode
(Video ON)
The setting returns to “Audio Mode (Video Off)”
when you change the disc or turn the unit off.
/
/
/
M6VP&PC.book 56 ページ 2006年2月6日 月曜日 午後3時20分

