background image

4


Install Firmware 

 
CAUTION:  Do not turn the DVD Recorder OFF or press any buttons on the DVD 

Recorder while the firmware update is in progress. 


1)


Power the DVD Recorder on. 


2)


Press the [OPEN/CLOSE] button to 

OPEN

 the disc tray. 

 
3)


Place the CD-R with the firmware update into the disc tray with the label side facing up. 

 
4)


Press the [OPEN/CLOSE] button to 

CLOSE

 the disc tray. 


NOTE:  If the firmware version in the unit is the same or higher than the firmware 

CD, 

UNSUPPORT

 may be displayed on the front panel.  In this case, an update is 

unnecessary.  Please remove the disc. 


NOTE:  If the firmware update will be installed, 

BYE

 will display on the front panel, 

the DVD Recorder will power off, and then power back on. 


NOTES: 


Several messages will be displayed on the front panel during the firmware 
update. 


When the firmware update is complete, the disc tray will automatically 

OPEN


5)


Remove the CD-R with the firmware update from the disc tray. 


6)


Without closing the disc tray, press the [POWER] button on the DVD Recorder to power 
the unit off.  The disc tray will 

CLOSE

 automatically, display 

BYE,

 and then power off. 

 
7)


Unplug the power cord for at least 30 seconds, and then plug the power cord back in. 
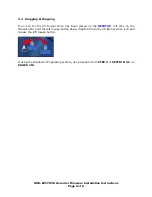
 
8)


Press the [POWER] button on the DVD Recorder to power the unit on.  (The unit will 

display 

HELLO

 and then begin the 

FIRST TIME SETUP

.) 


NOTE:  If the unit does not begin the 

FIRST TIME SETUP

 automatically, it is 

recommended to initiate the 

FIRST TIME SETUP


Tune the DVD Recorder to a channel. 


Simultaneously press the [CHANNEL UP] and [CHANNEL DOWN] buttons on the 

front of the DVD Recorder for approximately 10 – 15 seconds (until the unit powers 
off). 

DMR-EZ27 DVD Recorder Firmware Installation Instructions 

Page 7 of 8 

Summary of Contents for Diga DMR-EZ27

Page 1: ...2 1 1 Applicable Models 2 1 2 Purpose 2 2 Download Firmware 3 3 Burn Firmware 4 3 1 Windows OS CD Writing Program 4 3 2 Other OS CD Writing Program 5 3 3 3rd Party CD Burning Software 5 3 4 Dragging...

Page 2: ...d U8 196 Countermeasure for occurred aging mode by remote control signal Protection for Drive unit fuse blowing due to customer Disc condition Upgrade program for next generation drive U8 190 When rec...

Page 3: ...irmware DMR EZ27 DVD Recorder Firmware 2 Left click on SAVE The file name displayed should be PANA_DVD FRM 3 Left click on DESKTOP and then left click on SAVE NOTE The PANA_DVD FRM file will be placed...

Page 4: ...or attached to the computer 2 If the below or similar screen appears Windows XP left click on CANCEL 3 Right click on the PANA_DVD FRM file on the DESKTOP mouse over SEND TO and then left click on th...

Page 5: ...as been burned to the CD the disc should automatically eject from the CD Burner Drive If it doesn t manually eject the disc 3 2 Other OS CD Writing Program Refer to the computer s owner s manual or HE...

Page 6: ...k on the firmware file hold the left mouse button down drag the file to the CD Burner Drive icon and release the left mouse button If using the Windows XP operating system use procedure from STEP 5 of...

Page 7: ...the front panel during the firmware update When the firmware update is complete the disc tray will automatically OPEN 5 Remove the CD R with the firmware update from the disc tray 6 Without closing t...

Page 8: ...VD Recorder is powered back on the FIRST TIME SETUP screen should be displayed 9 Follow the on screen prompts to complete the FIRST TIME SETUP DMR EZ27 DVD Recorder Firmware Installation Instructions...

Reviews: