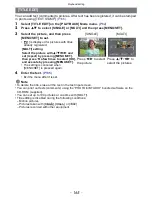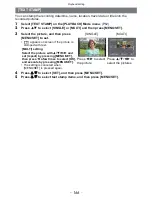
- 151 -
Recording
•
When you align the subject on the horizontal and vertical guidelines or the cross point of these
lines, you can take pictures with well-designed composition by viewing the size, the slope and
the balance of the subject.
•
If there are any white saturated areas, we
recommend compensating the exposure towards
negative
(P83)
referring to the histogram
(P150)
and
then taking the picture again. It may result in a better
quality picture.
•
This does not work while in Multi Playback, Calendar
Playback, or Playback Zoom.
•
Set to [ON] to display the [EXPO.METER] when correcting
exposure, performing Program Shift, setting aperture, and setting
shutter speed.
•
Unsuitable areas of the range are displayed in red.
•
When [EXPO.METER] is not displayed, switch the display
information for LCD monitor by pressing [DISP.].
(P37)
•
The [EXPO.METER] disappears after approximately 4 seconds if no operation is performed.
[GUIDE LINE]
This will set the pattern of guide lines displayed when taking a picture.
[OFF]/[
]/[
]
[
]:
Position can be set by dragging the
[
] on the guide line.
•
When it is difficult to move the guide line on
the screen edge by touch operation, use the
cursor button to set the position.
•
Direct touch operation is also possible from
the recording screen.
[HIGHLIGHT]
When the Auto Review function is activated or when playing back,
white saturated areas appear blinking in black and white.
This does not affect the recorded image.
[OFF]/[ON]
[EXPO.METER]
Set whether or not to display the exposure meter.
[OFF]/[ON]
[ON]
[OFF]


