

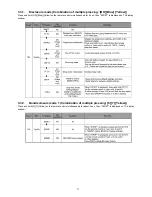


15
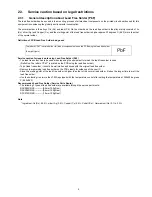
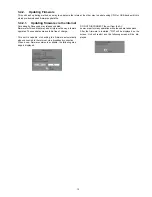
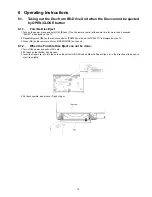
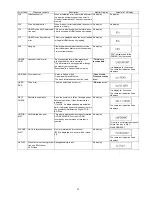
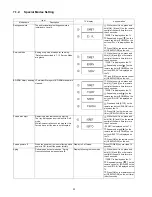
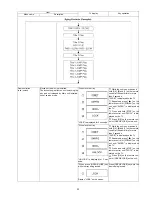
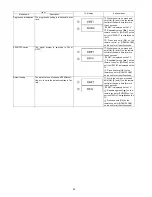
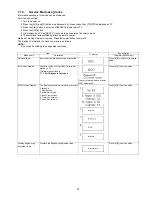
3. Update the unit
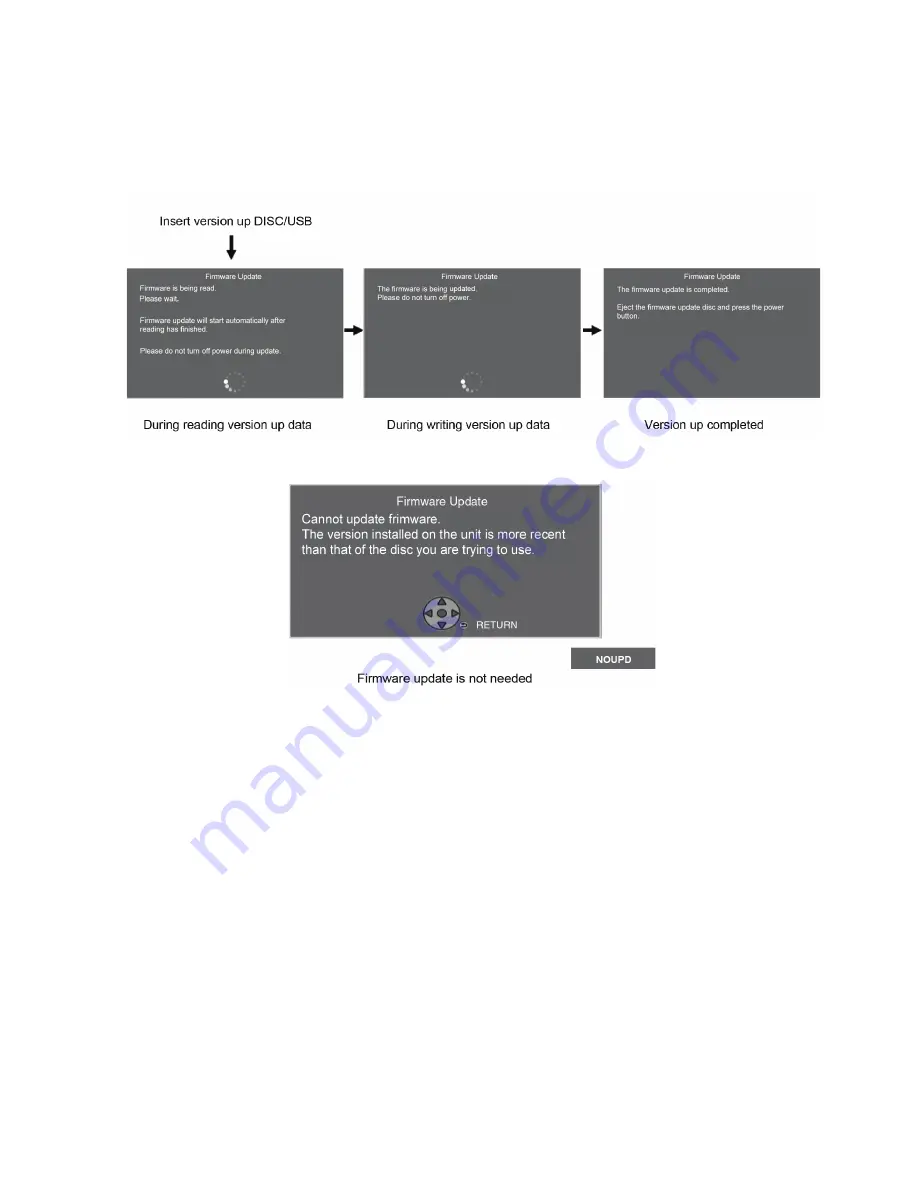
(1)Turn the unit power on.
(2)After the home screen is displayed, insert the USB device stored downloaded latest firmware file to front USB port of the
unit.(or set the CD-R into the unit and playback it.)
(3)The screens are displayed as below.
[Screen transition]
(if the following screen is displayed,the unit has already been updated the latest version of firmware.)
(4)Remove the USB device (or the CD-R) and press the [POWER] button to turn the unit off.
(5)Turn the unit on and home screen displayed, the firmware update is completed.
Summary of Contents for DMP-BD81PU
Page 2: ...2 ...
Page 3: ...3 ...
Page 8: ...8 2 2 Precaution of Laser Diode ...
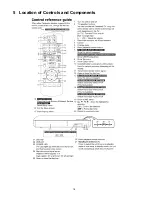
Page 18: ...18 5 Location of Controls and Components ...
Page 40: ...40 9 2 5 Grease ...
Page 44: ...44 9 3 3 How to Clean the Lens of Optical Pick UP ...
Page 45: ...45 9 4 Adjustment of BD Drive 9 4 1 Repair Flowchart ...
Page 49: ...49 10 1 2 Checking and Repairing of BD Drive and Digital P C B ...
Page 59: ...Model No DMP BD91GN 81PU 81GA 81GC 81GN 81GT BDT160GA 160GN 160GW BDT161GC PART LIST NOTICE ...
Page 60: ...Model No DMP BD91GN 81PU 81GA 81GC 81GN 81GT BDT160GA 160GN 160GW BDT161GC ABBREVIATION ...
Page 79: ...Model No DMP BD91GN 81PU 81GA 81GC 81GN 81GT BDT160GA 160GN 160GW BDT161GC Exploded View ...
Page 80: ...Model No DMP BD91GN 81PU 81GA 81GC 81GN 81GT BDT160GA 160GN 160GW BDT161GC Mechanism View ...
Page 81: ...Model No DMP BD91GN 81PU 81GA 81GC 81GN 81GT BDT160GA 160GN 160GW BDT161GC Packing View ...


