9
VQT4V26
G
e
tti
n
g
started
1
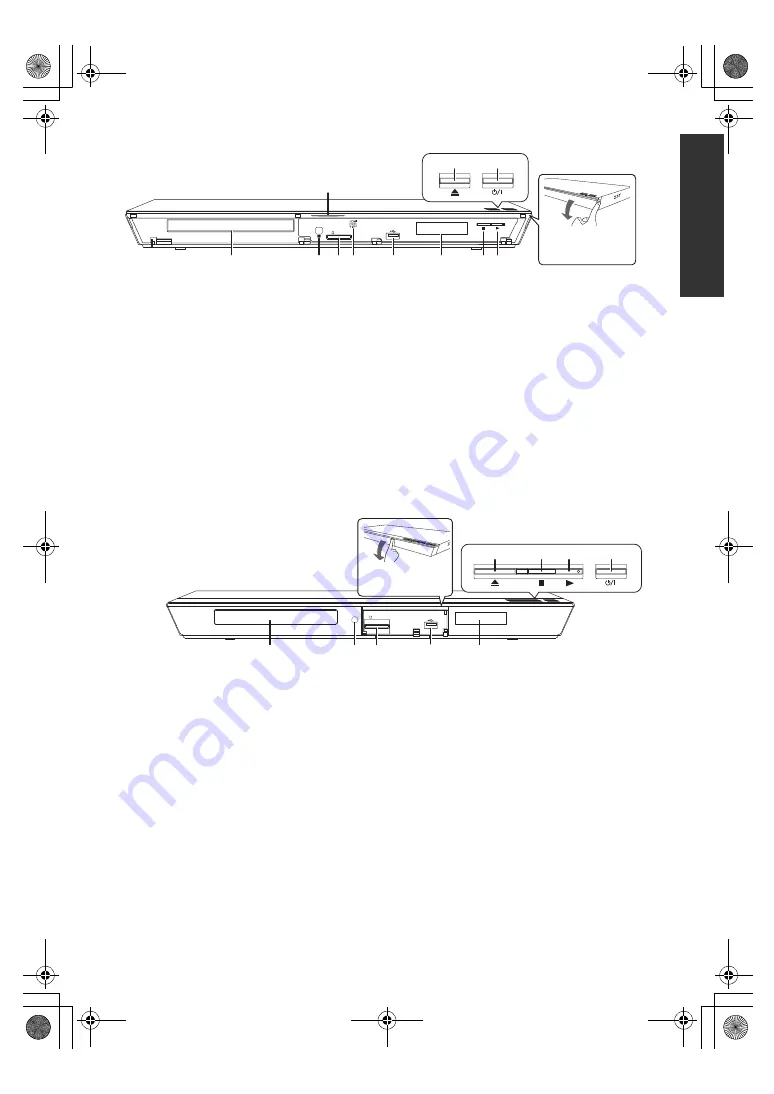
Standby/on switch (
Í
/I
)
(
>
14)
Press to switch the unit from on to standby
mode or vice versa. In standby mode, the unit
still consumes a small amount of power.
2
Open or close the disc tray (
>
17)
3
Blue LED
It is possible to set the LED to turn on/off.
(
>
34)
4
Start play (
>
20)
5
Stop (
>
20)
6
Display
7
USB port (
>
17)
8
V.OFF LED (Video off LED)
It is possible to set the LED to turn on/off.
(
>
34)
9
SD card slot (
>
17)
10 Remote control signal sensor
Distance: Within approx. 7 m (23 feet)
Angle: Approx. 20
e
up and down, 30
e
left and
right
11 Disc tray (
>
17)
Rear panel terminals (
>
10–13)
1
Standby/on switch (
Í
/I
)
(
>
14)
Press to switch the unit from on to standby
mode or vice versa. In standby mode, the unit
still consumes a small amount of power.
2
Start play (
>
20)
3
Stop (
>
20)
4
Open or close the disc tray (
>
17)
5
Display
6
USB port (
>
17)
7
SD card slot (
>
17)
8
Remote control signal sensor
Distance: Within approx. 7 m (23 feet)
Angle: Approx. 20
e
up and down, 30
e
left and
right
9
Disc tray (
>
17)
Rear panel terminals (
>
10–13)
SD CARD
IR
4
5
6
8
7
9
10
11
1
2
3
[BDT330]
Pull to flip down
the front panel.
SD CARD
5
7
8
9
6
1
2
3
4
[BDT230]
[BDT225]
Pull to flip down
the front panel.
DMP-BDT330_230_VQT4V26_eng.book 9 ページ 2013年8月6日 火曜日 午前11時16分


