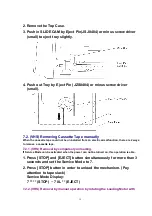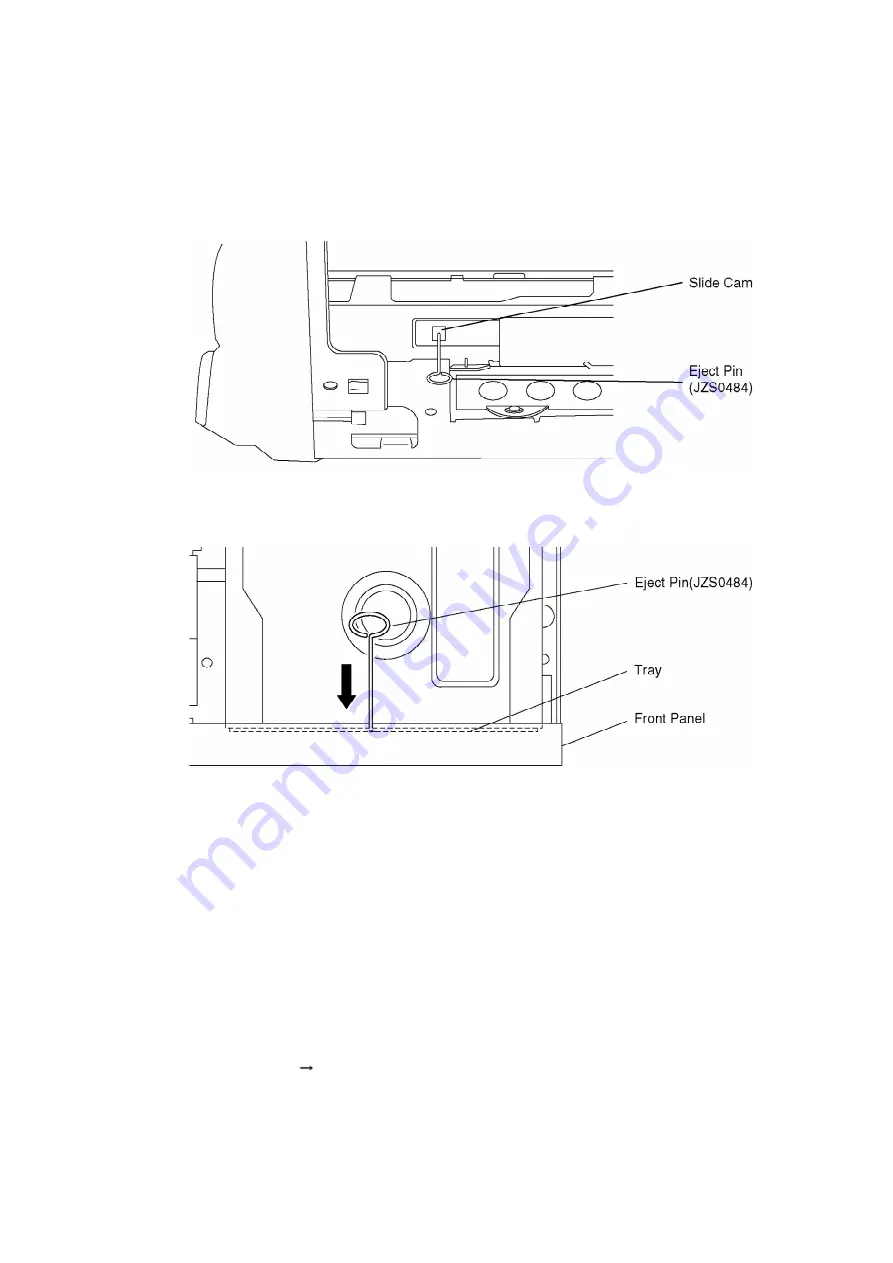
2. Remove the Top Case.
3. Push in SLIDE CAM by Eject Pin(JSJ0484) or minus screw driver
(small) to eject tray slightly.
4. Push out Tray by Eject Pin (JZS0484) or minus screw driver
(small).
7.2. (VHS) Removing Cassette Tape manually
When the cassette tape could not be uninstalled from an electrical malfunction, there are 2 ways
to remove a cassette tape.
7.2.1. (VHS) Removal by compulsory unloading.
If Service Mode can be activated when the power can not be turned on, this operation is able.
1. Press [STOP] and [EJECT] button simultaneously for more than 3
seconds and set the Service Mode to 7.
2. Press [STOP] button in order to unload the mechanism. (Pay
attention to tape slack)
Service Mode Display:
7 ** ** (STOP) 7 0L ** (EJECT)
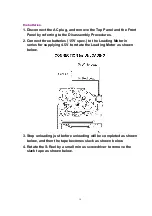
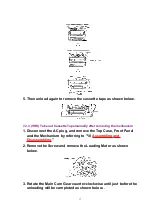
7.2.2. (VHS) Removal by manual operation by rotating the Loading Motor with
15
Summary of Contents for DMR-ES45VP
Page 7: ...3 Service Navigation 3 1 Service Information 4 Specifications 7 ...
Page 68: ...10 13 Main P C B 1 Disconnect 5 Connectors 2 Remove 2 Screws A and remove Main P C B 52 ...
Page 70: ...11 1 2 Checking and Repairing of Main P C B 54 ...
Page 71: ...11 1 3 Checking and Repairing of RAM Digital P C B Module 55 ...
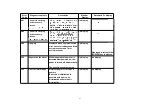
Page 73: ...11 2 3 Items that should be done after replacing parts 57 ...
Page 74: ...58 ...
Page 75: ......
Page 87: ...17 1 2 Casing Parts Mechanism Section 2 70 ...
Page 88: ...17 1 3 VHS Mechanism Section 71 ...
Page 89: ...17 1 4 Packing Accessories Section 72 ...
Page 111: ...C11701 F2A1A2220055 10V 2200U 1 94 ...
Page 123: ......
Page 124: ......
Page 132: ...1 4 2 4 3 4 4 4 DMR ES45VP ES46VP Main P C B VEPV0054BT 4 4 Section Location Map REAR FRONT ...


