Getting started
SQT0992
13
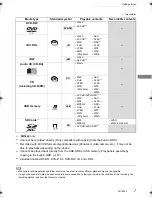
• While writing to/reading from the media, do not switch the
unit to standby mode or remove the media. Such action
may result in loss of the media contents.
• When inserting the media, ensure that it is facing the right
way up.
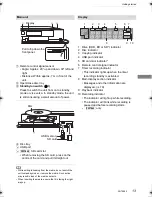
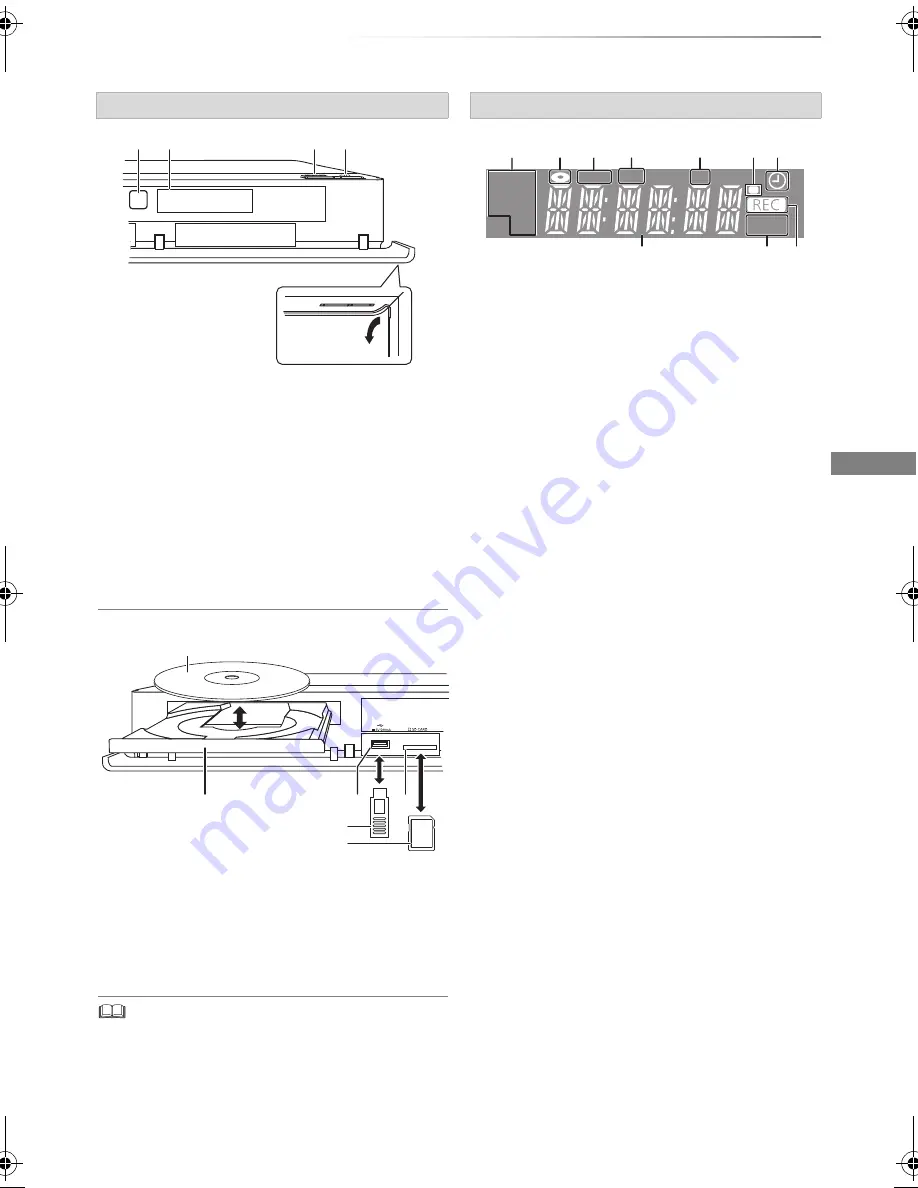
Main unit
1
Remote control signal sensor
• Angle: Approx. 20° up and down, 30° left and
right
• Distance: Within approx. 7 m in front of the
unit
2
Open/close disc tray
3
Standby/on switch (
Í
/I)
Press to switch the unit from on to standby
mode or vice versa. In standby mode, the unit
is still consuming a small amount of power.
4
Disc tray
5
USB port
6
[PWT655]
SD card slot
• When removing the SD card, press on the
centre of the card and pull it straight out.
Display
Pull to flip down the
front panel.
USB memory
Disc
SD card
Display
1 Drive (HDD, BD or SD
§
) indicator
2 Disc indicator
3 Copying indicator
4 USB port indicator
5 SD card slot indicator
§
6 Remote control signal indicator
7 Timer recording indicator
• This indicator lights up when the timer
recording standby is activated.
8 Main display section indicator
• Messages and other information are
displayed. (
>
79)
9 Playback indicator
10 Recording indicator
• The indicator will light up while recording.
• The indicator will blink while recording is
paused and before recording starts.
§
[PWT655]
only
PLAY
COPY
SD
USB
HDD
SD
BD
1
2
5
6
7
4
3
8
9
10
DMR-PWT655_550EB_eng.book 13 ページ 2015年9月14日 月曜日 午後2時7分


