10
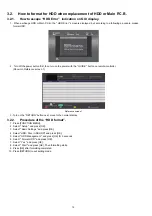
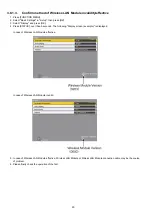
b. Select the USB HDD to cancel, then press [OK]. The confirmation screen appears.
c. Select "Yes", then press [OK].
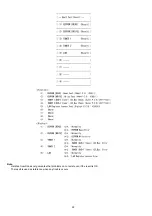
6. When the registering is complete, message screen appears.
Press [OK].
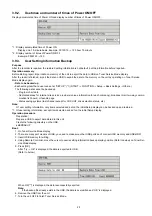
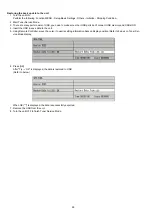
7. The confirmation screen appears.
Press [OK].
3.1.3.2.
Settings for USB HDD
Delete all titles
Delete all titles on the USB HDD.
- Delete does not work if one or more titles are protected.
1. Press [FUNCTION MENU].
2. Select "Basic Settings" in "Setup", then press [OK].
3. Select "Settings for USB HDD" in "HDD/ Disc/ USB HDD", then press [OK].
4. Select "USB HDD Management", then press and hold [OK] for 3 seconds.
5. Select "Delete all titles", then press [OK].
6. Select "Yes" and press [OK].
7. Select "Start" and press [OK].
8. The confirmation screen appears, then press [OK].
Format USB HDD
Formatting deletes all contents, and they cannot be restored.
- Check carefully before proceeding.
1. Press [FUNCTION MENU].
2. Select "Basic Settings" in "Setup", then press [OK].
3. Select "Settings for USB HDD" in "HDD/ Disc/ USB HDD", then press [OK].
4. Select "USB HDD Management", then press and hold [OK] for 3 seconds.
5. Select "Format USB HDD", then press [OK].
6. Select "Yes" and press [OK].
7. Select "Start" and press [OK]. Then formatting starts.
8. Press [OK] after formatting completed.
3.1.3.3.
To cancel all USB HDD registrations
• If you register a USB HDD, all the content already recorded on the USB HDD will be deleted.
• It is not possible to play back the content on the USB HDD whose registration has been cancelled.
• You can check the registration number of the USB HDD on the DIRECT NAVIGATOR.
Cancellation of all USB HDD Registrations
This function cancells the registrations of all the USB HDDs registered on this unit.
Only do this if you are going to dispose of this unit.
- Before operation, perform "3.1.2. Disconnecting the USB HDD" and remove the USB HDD.
- It is not possible to play back the content from a USB HDD whose registration has been cancelled.
1. Press [FUNCTION MENU].
2. Select "Basic Settings" in "Setup", then press [OK].
3. Select "Settings for USB HDD" in "HDD/ Disc/ USB HDD", then press [OK].
4. Select "Cancellation of all USB HDD Registrations", then press and hold [OK] for 3 seconds.
5. Select "Yes", then press [OK].
6. The confirmation screen appears.
Select "Yes", and press [OK].
7. When the cancellation is complete, message screen appears.
Press [OK].
3.1.3.4.
Registration procedure for USB HDD for inspection
This function registers a USB HDD for inspection aside from 8 USB HDDs that can be registered in Normal mode.
If the USB HDD for inspection is registered in User mode, it cannot be erased. Make sure to use Special mode to register the
USB HDD for inspection.
Registration procedure
1. Perform "3.4.3. Nondisclosure mode 2" to enter the Service mode.
2. Press the [7][4] buttons of remote control in the Service mode to enter the Special mode.
3. If the new USB HDD is connected, it is automatically formatted/registered. (There is no TV monitor display for registration.)
The USB HDD registered in the Special mode can be operated using the same functions (format, record/play/edit, dubbing)
as those for USB HDDs registered in the Normal mode.
The Special mode can be cancelled at power "OFF" only. (Cancelling the Special mode will erase the registration in the
Special mode.)
Summary of Contents for DMR-PWT550GL
Page 2: ...2 ...
Page 3: ...3 ...
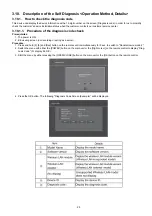
Page 26: ...26 3 10 1 2 Description of the diagnosis code screen Each of the diagnosis code details ...
Page 33: ...33 5 Location of Controls and Components ...
Page 34: ...34 ...
Page 35: ...35 ...
Page 50: ...50 Item FL Display Key Operation Mode Name Description Remote controller key ...
Page 67: ...67 9 11 6 Grease ...
Page 71: ...71 10 1 2 Checking and Repairing of BD Drive ...
Page 72: ...72 10 1 3 Checking and Repairing of Main P C B ...
Page 73: ...73 10 1 4 Checking and Repairing of Digital P C B ...
Page 74: ...74 ...
Page 83: ...Model No DMR PWT550GL GZ SCHEMATIC DIAGRAM NOTICE ...
Page 84: ...Model No DMR PWT550GL GZ PART LIST NOTICE ...
Page 85: ...Model No DMR PWT550GL GZ ABBREVIATION ...
Page 86: ...Model No DMR PWT550GL GZ POWER SECTION POWER P C B ...
Page 87: ...Model No DMR PWT550GL GZ MAIN NET SECTION MAIN P C B ...
Page 88: ...Model No DMR PWT550GL GZ FRONT SW SECTION MAIN P C B ...
Page 89: ...Model No DMR PWT550GL GZ SATA DIGITAL P C B ...
Page 90: ...Model No DMR PWT550GL GZ AUDIO IO SECTION DIGITAL P C B ...
Page 91: ...Model No DMR PWT550GL GZ DDR3 CH 0 SECTION DIGITAL P C B ...
Page 92: ...Model No DMR PWT550GL GZ DDR3 CH 1 SECTION DIGITAL P C B ...
Page 93: ...Model No DMR PWT550GL GZ DEMOD SECTION DEMOD P C B ...
Page 94: ...Model No DMR PWT550GL GZ DIGI NET SECTION DIGITAL P C B ...
Page 95: ...Model No DMR PWT550GL GZ DIGITAL POWER SECTION DIGITAL P C B ...
Page 96: ...Model No DMR PWT550GL GZ ETHER SECTION DIGITAL P C B ...
Page 97: ...Model No DMR PWT550GL GZ EXBUS PERI SECTION DIGITAL P C B ...
Page 98: ...Model No DMR PWT550GL GZ PEAKS PRO4 SECTION DIGITAL P C B ...
Page 99: ...Model No DMR PWT550GL GZ PRO4 POWER SECTION DIGITAL P C B ...
Page 100: ...Model No DMR PWT550GL GZ SATA SD USB SECTION DIGITAL P C B ...
Page 101: ...Model No DMR PWT550GL GZ TIMER SECTION DIGITAL P C B ...
Page 102: ...Model No DMR PWT550GL GZ VIDEO HDMI SECTION DIGITAL P C B ...
Page 103: ...Model No DMR PWT550GL GZ MAIN P C B COMPONENT SIDE ...
Page 104: ...Model No DMR PWT550GL GZ MAIN P C B FOIL SIDE ...
Page 105: ...Model No DMR PWT550GL GZ DIGITAL P C B COMPONENT SIDE ...
Page 106: ...Model No DMR PWT550GL GZ DIGITAL P C B FOIL SIDE ...
Page 107: ...Model No DMR PWT550GL GZ FRONT SW P C B COMPONENT SIDE ...
Page 108: ...Model No DMR PWT550GL GZ FRONT SW P C B FOIL SIDE ...
Page 109: ...Model No DMR PWT550GL GZ SATA P C B COMPONENT SIDE ...
Page 110: ...Model No DMR PWT550GL GZ SATA P C B FOIL SIDE ...
Page 122: ...Model No DMR PWT550GL GZ Exploded View ...
Page 123: ...Model No DMR PWT550GL GZ Mechanism View ...


