399
JAN 2006
Ver. 5.2
DP-3510/3520/3530/4510/4520/4530/6010/6020/6030
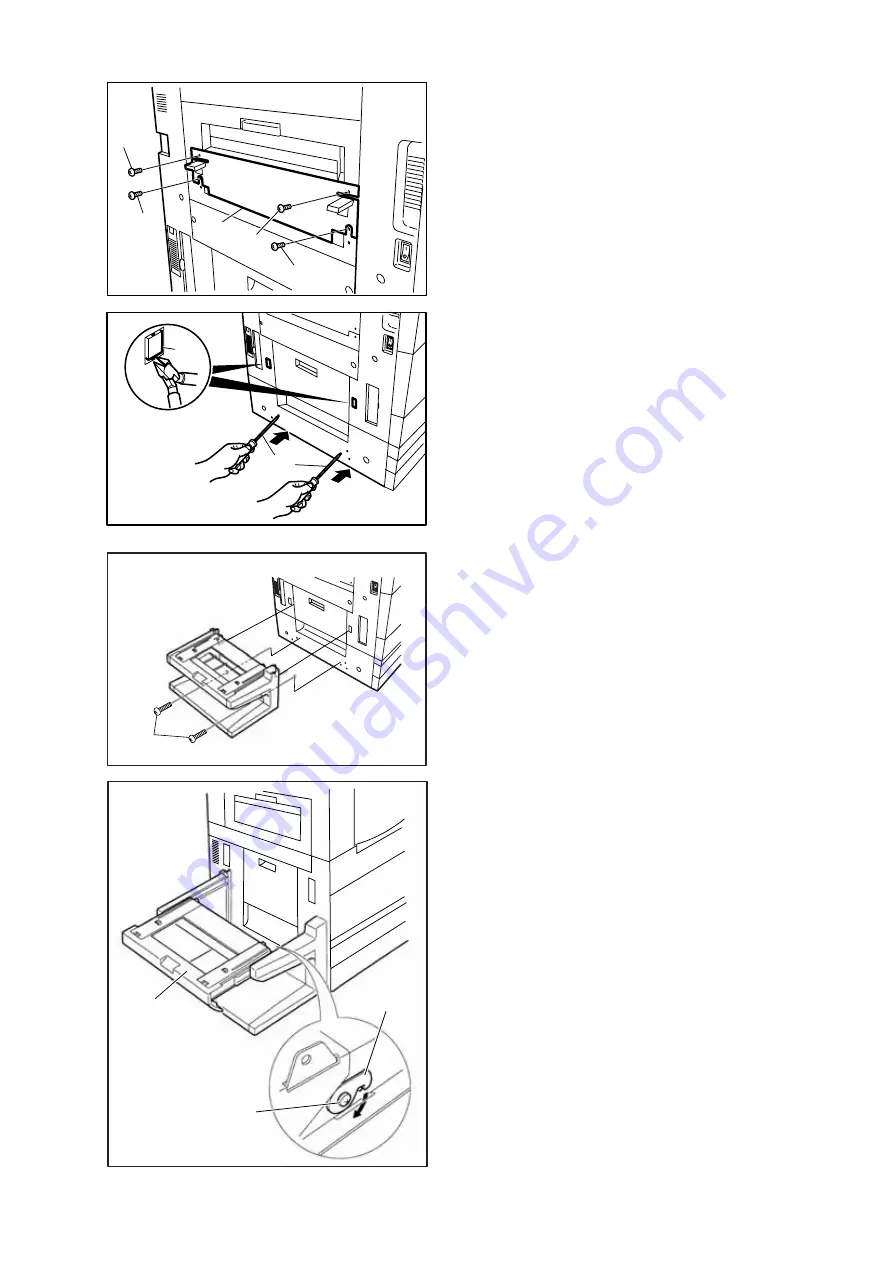
(37) Insert the lower 2 Silver Screws (M3 x 10) first
into the 3rd Holes from top and tighten them 1/2
way.
(38) Place the Latch Plate on top of these Silver
Screws (M3 x 10).
(39) Install the upper 2 Silver Screws (M3 x 10), and
then tighten all 4 Screws.
Note:
Before connecting the Finisher to its Host
Machine, be sure to attach the Latch Plate to the
Host Machine.
(40) Remove the 2 Protective Tabs using a Phillips
type Screw Driver as illustrated.
(41) Remove the 2 Protective Tabs using a Nipper.
4. Attaching to the Host Machine
Caution:
Be sure install both the Finisher and Host Machine
on a level floor. A stepped or slanted floor can
result in improper paper feed.
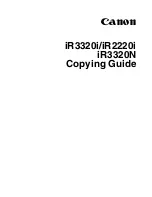
(1) Fit the hooks of the Stand into the mounting
holes on the side panel of the Host Machine,
then secure the Stand with Silver Screws
(M4 x 30).
(2) Slide the Slider of the Stand outward, loosen the
Screws securing the Bracket, then secure the
Slider.
(39)
(37)
(37)
(39)
(38)
(*)
(40)
(41)
(1)
Bracket
Screw
Slider
Summary of Contents for DP-3530
Page 4: ...4 Beispiel DP 6530 4530 6030 Hinweis ...
Page 424: ...424 JAN 2006 Ver 5 2 DP 3510 3520 3530 4510 4520 4530 6010 6020 6030 ...
Page 425: ...425 JAN 2006 Ver 5 2 DP 3510 3520 3530 4510 4520 4530 6010 6020 6030 ...
Page 474: ...474 JAN 2006 Ver 5 2 DP 3510 3520 3530 4510 4520 4530 6010 6020 6030 memo ...
Page 842: ...memo ...
Page 858: ...DZZSM00298 ...


