Ad
v
a
nc
ed ope
rations
RQT67
2
6
17
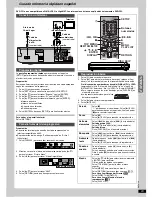
Audio Menu
Picture Menu
∫
User mode
Press [
1
] while “U1” or “U2” is highlighted and then press [
3
,
4
] to
select “1” or “2”.
U1: User mode 1
U2: User mode 2
(Video output mode
➜
above)
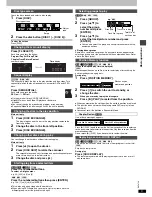
Indicates how far you have played through an item.
Changing the time display
[RAM] [DVD-A]
[DVD-V]
[VCD]
[CD]
Press [
3
,
4
] to show the elapsed play time or remaining time for the
program, play list, track or title (or chapter during program and random
play).
Elapsed play time
[VCD]
(SVCD only)
[WMA] [MP3]
For display only, cannot be changed.
∫
Changing play speed
[DVD-A]
(Moving picture part)
[DVD-V]
(Dolby Digital only)
Press [
2
] (slower) or [
1
] (faster).
There are five speeds:
a
0.8
,.
a
0.9
,.
a
1.0 (normal speed)
,.
a
1.2
,.
a
1.4
≥
After you change the speed:
–Output is in stereo,
–Advanced surround does not work,
–Digital output switches to PCM.
≥
Sound is stereo as long as “
k
1.0” is orange.
To return to normal play
Press [
1
] (PLAY).
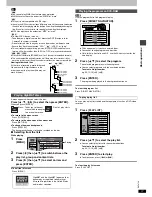
Advanced surround (VSS)
[RAM] [DVD-V]
[VCD]
(2-channel or greater)
Enjoy a surround-like effect when using 2 front speakers
(SP) or headphones (HP) (connect the unit to equipment
that has a headphone jack). The effect broadens when
playing discs with surround effects and sound seems to
come from speakers on either side of you.
≥
VSS mode: SP
()
HP
≥
SP/HP level
1: Natural effect
2: Emphasized effect
OFF: Cancel (Factory preset)
To change SP/HP level: [
1
]
➜
[
3
,
4
]
Optimum seating position
<When using the
television’s
speakers>
Distance A=
Television’s width
≥
This does not work or has less effect with some discs.
≥
Turn off if it causes distortion.
≥
Do not use in combination with surround effects on other
equipment.
Double re-master (
➜
page 13)
Dialogue enhancer
[DVD-V]
(Dolby Digital, DTS, 3-channel or over, where the
dialogue is recorded in the center channel)
This makes the dialogue in movies easier to hear.
ON
(—)
OFF (Factory preset)
≥
This does not work or has less effect with some
discs.
A
SP 1
A
Speaker
Speaker
3 to 4 times
distance A
Seating position
D
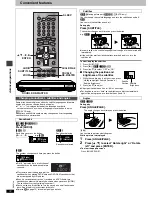
Picture mode
N: Normal mode
U1/U2: User mode (
➜
below)
Video output mode
480I:
Interlace video
480P: Progressive video
(
¢
: Progressive output not possible with PAL signals)
≥
You can change the video output mode only when
“Progressive Out (Component)” in the SETUP menu is set
to “Enable” (
➜
page 18).
≥
When progressive output is on, closed captions will not be
displayed.
Transfer mode
Select the method of conversion for progressive output to
suit the type of material being played. (
➜
back cover,
Glossary—Film and video)
Auto1 (normal): For viewing film material
Auto2:
For viewing film material (the same as Auto1, but able
to convert 30-frame-per-second progressive video)
Video:
For video material
Contrast (
j
7 to
i
7)
Adjusts the contrast between light and dark parts of the
picture.
Brightness (0 to
i
15)
Adjusts the picture brightness.
Sharpness (
j
7 to
i
7)
Adjusts the sharpness of the edges of the horizontal lines.
Color (
j
7 to
i
7)
Adjusts the shade of the picture’s color.
Gamma (0 to
i
5)
Adjusts the brightness of dark parts of the picture.
C1 (Cinema1): Mellows images and
enhances detail in dark
scenes
C2 (Cinema2): Sharpens images and
enhances detail in dark
scenes
C
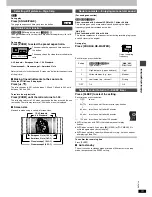
Progress indicator
e.g.
[DVD-V]
Current position
Condition – play, pause, or slow/search


