background image

Ge

tting star

te

d

RQT67

3

0

2

Caution for AC Mains Lead

(For United Kingdom)

(“EB” area code model only)

For your safety, please read the following text carefully.
This appliance is supplied with a moulded three pin mains plug for your 
safety and convenience.
A 5-ampere fuse is fitted in this plug.
Should the fuse need to be replaced please ensure that the replacement 
fuse has a rating of 5-ampere and that it is approved by ASTA or BSI to 
BS1362.
Check for the ASTA mark 

Ï

 or the BSI mark 

Ì

 on the body of the fuse.

If the plug contains a removable fuse cover you must ensure that it is 
refitted when the fuse is replaced.
If you lose the fuse cover the plug must not be used until a replacement 
cover is obtained.
A replacement fuse cover can be purchased from your local dealer.

If a new plug is to be fitted please observe the wiring code as stated 
below.
If in any doubt please consult a qualified electrician.

IMPORTANT

The wires in this mains lead are coloured in accordance with the following 
code:
Blue: Neutral, Brown: Live.
As these colours may not correspond with the coloured markings 
identifying the terminals in your plug, proceed as follows:
The wire which is coloured Blue must be connected to the terminal which 
is marked with the letter N or coloured Black or Blue.
The wire which is coloured Brown must be connected to the terminal 
which is marked with the letter L or coloured Brown or Red.

WARNING: DO NOT CONNECT EITHER WIRE TO THE 
EARTH TERMINAL WHICH IS MARKED WITH THE LETTER 
E, BY THE EARTH SYMBOL 

Ó

 OR COLOURED GREEN OR 

GREEN/YELLOW.

THIS PLUG IS NOT WATERPROOF—KEEP DRY.

Before use

Remove the connector cover.

How to replace the fuse

The location of the fuse differ according to the type of AC mains plug 
(figures A and B). Confirm the AC mains plug fitted and follow the 
instructions below.
Illustrations may differ from actual AC mains plug.

1. Open the fuse cover with a screwdriver.

2. Replace the fuse and close or attach the fuse cover. 

Safety precautions

Set the unit up on an even surface away from direct sunlight, high 
temperatures, high humidity, and excessive vibration. These conditions 
can damage the cabinet and other components, thereby shortening the 
unit’s service life. Do not place heavy items on the unit.

  Do not use high voltage power sources. This can overload the unit and 
cause a fire. Do not use a DC power source. Check the source carefully 
when setting the unit up on a ship or other place where DC is used.

  Ensure the AC mains lead is connected correctly and not damaged. Poor 
connection and lead damage can cause fire or electric shock. Do not pull, 
bend, or place heavy items on the lead.
  Grasp the plug firmly when unplugging the lead. Pulling the AC mains 
lead can cause electric shock. Do not handle the plug with wet hands. 
This can cause electric shock.

  Do not let metal objects fall inside the unit. This can cause electric shock 
or malfunction.
  Do not let liquids get into the unit. This can cause electric shock or 
malfunction. If this occurs, immediately disconnect the unit from the power 
supply and contact your dealer.
  Do not spray insecticides onto or into the unit. They contain flammable 
gases which can ignite if sprayed into the unit.

  Do not attempt to repair this unit by yourself. If sound is interrupted, 
indicators fail to light, smoke appears, or any other problem that is not 
covered in these instructions occurs, disconnect the AC mains lead and 
contact your dealer or an authorized service center. Electric shock or 
damage to the unit can occur if the unit is repaired, disassembled or 
reconstructed by unqualified persons.

  Extend operating life by disconnecting the unit from the power source if it 
is not to be used for a long time.

.

Clean this unit with a soft, dry cloth.

Never use alcohol, paint thinner or benzine to clean this unit.

CAUTION!

IF THE FITTED MOULDED PLUG IS UNSUITABLE FOR THE 
SOCKET OUTLET IN YOUR HOME THEN THE FUSE SHOULD BE 
REMOVED AND THE PLUG CUT OFF AND DISPOSED OF SAFELY.
THERE IS A DANGER OF SEVERE ELECTRICAL SHOCK IF THE 
CUT OFF PLUG IS INSERTED INTO ANY 13-AMPERE SOCKET.

Fuse cover

Figure A

Figure B

Figure A

Figure B

Fuse

(5 ampere)

Fuse

(5 ampere)

Placement

Voltage

AC mains lead protection

Foreign matter

Service

Maintenance

Before moving the unit, ensure the disc trays are empty. 

Failure to do so will risk severely damaging the discs and the unit.

Manufactured under license from Dolby Laboratories. “Dolby” and the 
double-D symbol are trademarks of Dolby Laboratories.

Manufactured under license from Digital Theater Systems, Inc. US Pat. 
No. 5,451,942, 5,956,674, 5,974,380, 5,978,762 and other world-wide 
patents issued and pending. “DTS” and “DTS Digital Surround” are 
registered trademarks of Digital Theater Systems, Inc. © 1996, 2000 
Digital Theater Systems, Inc. All rights reserved.

This product incorporates copyright protection technology that is 
protected by method claims of certain U.S. patents and other 
intellectual property rights owned by Macrovision Corporation and 
other rights owners. Use of this copyright protection technology must 
be authorized by Macrovision Corporation, and is intended for home 
and other limited viewing uses only unless otherwise authorized by 
Macrovision Corporation. Reverse engineering or disassembly is 
prohibited.

Summary of Contents for DVD-F65

Page 1: ...ecifications 19 Glossary Back cover Getting started Basic operations Advanced operations Reference Accessories Please check and identify the supplied accessories Use numbers indicated in parentheses when asking for replacement parts 1 Remote control N2QAJB000071 1 AC mains lead The United Kingdom RJA0053 3X Continental Europe RJA0019 2X 1 Audio video cable K2KA6CA00001 2 Remote control batteries N...

Page 2: ...onnection and lead damage can cause fire or electric shock Do not pull bend or place heavy items on the lead Grasp the plug firmly when unplugging the lead Pulling the AC mains lead can cause electric shock Do not handle the plug with wet hands This can cause electric shock Do not let metal objects fall inside the unit This can cause electric shock or malfunction Do not let liquids get into the un...

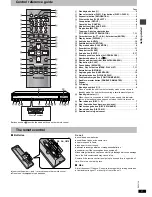
Page 3: ... to the AC mains supply this indicator lights up in standby mode and goes out when the unit is turned on Q Disc indicators DISC 1 5 7 R Skip Search buttons 4 5 7 S Disc exchange button DISC EXCHANGE 8 T Disc skip button DISC SKIP 7 U Remote control signal sensor Batteries Insert so the poles i and j match those in the remote control Do not use rechargeable type batteries Do not mix old and new bat...

Page 4: ...rminal These terminals can be used for either interlace or progressive output and provide a purer picture than the S VIDEO OUT terminal Connection using these terminals outputs the colour difference signals PB PR and luminance signal Y separately in order to achieve high fidelity in reproducing colours The description of the component video input terminals depends on the television or monitor e g ...

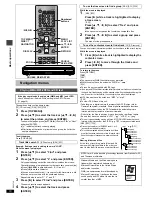
Page 5: ...Connect an analog amplifier or system component Amplifier or system component Audio cable Speakers example Connect three or more speakers for surround sound Quick setup The QUICK SETUP screen appears when you press SETUP the first time after purchase and assists you to make necessary settings Preparation Turn on the television and select the appropriate video input on the television to suit the co...

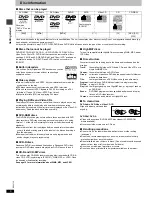
Page 6: ...m ends and another begins may not play smoothly DVD R discs Panasonic DVD R recorded and finalized on a Panasonic DVD video recorder or DVD video camera are played as DVD Video on this unit CD R and CD RW discs This unit can play CD R RW audio recording disc recorded with CD DA video CD SVCD conforming to IEC62107 WMA MP3 or JPEG Close the session or finalize after recording See page 10 for more i...

Page 7: ...DISPLAY SUBTITLE PLAYMODE ZOOM POSITION MEMORY DOUBLE RE MASTER AUDIO ANGLE PAGE QUICKREPLAY RETURN MENU ENTER PLAYLIST SKIP SLOW SEARCH PLAY PAUSE STOP DISC1 DISC5 1 2 3 4 MENU 6 5 DISC TOP MENU SUBTITLE 9 3 4 2 1 ENTER RETURN POWER Í I CD SEQUENTIAL DISC DOUBLE RE MASTER 1 6 5 9 DISC EXCHANGE DISC SKIP OPEN CLOSE 1 2 3 4 5 1 4 2 3 2 4 5 DISC SKIP Numbered buttons Disc indicators 1 5 1 5 Play sta...

Page 8: ...oups Some discs contain bonus groups If a password screen appears after selecting a group enter the password with the numbered buttons Refer also to the disc s jacket RAM DVD A DVD V VCD CD WMA MP3 When the elapsed play time is displayed JPEG Memorize positions on up to five discs to restart play after switching the unit to standby or changing discs During play 1 Press POSITION MEMORY 2 Press Í to...

Page 9: ...e group you want to clear 2 Press 1 PLAY You can select up to 32 items to play in the order you choose When Sequential Mode is on VCD CD WMA MP3 You can program all the items on discs When Sequential Mode is off RAM DVD A DVD V VCD CD WMA MP3 You can program all the items on a disc in the play position 1 When Sequential Mode is on Press the numbered buttons to select a disc 2 DVD A DVD V WMA MP3 P...

Page 10: ...camera that meets the DCF Design rule for Camera File system standard Some digital cameras have functions that are not supported by the DCF standard like automatic picture rotation which may render a picture un viewable Do not alter the files in any way or save them under a different name Ensure they have the extension JPG jpg JPEG or jpeg This unit cannot display moving pictures MOTION JPEG and o...

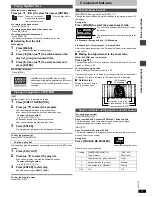
Page 11: ...lists or another menu Play list play starts 0 Convenient features RAM DVD A Moving picture part DVD V VCD Change the zoom ratio so the picture expands to the optimum size to fill the screen During play Press ZOOM to select the preset aspect ratio The zoom ratio changes each time you press the button The popup shows the video format suited to the ratio 4 3 Standard European Vista 16 9 Standard Cine...

Page 12: ...ing play Press SUBTITLE The number changes each time you press the button In some cases the subtitle language is not changed to the selected one immediately To clear display the subtitles 1 Press SUBTITLE 2 Press 1 DVD A DVD V VCD 3 Press 3 4 to select OFF or ON Changing the position and brightness of the subtitles 1 While the subtitle icon is on the screen press 2 1 to highlight Subtitle Position...

Page 13: ...l Number of channels Example 3 2 1ch 1 Low frequency effect not displayed if there is no signal 0 No surround 1 Mono surround 2 Stereo surround left right 1 Center 2 Front leftiFront right 3 Front leftiFront rightiCenter Disc information e g C Chapter number or Content number G Group number P Picture number PG Program number PL Play list number T Title number or Track number Time RAM DVD A DVD V P...

Page 14: ...markers To mark a position ENTER at the desired point To mark another position 2 1 ENTER To recall a marker 2 1 ENTER To erase a marker 2 1 CANCEL RAM To mark the eleventh point and beyond 1 Press 2 1 to select the marker pin icon 2 Press 3 4 to select 11 20 You can select the next group when the current group is full 3 Press 1 The markers are ordered by time This means that the marker numbers can...

Page 15: ...se in combination with surround effects on other equipment Double re master page 11 Dialogue enhancer DVD V Dolby Digital DTS 3 channel or over where the dialogue is recorded in the center channel This makes the dialogue in movies easier to hear ON OFF Factory preset This does not work or has less effect with some discs SP 1 A Speaker Speaker 3 to 4 times distance A Seating position 4 3 Aspect Sel...

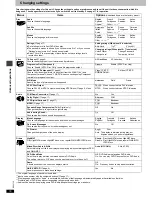
Page 16: ...t Disable Enable NTSC Disc Only Video Out AV Component page 4 Choose the video signal format to be output from the SCART AV and Component terminal Choose Y PB PR when connecting using Component terminals for progressive output Video Y PB PR S Video Y PB PR RGB No Output Still Mode Specify the type of picture shown when paused Automatic Field Frame NTSC Disc Output Choose PAL 60 or NTSC output when...

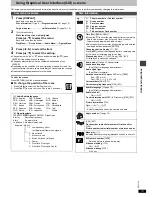
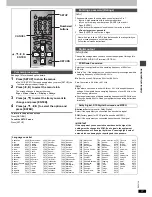
Page 17: ...NCEL 1 2 3 4 5 6 7 8 9 0 10 DISC1 DISC2 DISC3 DISC4 DISC5 SLEEP DISC SETUP OPEN CLOSE SEQUENTIAL FLSELECT GROUP DIRECTNAVIGATOR TOP MENU DISPLAY SUBTITLE AUDIO ANGLE PAGE QUICKREPLAY RETURN MENU ENTER PLAYLIST SLOW SEARCH STOP PLAY PAUSE CANCEL RETURN SETUP 3 4 2 1 ENTER SKIP Numbered buttons Entering a password Ratings Digital output PCM Down Conversion Dolby Digital DTS Digital Surround and MPEG...

Page 18: ...Soundtrack and or subtitle language is not the one selected with the SETUP menus This function depends on software availability Cannot change angle This function depends on software availability Even if a disc has a number of angles recorded these angles may be recorded for specific scenes only You have forgotten your ratings password Reset all the settings to Factory Preset While stopped press an...

Page 19: ...tions are subject to change without notice Mass and dimensions are approximate No sound Distorted sound Check the connections Check the volume on the equipment you have connected Ensure that the input settings on the other equipment are correct Turn Advanced surround off if it causes distortion Output from this unit will be in stereo two channels when Advanced surround is on Turn Advanced surround...

Page 20: ...E TO OVERHEATING ENSURE THAT CURTAINS AND ANY OTHER MATERIALS DO NOT OBSTRUCT THE VENTILATION VENTS DO NOT OBSTRUCT THE UNIT S VENTILATION OPENINGS WITH NEWSPAPERS TABLECLOTHS CURTAINS AND SIMILAR ITEMS DO NOT PLACE SOURCES OF NAKED FLAMES SUCH AS LIGHTED CANDLES ON THE UNIT DISPOSE OF BATTERIES IN AN ENVIRONMENTALLY FRIENDLY MANNER THIS UNIT IS INTENDED FOR USE IN MODERATE CLIMATES VAROITUS LAITT...

Reviews: