24
5
Connect power cord and ground
wire to your washing machine.
●
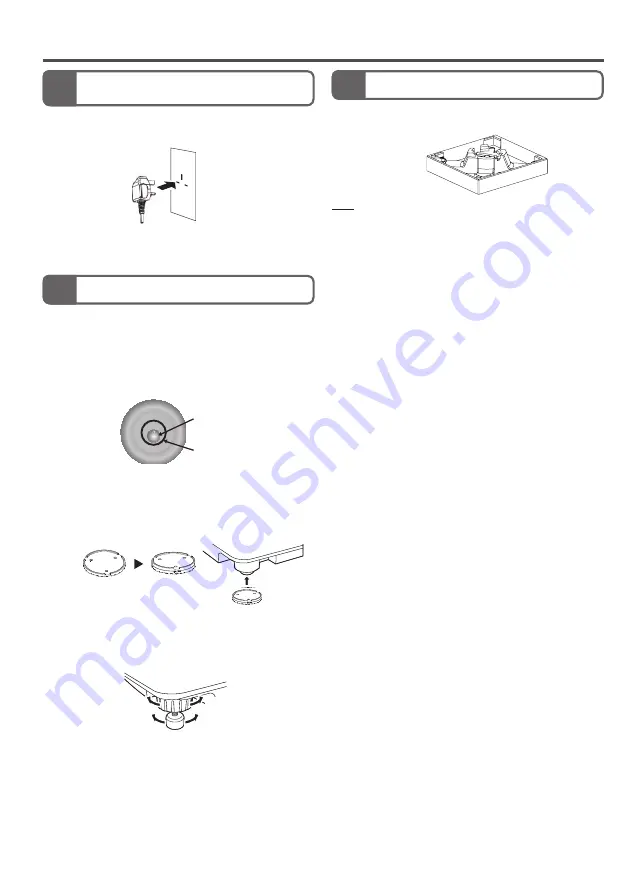
If there is a ground terminal:
Plug the power cord into a 3-prong AC outlet.
6
7
Check if the washing machine is level.
After installation
Note
●
Prevent water leak:
– Please use included new water feeding tube connector,
water feeding tube, and drainpipe. Do not use the old
tube kit.
– Turn tight each knob and screw.
– Do not bend water feeding tube by force, it may crack.
●
Do not move the washing machine in tilt or upside down
position or its components may get damaged.
●
Do not the washing machine backward as there is safety
switches located at left side of its rear.
●
Test run the washing machine after installation to check for
any water leak.
When the installation is complete, look at level of the
washing machine to check if it is leveled.
●
If the bubble is inside the circle mark at the center of the
level, the washing machine is leveled.
●
The washing machine may wash and spin poorly if the
bubble is touching the mark line. Level the washing
machine to center the bubble in marked area when it is
not so.
Please remove bottom cushion (EPS), before using the
washing machine.
● Use adjustable leg
(located at front right corner of bottom
of the washing machine)
● Use the included level adjustment disk
Install level adjustment disk to legs of the washing
machine you want to adjust height.
Raise 3 mm: with one disk as shown in Figure 1
Raise 8 mm: with two disks stacked as shown in Figure 2
Rubber adjustable plate must put at the bottom.
(Figure 1)
(Figure 2)
Bubble
Line mark
①
Turn loose
②
Raise
③
Lower
Lock
Adjust


