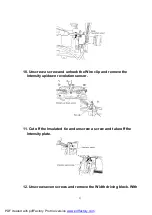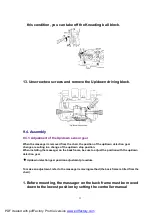
roller assy. to 10mm, check by using the up/down adjustment
button found on the manual operation panel of the controller.
7. Install the rail piece A and B, and tighten uniformly the set screws
(left and right, 3 pcs. each).
8. Using the manual operation of the controller, conduct the rolling
operation. Set the massage heads adjustment switch to level 1,
and check the up/down stroke.
9. DISASSEMBLY AND ASSEMBLY INSTRUCTION /
(COSMETIC PART AND CHAIR CONSTRUCTION)
9.1. Removing the Head rest, Back rest cushion, Arm rest
1. Unzip the zippers and remove the Back cushion with pillow.
2. Remove nine brush clips on each sides, which fix the Arm rest left
and the right, with a slotted screwdriver.
This procedure is unnecessary so as to remove the Seat.
12
PDF created with pdfFactory Pro trial version
Summary of Contents for EP1061-P1
Page 3: ...1 2 Controller 3 PDF created with pdfFactory Pro trial version www pdffactory com ...
Page 39: ...11 3 Air bags 39 PDF created with pdfFactory Pro trial version www pdffactory com ...
Page 40: ...40 PDF created with pdfFactory Pro trial version www pdffactory com ...
Page 41: ...41 PDF created with pdfFactory Pro trial version www pdffactory com ...
Page 42: ...12 EXPLODED VIEW 42 PDF created with pdfFactory Pro trial version www pdffactory com ...
Page 43: ...43 PDF created with pdfFactory Pro trial version www pdffactory com ...
Page 44: ...44 PDF created with pdfFactory Pro trial version www pdffactory com ...
Page 45: ...45 PDF created with pdfFactory Pro trial version www pdffactory com ...
Page 46: ...46 PDF created with pdfFactory Pro trial version www pdffactory com ...


