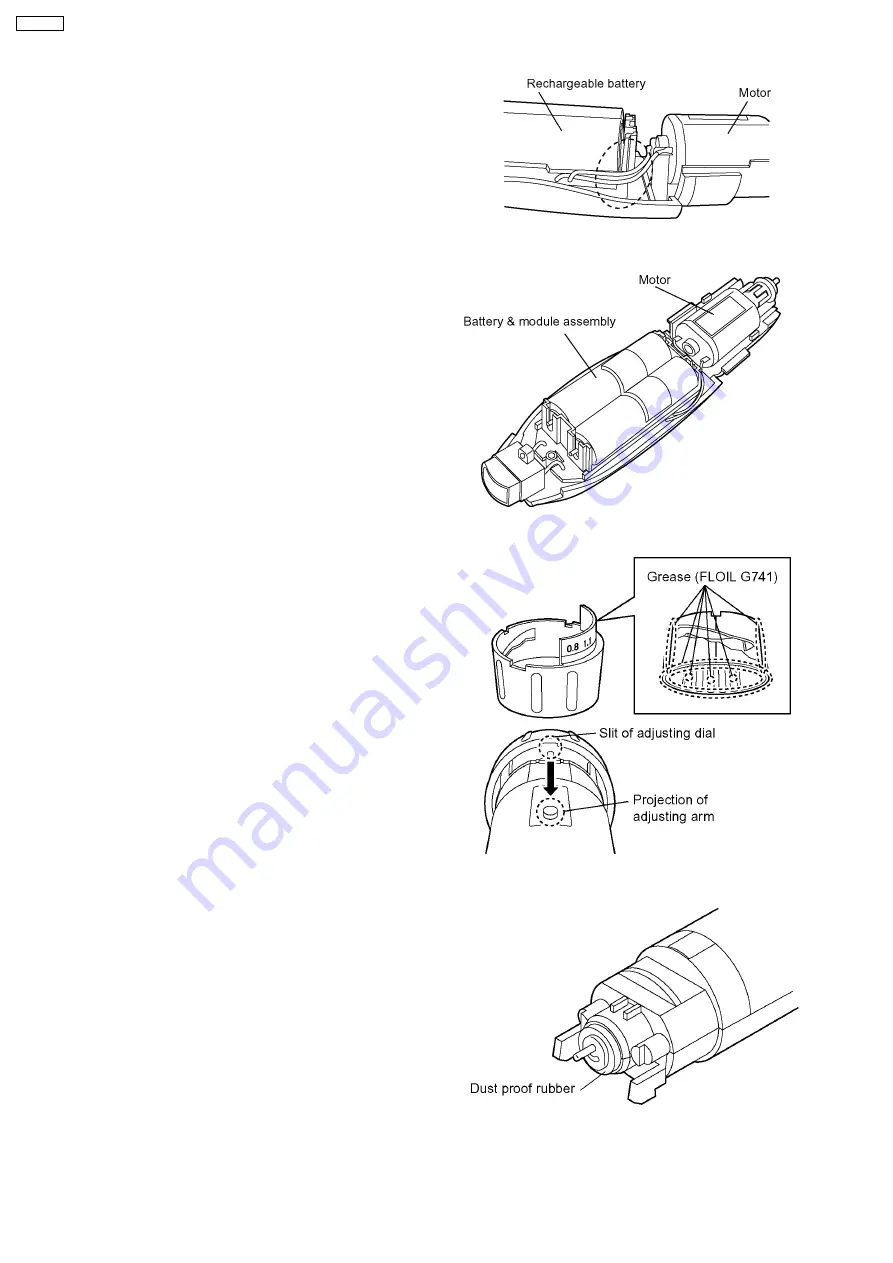
4. Insert the motor facing the sticker on the housing B side.
NOTE: The motor has a own direction. Make sure to set
the proper direction when reassembling.
NOTE: Be certain that the lead wires are mounted in the
proper position without setting over the housing ribs.
NOTE: Confirm the smooth movement of click button
and the motor rotates when switching ON.
5. Close the housing B on the housing A.
NOTE: Make sure of the position of lead wires to
prevent pinching.
NOTE: Confirm that the motor rotates when switching
ON.
6. Applying GREASE (FLOIL G741) on the dial. Put two dials
together and align the slit of adjusting dial with the
projection of adjusting arm to assemble the dial.
NOTE: Confirm the smooth movement of adjusting dial.
7. Attach the dust-proof rubber.
8. Set the front panel.
9. Attach the spring for cutter tighten with two screws.
10. Attach the bottom cover with a screw.
11. Tighten a screw and set the name plate.
6
ER154-E8


