


13
English
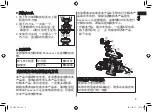
Charge
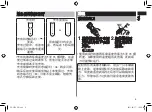
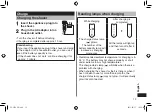
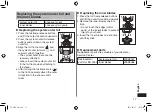
Charging the shaver
1
1
Insert the appliance plug into
the shaver.
2
2
Plug in the AC adaptor into a
household outlet.
Turn the shaver off before attaching.
Charging is completed after approx. 1 hour.
Cord shaving
If you insert the appliance plug to the shaver and plug
in the adaptor into a household outlet, you can use it
even if the battery capacity is low.
If the shaver does not work, continue charging it for
approx. 1 minute.
•
•
•
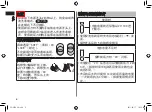
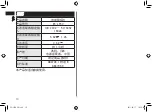
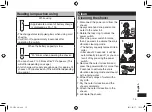
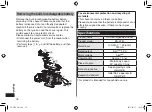
Reading lamps when charging
While charging
After charging is
completed
The charge status lamp
(
) glows.
The number of the
battery capacity lamp will
increase as charging
progresses.
All the lamps will light up
and then turn off after 5
seconds.
Recommended ambient temperature for charging is 5-
35 °C. The battery may not charge properly or at all
under extreme low or high temperatures.
The charge status lamp (
) will blink when there is a
problem with charging.
When charging the shaver for the first time or when it
has not been in use for more than 6 months, the
charge status lamp (
) may not glow. It will eventually
glow if kept connected.
•
•
'5.(A%*KPFD
Summary of Contents for ES-LF50
Page 2: ...2 3DQDVRQLF 6 5 5 A KPFD...
Page 3: ...3 5 5 A KPFD...
Page 4: ...4 1 1 2 2 5 A KPFD...
Page 5: ...5 1 1 2 2 5 A KPFD...
Page 6: ...6 62 7 2 5 A KPFD...
Page 7: ...7 4 5 5 A KPFD...
Page 8: ...8 A B 5 A KPFD...
Page 9: ...9 3DQDVRQLF 6 6 6 3DQDVRQLF 3DQDVRQLF 5 A KPFD...
Page 10: ...10 6 9 P 9 9 5 A KPFD...
Page 19: ...19 MEMO 5 A KPFD...


