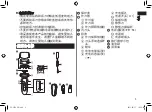


17
English
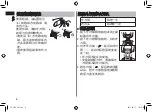
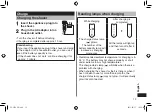
Replacing the system outer foil and
the inner blades
system outer foil
once every year
inner blades
once every two years
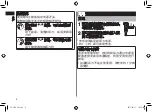
Replacing the system outer foil
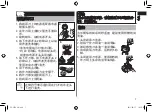
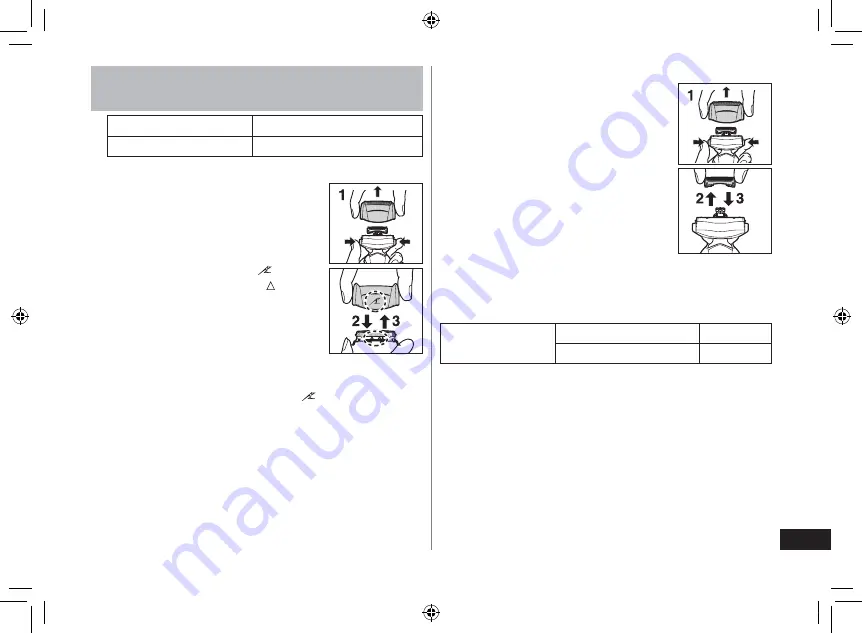
1. Press the foil frame release buttons
and lift the outer foil section upwards.
2. Press the system outer foil release
buttons and pull down the system
outer foil.
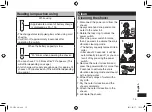
3. Align the foil frame mark (
) and
the system outer foil mark ( ) and
securely attach together.
The system outer foil cannot be
reversely attached.
Always insert the system outer foil
to the foil frame when attaching to
the shaver.
4. After turning the foil frame mark (
)
to the front, securely attach the outer
foil section to the shaver until it
clicks.
•
•
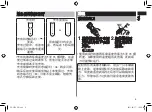
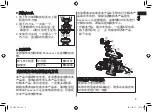
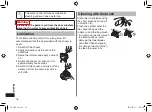
Replacing the inner blades
1. Press the foil frame release buttons
and lift the outer foil section upwards.
2. Remove the inner blades one at a
time.
Do not touch the edges (metal
parts) of the inner blades to prevent
injury to your hand.
3. Insert the inner blades one at a time
until they click.
•
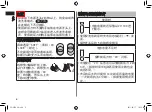
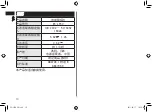
Replacement parts
Replacement parts are available at your dealer or
Service Center.
Replacement
parts for ES-LF50
System outer foil
WES9167
Inner blades
WES9068
'5.(A%*KPFD
Summary of Contents for ES-LF50
Page 2: ...2 3DQDVRQLF 6 5 5 A KPFD...
Page 3: ...3 5 5 A KPFD...
Page 4: ...4 1 1 2 2 5 A KPFD...
Page 5: ...5 1 1 2 2 5 A KPFD...
Page 6: ...6 62 7 2 5 A KPFD...
Page 7: ...7 4 5 5 A KPFD...
Page 8: ...8 A B 5 A KPFD...
Page 9: ...9 3DQDVRQLF 6 6 6 3DQDVRQLF 3DQDVRQLF 5 A KPFD...
Page 10: ...10 6 9 P 9 9 5 A KPFD...
Page 19: ...19 MEMO 5 A KPFD...


