ENGLISH - 15
Removing the projector from the existing bracket
When combining an existing ET-PKD120H, ET-PKD120S, ET-PKD310H, ET-PKD310S, ET-PKD56H, ET-PKD55S,
ET-PKD100H, ET-PKD100S, ET-PKD77H and ET-PKD75S ceiling mount brackets with this product, you will need
to first remove the projector from these ceiling mount brackets.
Note
z
The illustration shows an installation using the ET-PKD56H ceiling bracket for high ceilings. Other ceiling
mount brackets for low or high ceilings can be removed according to the same procedure.
z
The illustrations of projectors are for informational purposes only and do not represent a specific model.
Configurations may vary with the model.
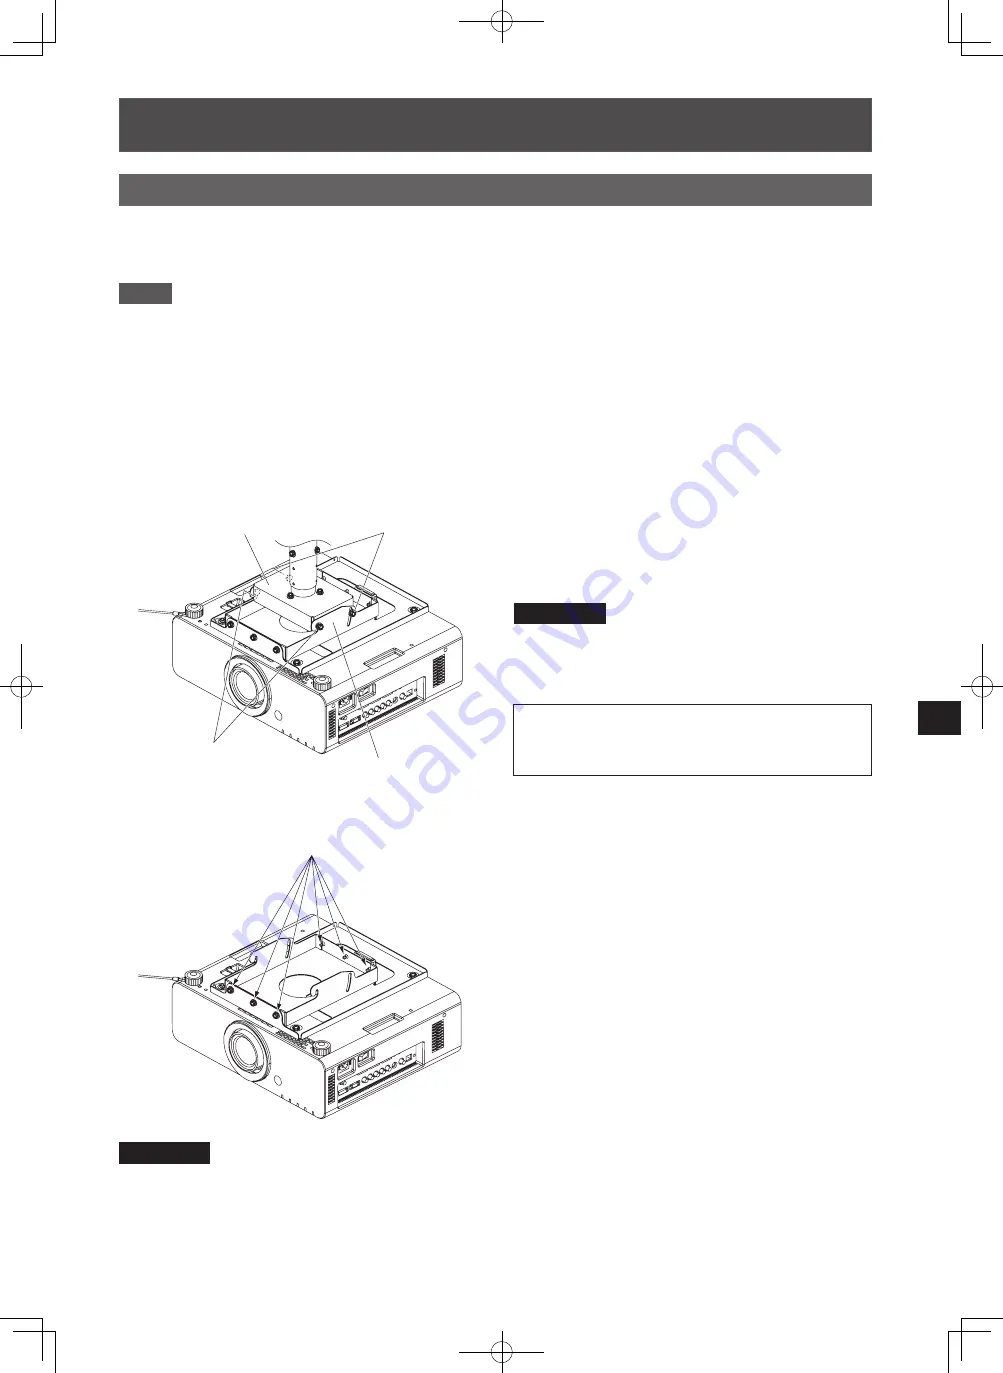
1) Remove the wire rope from the ceiling.
2) Remove the two captive washer hex head bolts.
z
Make sure the projector is properly supported
from below while doing this.
Hex head bolt,
captive washer
Hook
Angle adjusting
bracket
Pole base
3) Slightly loosen the captive washer hex head bolts
in the hooks and remove the angle adjusting
bracket from the pole base (the attachment plate if
a ceiling mount bracket for low ceilings is used) as
shown in the figure on the left.
Attention
z
Do not over-loosen the captive washer hex head
bolts in the hooks. If the bolts become too loose,
the projector could fall down.
WARNING:
Removal must be carried out by two or more
persons.
Hex head bolt,
captive washer
4) Loosen and remove the six captive washer hex
head bolts that secure the angle adjusting bracket
and remove it.
Attention
z
The removed angle adjusting bracket and the captive washer hex head bolts that secured it will be used later.
z
When the projector and the projector mount bracket are no longer needed, be sure to dispose of them
appropriately.
Using an existing bracket
ET-PKD130B_EN_TQZJ577-7.indd 15
2017/03/13 19:05:03


