ENGLISH -
7
Installation
After checking the height, width and structure of the installation location while referring to the “Dimensional rela-
tionship diagram” in the “Standard installation dimensions” (pages 5-6) and “Dimensional relationship” in the Ap-
pendix, determine the appropriate positions for setting up the screen and installing the projector.
Setting up the screen
Set up the screen according to the specified method in a position which takes into account the projection distance
and angle and the type of screen being used.
Screws tightening torques
M4………1.25 ± 0.2 N • m
z
When tightening the screws, use a tool such as a torque screwdriver to tighten the screws to the specified tight-
ening torques. Do not use electric screwdrivers or impact screwdrivers.
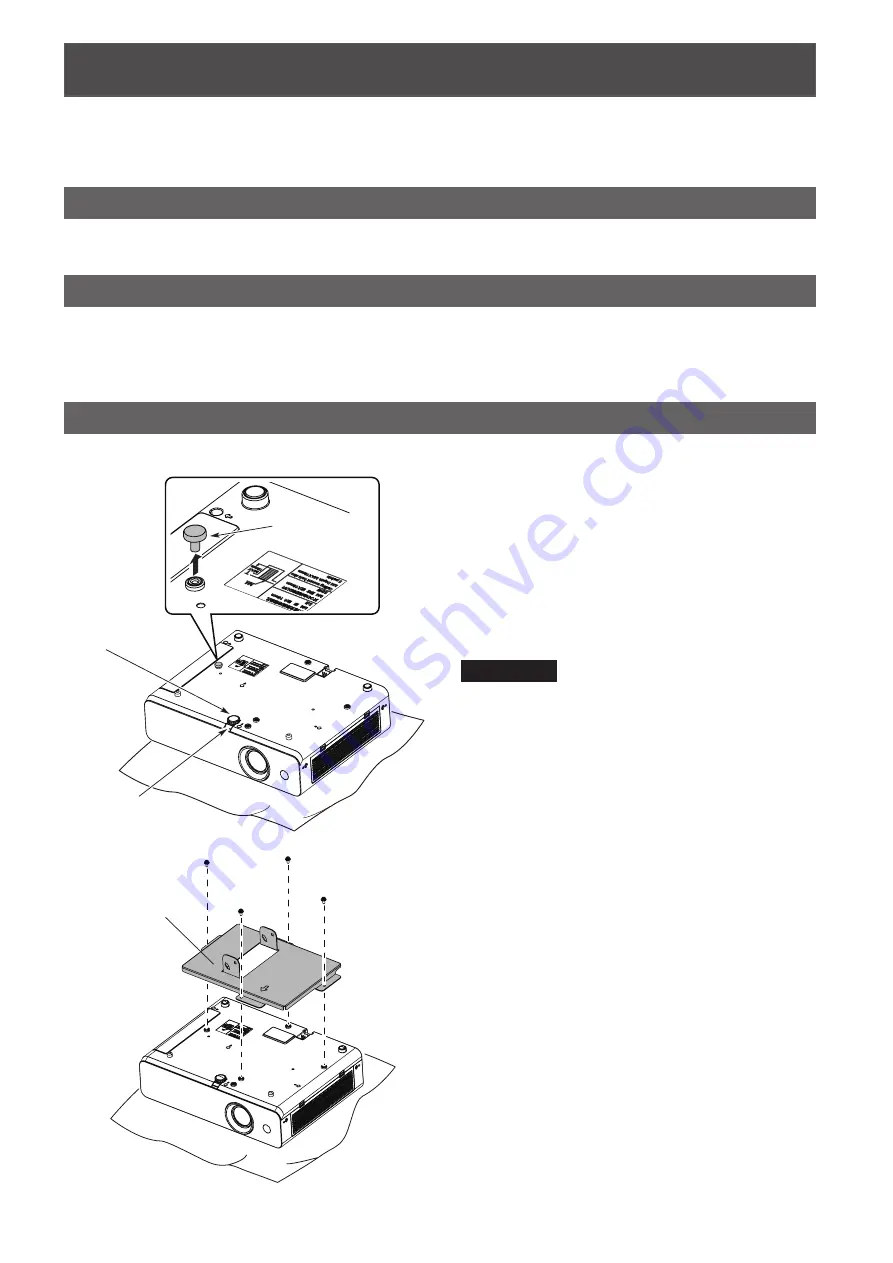
Installing the bracket to the projector
Install the bracket to the projector (sold separately) by following the procedure below.
1 Place the projector upside down on the top of a
soft cloth.
2
Retract the adjustable foot.
z
Press the adjustable foot lock latch and release
it at shortest length of the adjustable foot. Or
rotate the adjustable foot in clockwise to retract
it.
3 Remove the rubber cap on the bottom of the pro-
jector (one place).
Attention
z
If the projector will be used for the desktop instead
of for the ceiling, the rubber cap will be necessary
to prevent burning. Save it for future use.
4
Secure the projector mount bracket to the bot-
tom of the projector using the 4 supplied captive
washer screws (M4 × 10) as illustrated on the
left.
Rubber cap
Adjustable foot
lock latch
Adjustable foot
Projector mount
bracket


