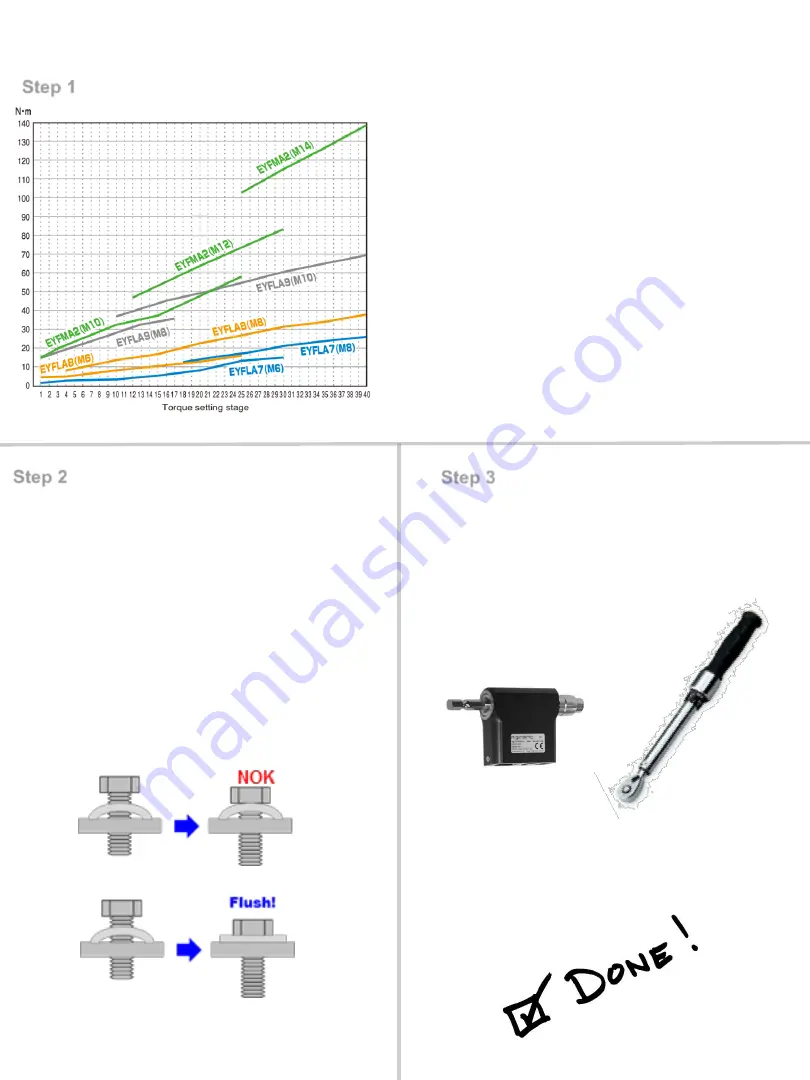
Step 1
Step 2
Step 3
1. Choose correct tool & fastener size
from chart
2. Set tool torque stage according to the
chart & put tool in L1 mode.
3. Rundown fastener & audit with
torque wrench
4. Adjust torque stage up or down to
achieve target torque
5. If unable to achieve target torque
proceed to step 2
Select Tool & Initial Torque Setting
AccuPulse HR Setup Instructions
*Chart based on medium/hard joint type
1. Reset Torque Stage to initial
setting from Step 1 #2
2. Adjust L mode from L1 to L2
3. Rundown Fastener & confirm
Bolt head is Flush by VISUAL
Check
4. If NOK increase L mode until
Flush by Visual Check
5. If OK proceed to step 3
1. Perform static audit on fastener
with rotary transducer or torque
wrench
2. Adjust target torque value until
target torque is achieved
Flush Detection Level Adjustment
Set Final Torque Stage
Summary of Contents for EYFLA4
Page 1: ......
Page 9: ...EYFLA4 EYFLA5 EYFLA6 EYFMA1 EYFNA1 EYFPA1 Mechanical Pulse Tools ...
Page 14: ... Tool set to L1 ...
Page 15: ... Tool set to L1 ...
Page 16: ...EYFLA7 EYFLA8 EYFLA9 EYFMA2 AccuPulse ...
Page 24: ...EYFGA1 EYFGA2 EYFGA3 EYFGB1 EYFGB2 EYFGB3 Clutch Tools ...


