- 8 -
NOTE:
• If the tool does not respond to the wireless
remote control even when the remote control is
operated close to the tool, the battery (CR05)
is dead. Replace it with a fresh battery.
• The included battery is provided for sam-
ple use and may not last as long as com-
mercially available batteries.
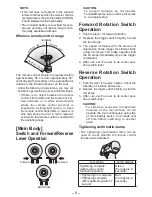
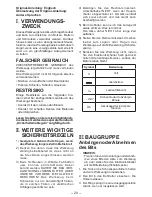
Wireless remote control range
Approx. 50 cm
Vertically
Ap
pro
x. 6
0°
Approx
. 60
°
The remote control should be operated within
approximately 50 cm and approximately 60°
vertically and horizontally of the perpendicular
relative to the infrared receiver on the tool.
• Under the following circumstances, you may not
be able to operate the tool, even within this range.
• If there is an object between the remote
control’s transmitter and the tool’s receiver.
• Use outdoors or in other environments
where the remote control receiver is
exposed to a strong light source, or when
the remote control transmitter or receiver is
dirty may cause the tool to fail to respond,
even when the remote control is used within
the operating range.
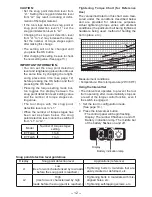
[Main Body]
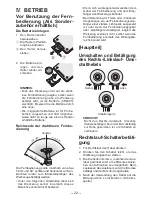
Switch and Forward/Reverse
Lever Operation
Forward
Reverse
Switch lock
CAUTION:
To prevent damage, do not operate
Forward/Reverse lever until the bit comes
to a complete stop.
Forward Rotation Switch
Operation
1. Push the lever for forward rotation.
. Depress the trigger switch slightly to start
the tool slowly.
3. The speed increases with the amount of
depression of the trigger for efficient tight-
ening of screws. The brake operates and
the bit stops immediately when the trigger
is released.
4. After use, set the lever to its center posi-
tion (switch lock).
Reverse Rotation Switch
Operation
1. Push the lever for reverse rotation. Check the
direction of rotation before use.
. Depress the trigger switch slightly to start the
tool slowly.
3. After use, set the lever to its center posi-
tion (switch lock).
CAUTION:
• To eliminate excessive temperature
increase of the tool surface, do not
operate the tool continuously using two
or more battery packs. Tool needs cool
off time before switching to another
pack.
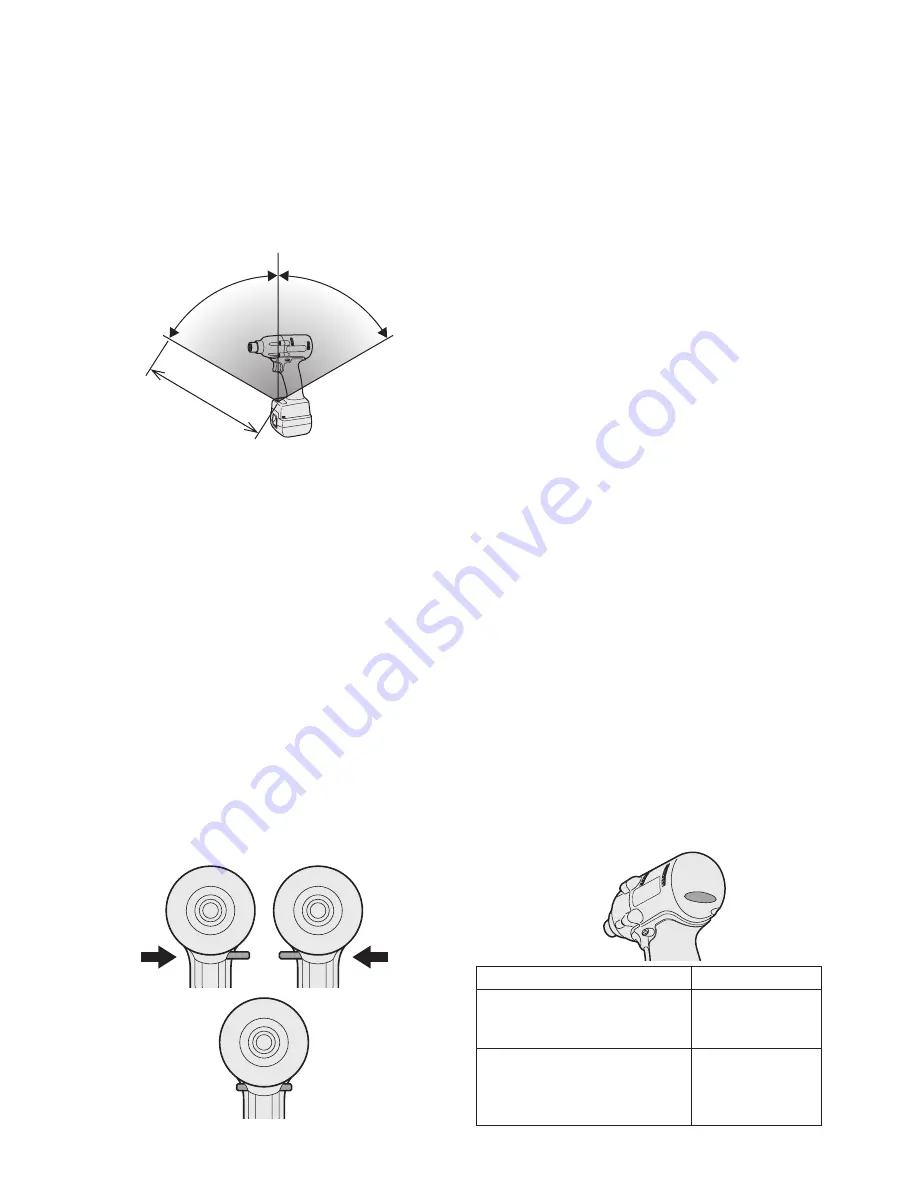
Tightening confirmation lamp
• The tightening confirmation lamp can be
used to check whether the torque control
function was activated.
Tool status
Lamp display
Tightening complete
(with torque control
function operation)
Green
(For approx.
seconds)
• Tightening not complete
• Tightening complete
with retightening within 1
second
Red
(For approx.
seconds)


