10
CONFIGURING THE TORQUE CLUTCH SETTING.
1. Press the (+) and (-) buttons to select the clutch setting
that is appropriate for the work being performed.
a. “F” indicates that the torque control function is off.
b. You can select from 30 torque clutch settings (1 to
30).
2. Press the OK button to accept the selected torque clutch
setting.
a. The control panel will stop flashing and light up.
NOTE:
You must press the OK button in order for the selected
setting to take effect.
SETTING THE SNUG POINT DETECTION LEVEL.
1. Press the torque setting mode button.
a. The snug point detection level setting value will be
displayed.
2. Press the (+) and (-) buttons to set the best snug point
detection level for the work you are performing.
3. Press the OK button to accept the number of torque
stages and the snug point detection level.
a. The tool’s panel will flash and then light up continu-
ously.
Summary of Contents for EYFLA4AR
Page 3: ...3 3 Troubleshooting Guide ...
Page 4: ...4 ...
Page 5: ...5 ...
Page 6: ...6 4 Service Fixture and Adjustment 4 1 Check Parts Identify Procedure ...
Page 7: ...7 ...
Page 8: ...8 ...
Page 24: ...24 7 Wiring Connection Diagram ...
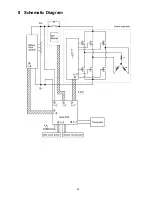
Page 25: ...25 8 Schematic Diagram ...
Page 26: ...26 9 Exploded View and Replacement Parts List 9 1 EXPLODED VIEW for EYFLA4AR ...
Page 28: ...28 9 3 EXPLODED VIEW for EYFLA5AR ...
Page 30: ...30 9 5 EXPLODED VIEW for EYFLA5QR ...


