11
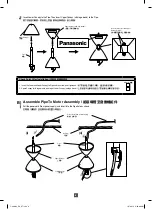
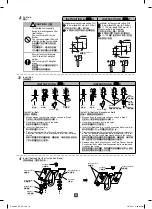
Pulley /
滑輪
C Hock /
鉤子
C
1st step /
步驟一
Take out Pulley Set from Parts Set, after
that cross it to Pipe.
從零件組取出滑輪組件,隨後將其轉到導
管上。
Ceiling Hook
(“J” Hook) /
天花板鉤子
(“
J
"型鉤子)
Pulley /
滑輪
2nd step /
步驟二
Place Pulley onto Ceiling Hook.
將滑輪放在天花板鉤子上。
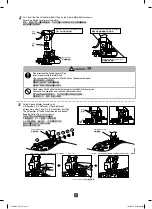
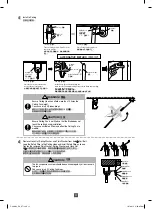
1st step /
步驟一
Place the Pulley Set to the Ceiling
Hook as shown in the picture.
如圖所示將滑輪組件置入天花板鉤子。
2nd step /
步驟二
Incline Pulley Set and install Ceiling Fan.
Make sure the Fan maintain straight to avoid the Blade from touching
the ceiling during installation.
使滑輪組件傾斜,然後安裝吊扇。
請確保風扇保持筆直以避免扇翼在安裝過程中觸碰天花板。
Ceiling Hook
(“J” Hook) /
天花板鉤子
(“
J
"型鉤子)
C Hock /
鉤子
C
Alligned Parallel /
平
行對準
Pipe Hole /
導
管孔
5
5
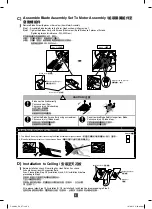
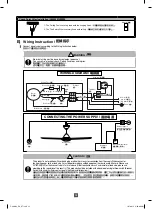
Install to Ceiling.
安裝至天花板。
ALTERNATIVE METHOD /
其他方式
WARNING /
警告
Ensure Ceiling Hook can afford more than 10 times the
Ceiling Fan weight.
Can cause injury if Blades drops.
確定天花板鉤子可以承受超過吊扇的 10 倍重量。
若扇翼掉落會導致受傷。
CAUTION /
注意
Ensure Ceiling Fan is not tilted so that the Blade does not
touch the ceiling during installation.
Can cause unstable air fl ow and effect the Ceiling Fan to
wobble.
确保吊扇不傾斜,使扇翼在安裝過程中不触及天花板。
可以導致不穩定氣流和吊扇搖晃。
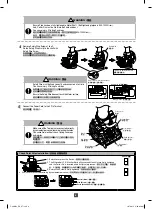
6
6
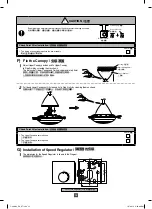
Remove Hexa Nut, Spring Washer, and Plain Washer from hole Carl Bolt.
Loop the Safety Wire to the Ceiling Hook and install Safety Wire as shown.
Tighten the removed Plain Washer, Spring Washer and Hexa Nut.
將
卡爾螺栓的六角形螺帽、彈簧墊圈和普通墊圈全部從孔取出。
如圖所示將保險線圈結至天花板鉤子並安裝保險線。
鎖緊取出的普通墊圈、彈簧墊圈、六角形螺帽。
CAUTION /
注意
The fan suspension system should be examined regularly at least once in
two years.
Can cause injury if Ceiling Fan drops.
必須至少每兩年定期為風扇懸掛系統進行檢查。
若吊扇掉落會導致受傷。
Safety Wire /
保險線
Hexa Nut /
六角形螺帽
Carl Bolt /
卡爾螺栓
Spring Washer /
彈簧墊圈
Plain Washer /
普通墊圈
F-48MS2_EN_CT.indd 11
F-48MS2_EN_CT.indd 11
1/27/2015 9:05:05 AM
1/27/2015 9:05:05 AM


