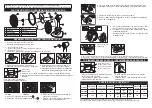
9. Press on the clip.
9. Tekan klip.
Securely snap together the front and rear guards by pressing on the clip. Otherwise the front guard may fall off.
Sila pastikan “front guard” dan “rear guard” terlekat dengan menekan klip pengunci. Jika tidak “front guard” akan jatuh.
*TO AVOID FAILURE, PLEASE ASSEMBLE ALL THE PARTS COMPLETELY BEFORE USING.
* UNTUK MENGELAKKAN KESILAPAN, SILA PASANGKAN SEMUA BAHAGIAN KIPAS SEBELUM MENGGUNA.
PART IDENTIFICATION / PENGENALAN BAHAGIAN KIPAS
8
9
7
1
3
4
5
6
2
ASSEMBLY METHOD / CARA-CARA PEMASANGAN
1. Remove all the parts from the carton box.
1. Keluarkan semua barang dari dalam kotak.
2. • Remove the P.V.C tube.
• Remove the guard set nut by turning anti-clockwise.
2. • Keluarkan tiub P.V.C.
• Keluarkan “guard set nut” dengan cara pusing ke arah lawan jam.
1 FRONT GUARD
6 REAR GUARD
2 SPINNER
7 MOTOR
3 GUARD RING
8 STAND POLE ASSY
4 BLADE
9 STAND BASE
5 GUARD SET NUT
View from bottom of stand base
Pandangan dari bawah stand base
A
A
F-MN304 F-MN404
4. Fix the rear guard into the motor guide A .
4. Pasangkan “rear guard” mengikut tanda pandu A .
5. Fasten the rear guard tightly by turning the
guard set nut clockwise.
5. Pasang “rear guard” dengan mengetatkan
“guard set nut” mengikut arah jam.
3. Make sure both of Stand Pole Nail to be fi x inside the stand base hole fi rmly.
3. Pastikan kedua-dua Stand Pole Rib masuk ke dalam lubang stand base dengan
sempurna.
cli
ck!!!
cli
ck!!!
1. Match stand pole assembly to stand base.
1. Padankan “stand pole assembly” ke “stand base”.
2. Fix the stand pole assembly according to the
arrow direction until a click sound is heard.
2. Pasangkan “stand pole assembly” mengikut arah
anak panah sehingga kedengaran bunyi “klik”.
- 2 -
- 3 -
Pin
Blade slot
6. Insert the blade to the shaft and ensure the pin must enter the blade slot.
6. Masukkan “blade” pada “shaft” dan pastikan pin memasuki lurah “blade”.
7. Tighten the blade using the spinner. Turn anti-clockwise.
7. Ketatkan “blade” dengan menggunakan “spinner”. Pusingkan mengikut arah
lawan jam sehingga ketat.
Plastic hook
Plastic hook
guide
8. • Fix the front guard with the logo in the upright position.
• Fix the plastic hook onto the rear guard as shown.
8. • Pasangkan “front guard” dan tentukan logo dalam
kedudukan yang betul.
• Pasangkan “plastic hook” ke arah “rear guard” seperti
di gambar rajah.
TO DISMANTLED BASE AND POLE / CARA MEMBUKA BASE DAN POLE
Second Stand Pole Nail
Stand Pole Rib Kedua
First Stand Pole Nail
Stand Pole Rib Pertama
* Push the First Stand Pole Nail and followed by
the Second Stand Pole Nail.
* Tekan Stand Pole Rib Pertama dan diikuti
dengan Stand Pole Rib Kedua.
* Hold the Stand Pole and pull the base towards
opposite direction.
* Pegang Stand Pole dan tarik stand base ke arah
bertentangan.
SPECIFICATION / SPESIFIKASI
MODEL
VOLTAGE(V~)
VOLTAN
FREQ.(Hz)
FREKUENSI
POWER(W)
KUASA
SPEED/KELAJUAN (RPM) AIR VELO.
m/min
AIR DEL.
m
3
/min
1
2
3
F-MN304
240
50
39
875 ~
1074
1053 ~
1287
1123 ~
1373
214
43
F-MN404
240
50
58
765 ~
935
923 ~
1128
1089 ~
1331
250
84.6
Specifi cation are subject to change without notice with the development of technology.
Spesifikasi adalah tertakluk pada pertukaran tanpa notis selaras dengan perkembangan teknologi.
Stand Pole Nail
Stand Pole Rib
Push


