


Fig. 5
6
INSTALLATION (BETWEEN JOISTS MOUNTING) CONTINUED
4. Fix four long screws (ST4.2X20) partially into
joists at the four marked locations. (Fig. 4)
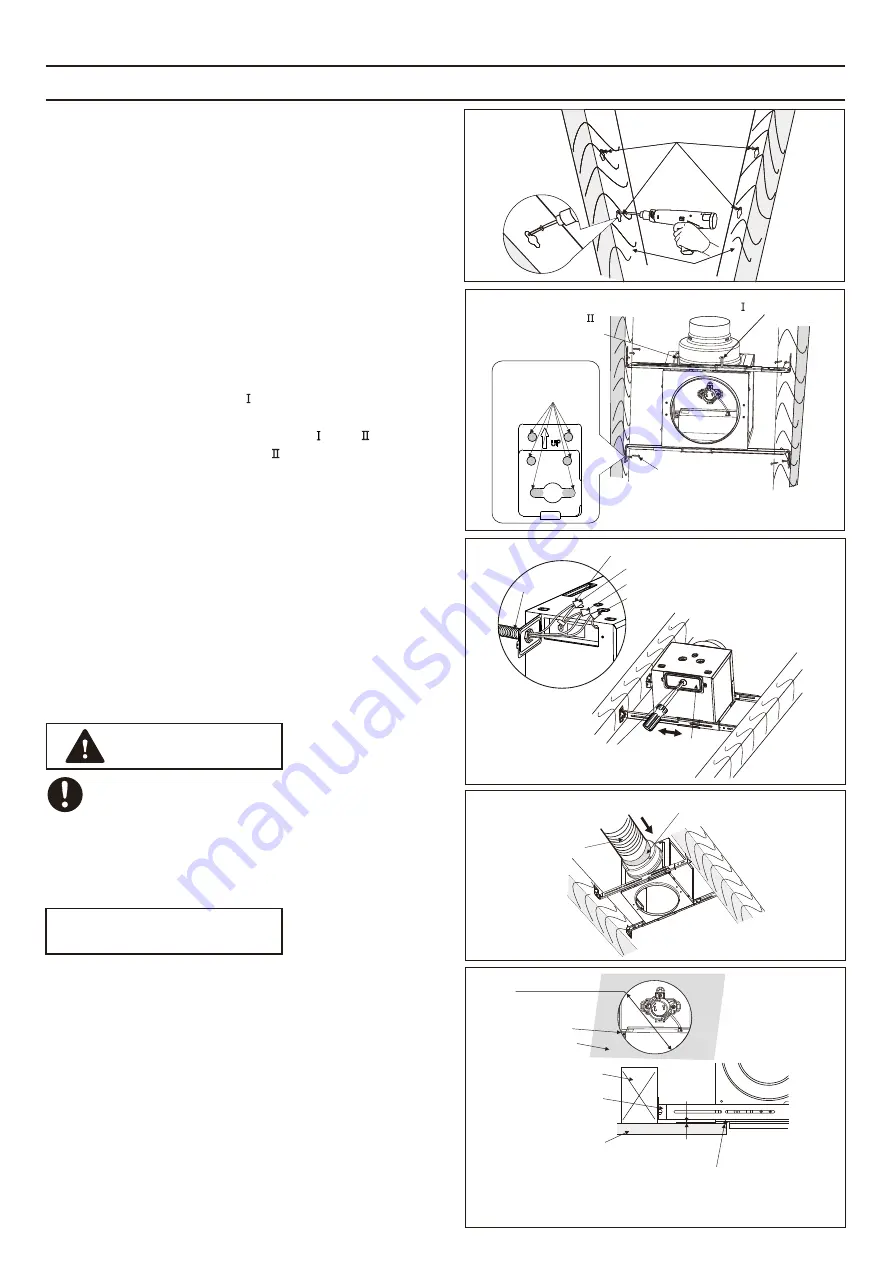
5. Hang the luminaire body down from the four long
screws, and adjust the suspension brackets if
necessary. Then, tighten the four long screws
up. And that, fix the other four long screws
(ST4.2X20) to other holes. Make sure the luminaire
body is level and square with the joists. (Fig. 5)
6. Tighten the two screws (ST4.2X6) up (Except
that the spacing is 12 inches between joists.).
Then secure suspension bracket and to the
luminaire body with screws
(ST4.2X18)
.
(Fig. 5)
2-screws (ST4.2X6)
2-screws
(ST4.2X18)
8-Long screws
(ST4.2X20)
Suitable screw
fixing positions
Fig. 8
Ceiling
Unit: inches (mm)
Suspension
bracket
Joist
>1/8 (3.2)
After finishing the ceiling job, fill gap between flange and
ceiling with caulk or other sealant to prevent air leakage.
Fig. 6
Neutral to white
Wire nut
Live to black
Earth ground to green
Conduit
Knock-out
hole
Junction
box cover
CAUTION
Mount junction box cover carefully so
that lead wires are not pinched.
If recessed luminaire is used for lighting,
please ignore step 9. (Fig 1 of page 5)
11. Finish ceiling work.
A circle ceiling hole ( 6 1/2 inches (165mm) dia.)
should be cut. And make sure there will be a
gap ( >1/8 inches (3.2mm )) between bottom of
luminaire body and ceiling. (Fig. 8)
10. Install a circular duct and secure it with clamps
or wire ties, and seal it with mastic or approved
foil tape. A 4 or 6-inch circular duct is needed to
connect to the relevant part of adaptor. (Fig. 7)
7. Remove the knock-out hole from the
junction box cover, and remove the junction
box cover. Then secure the conduit or stress
relief to the junction box knock-out hole.
(Fig. 6)
8. Refer to wiring diagram (Page ).
5
Follow all the local electrical safety codes as
well as the National Electrical Code (NEC).
Using UL approved wire nuts, connect house
power wire to
wires. (Fig. )
recessed luminaire
6
Fig. 7
Circular duct
Mastic or approved foil tape
6 1/2 (165) Dia.
Ceiling
Ceiling
hole
NOTICE
4-Long screws
(ST4.2X20)
joists
Fig. 4
9. Mount back the junction box cover.


