background image

About tablet

Allows you to confirm information about the tablet.

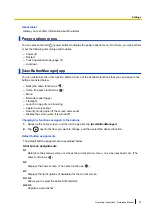
Power options menu

You can press and hold 

 (power button) to display the power options menu. From here, you can perform

or set the following commonly-used features.

Power off

Restart

Touch operation mode (page 37)

Lockdown

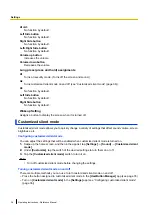
[UserButtonManager] app

You can customize the unit’s function buttons. Some of the available functions that you can assign to the
buttons are listed below.

Back (the same function as 

)

Home (the same function as 

)

Menu

Barcode reader trigger

Flashlight

Launch an app of your choosing

Capture a screenshot

Security mode (turns off the screen and sound)

Display the screen when it is turned off

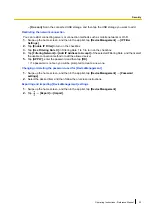
Changing the functions assigned to the buttons

1.

Swipe up the home screen, and then in the app list, tap 

[UserButtonManager]

.

2.

Tap 

 next to the item you want to change, and then select the desired function.

Default button assignments

The default button assignments are explained below.

Short press assignments

A1

Returns to the previous screen or closes the current screen, menu, on-screen keyboard, etc. (The
same function as 

.)

A2

Displays the home screen. (The same function as 

.)

A3

Displays the list of options (if available) for the current screen.

A1+A2

Allows you to select the active SIM card slot.

A2+A3

Captures a screenshot.

Operating Instructions - Reference Manual

35

Settings

Summary of Contents for FZ-A3 Series

Page 1: ...Operating Instructions Reference Manual Tablet Computer Model No FZ A3 series ...

Page 2: ...vigation buttons 21 Status bar 21 Notifications panel 21 Icons 22 Customizing the home screen 23 Input 25 Typing and voice input 25 Using the keyboard 25 Connectivity 26 Mobile network models with wireless WAN only 26 Wi Fi 27 Bluetooth 29 Airplane mode 30 USB connection 30 SD memory card 31 Security 32 Locking the screen 32 DeviceManagement app 32 Settings 34 Settings app 34 Power options menu 35...
Page 3: ...tary items 49 Cradle FZ VEBA21 49 Protective Film FZ VPFA31 52 Hand Strap FZ VSTA31 54 Troubleshooting 57 General information 57 Starting up 57 Shutting down 57 Screen 57 Indicator 58 Touch screen operation 58 Connectivity 59 Sound 59 Other 59 Appendix 61 Replacing the batteries 61 Factory data reset 61 Tips for battery usage 61 Updating the software 62 Regulatory information 64 Specifications 67 ...

Page 4: ...c assumes no liability for damage incurred from customer misuse or use under other irregular conditions and damage resulting from the use or the unavailable use of the product Panasonic shall not be liable for loss of data or other incidental or consequential damages resulting from the use of this product This product can download store forward and receive additional content such as applications r...

Page 5: ...f the battery status indicator rear camera and photo light Do not use the dedicated stylus when dust or dirt e g oil is on the display or on the tip of the dedicated stylus Otherwise foreign particles on the screen stylus tip may scratch the display surface or obstruct operation of the dedicated stylus Clean the display and stylus tip before use Use the dedicated stylus only for touching the displ...

Page 6: ...ut jack USB port or headset jack to short circuit or create smears on the screen If the product is wet wipe off the moisture before connecting with peripheral devices Do not dry the product with an appliance or heat source such as a microwave oven or dryer Use the charger included optional while dry and do not use it in places with water such as bathrooms because it is not drip proof dustproof Mai...

Page 7: ... Bluetooth SIG Inc and any use of such marks by Panasonic Corporation is under license Other trademarks and trade names are those of their respective owners microSDXC Logo is a trademark of SD 3C LLC The N Mark is a trademark or registered trademark of NFC Forum Inc in the United States and in other countries Android and Google are trademarks of Google LLC Wi Fi the Wi Fi logo the Wi Fi CERTIFIED ...

Page 8: ...he illustrations but FZ VZSUT11 is used in some illustrations AC adaptor 1 1 Model No CF AA6413A AC cord 2 1 Operating Instructions Read Me First 1 1 If it is not included use an AC adaptor with the same model number 2 Included with the AC Adaptor Do not use this with products other than the AC Adaptor it is included with Only for North America models Stylus 1 Tether 1 8 Operating Instructions Ref...

Page 9: ...ted while using gloves Rain mode Prevents misoperation in wet conditions E Side button page 21 F Speaker G Application button A1 page 21 H Application button A2 page 21 I Application button A3 page 21 J Volume buttons K Power button page 20 L Indicator Orange lit Battery is charging Green lit Battery charging is complete Red lit Battery level is less than 30 of a full charge Operating Instructions...

Page 10: ...evel is sufficient Red lit Battery level is less than 30 of a full charge B Photo light Can be used when taking pictures with the rear camera C Rear camera D Strap attachment hole E Wireless WAN antenna 1 internal F Pen holder G Cover latch H Cover latch lock I Card slot cover J Nano SIM card slot 1 1 page 14 K Nano SIM card slot 2 1 2 page 14 L microSD card slot page 13 10 Operating Instructions ...

Page 11: ... Headset jack cover B Headset jack C DC input jack cover page 12 D DC input jack page 19 E USB port cover page 12 F USB Type A USB 2 0 port G USB Type C USB 3 0 port H Security lock IMPORTANT Observe the following to ensure the drip proof and dustproof performance of the unit Make sure the headset jack cover is securely closed when the headset jack is not being used When closing the headset jack c...

Page 12: ...ver 2 Slide the cover in the direction of the arrow until you hear a click Close the cover firmly until the red area circled in the illustration of the cover is no longer visible IMPORTANT Observe the following to ensure the drip proof and dustproof performance of the unit Make sure the DC input jack cover and USB port cover are securely closed and locked when the DC input jack and USB port are no...

Page 13: ...lot B Install only microSD cards Hold the microSD card so that the metal terminals are facing down and insert with the notch facing in the same direction of the circled area in the illustration below 2 Slide the microSD card until you hear a click To remove a microSD card push it slightly into the slot to eject it 3 Close the card slot cover until you hear a click Operating Instructions Reference ...

Page 14: ...e card slot cover A and then insert the Nano SIM card into the Nano SIM card slot B Install only Nano SIM cards Hold the SIM card so that the metal terminals are facing down and insert with the notch facing in the same direction of the circled area in the illustration below 2 Slide the Nano SIM card until you hear a click To remove a Nano SIM card push it slightly into the slot to eject it 3 Close...

Page 15: ...battery into place B FZ VZSUT10 FZ VZSUT11 2 Press down firmly on the outside edges of the battery to seal it closed FZ VZSUT10 FZ VZSUT11 3 Close the cover latch A and lock it B by sliding the switch circled in the illustration toward If the gap above the latch or the red area inside the switch is visible the latch is not properly closed or locked Operating Instructions Reference Manual 15 Gettin...

Page 16: ... numbers Removing the batteries Make sure to turn off the unit before replacing the battery 1 Unlock the cover latch by sliding the switch circled in the illustration away from A and then open the cover latch by sliding it B 2 Insert your fingertip into the groove circled in the illustration lift the battery A and then remove it B FZ VZSUT10 FZ VZSUT11 IMPORTANT Do not remove the batteries while t...

Page 17: ... a click If the stylus is protruding from the unit it is not properly stored To detach the stylus push it into the pen holder until you hear a click IMPORTANT Do not insert a stylus other than the supplied item or the specified item CF VNP025 Do not insert the stylus upside down Operating Instructions Reference Manual 17 Getting started ...

Page 18: ...e strap attachment hole of the unit circled in the illustration above using the tether IMPORTANT Do not forcefully pull on the tether If you let go of the stylus it may hit the unit or people 18 Operating Instructions Reference Manual Getting started ...

Page 19: ...ge while the batteries are charging and lights in green when charging is complete The unit prevents overcharging of the batteries by charging only when the remaining battery level is reduced at a certain extent Note Remove any dust or water droplets from plugs before connecting them Do not use excessive force when inserting plugs or insert them at an angle Confirming the battery level The battery ...

Page 20: ...e screen is displayed the screen will turn off Press power button to turn on the display again Releasing the screen lock If you press power button while the display is off the lock screen will be displayed Swipe up the screen to release the screen lock Configuring the unit for the first time The first time you turn the unit on you will be prompted to configure the initial settings Follow the on sc...

Page 21: ...is while an app is running to split the screen and display two apps at the same time To return to single screen swipe the middle line left or right The unit also features physical buttons that can be used to access various functions quickly The default button assignments are described below A1 The same function as A2 The same function as A3 Displays the list of options if available for the current...

Page 22: ...o reset the notification panel Icons Status icons Status icons are displayed in the status bar Some commonly displayed icons are explained below Batteries are fully charged 1 Batteries are charging 1 Battery level is very low 1 1 You can also use the Settings app to view details about battery usage Swipe up the home screen and then in the app list tap Settings Battery Do not disturb mode is active...

Page 23: ... then move it slightly The screen switches to the home screen 3 Drag the app and drop it in the home screen A folder will be created if you overlap it with another app To change the folder name tap Unnamed Folder while the folder is open Adding widgets to the home screen 1 Tap and hold a blank area in the home screen 2 Tap Widgets 3 Scroll to find the desired widget 4 Tap and hold the desired widg...

Page 24: ... Set wallpaper Configuring the home screen 1 Tap and hold a blank area in the home screen 2 Tap Home settings 3 Follow the on screen instructions and configure the desired settings as necessary 24 Operating Instructions Reference Manual Screen description ...

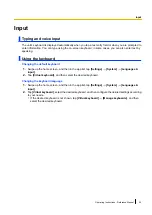
Page 25: ...een and then in the app list tap Settings System Languages input 2 Tap Virtual keyboard and then select the desired keyboard Changing the keyboard language 1 Swipe up the home screen and then in the app list tap Settings System Languages input 2 Tap Virtual keyboard select the desired keyboard and then configure the desired settings according to your needs If the desired keyboard is not shown tap ...

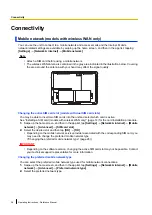
Page 26: ...nly page 14 for the card installation procedure 1 Swipe up the home screen and then in the app list tap Settings Network internet Mobile network Advanced SIM card slot 2 Select the desired slot and then tap OK OK Depending on the mobile network service provider associated with the corresponding SIM card you may need to change the preferred mobile network type Changing the preferred mobile network ...

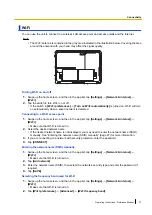
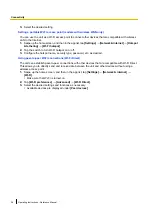
Page 27: ...sure that Wi Fi is turned on 2 Select the desired network name If the desired network name is not displayed you may need to enter the network name SSID manually See Entering the network name SSID manually page 27 for more information 3 If you are connecting to a network with security protection enter the password 4 Tap CONNECT Entering the network name SSID manually 1 Swipe up the home screen and ...

Page 28: ...ssword etc as desired Using peer to peer Wi Fi connections Wi Fi Direct The unit can establish peer to peer connections with other devices that are compatible with Wi Fi Direct This allows you to directly send and receive data between the unit and other devices without using a wireless access point 1 Swipe up the home screen and then in the app list tap Settings Network internet Wi Fi Make sure th...

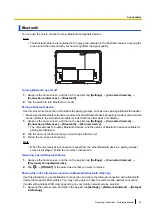
Page 29: ...evice The unit searches for nearby Bluetooth devices and the names of Bluetooth devices available for pairing are displayed 2 Tap the name of the device that you want to pair with the unit 3 Follow the on screen instructions Note When the unit receives a connection request from the other Bluetooth device a pairing request screen is displayed Follow the on screen instructions Removing a paired Blue...

Page 30: ...can connect the unit to a computer and transfer files Connect the unit s Type C port to a computer using the USB connection cable and follow the procedure below 1 Swipe up the home screen and then in the app list tap Settings Connected devices USB 2 Tap File Transfer Note You can also change the setting by tapping the notification in the notifications panel Do not remove the USB connection cable w...

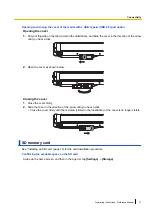
Page 31: ...ng the cover 1 Close the cover firmly 2 Slide the cover in the direction of the arrow until you hear a click Close the cover firmly until the red area circled in the illustration of the cover is no longer visible SD memory card See Installing an SD card page 13 for the card installation procedure Confirming the available space on the SD card Swipe up the home screen and then in the app list tap Se...

Page 32: ...l hardware features to prevent access to certain functions IMPORTANT A password must be set in order to use this feature If you forget this password there is no way to reset it it is not erased if the unit is reset using the factory data reset utility and therefore you will no longer be able to change this feature s settings If you forget the password contact your technical support representative ...

Page 33: ...dd IP Address to Accept of the selected Filtering Rule and then select the usable connection method or add the allowed server 5 Tap APPLY enter the password and then tap OK If a password is not set you will be prompted to create a new one Changing or deleting the password used for DeviceManagement 1 Swipe up the home screen and then in the app list tap DeviceManagement Password settings 2 Select t...

Page 34: ...o the unit s various sounds volume Do Not Disturb mode etc Storage Allows you to confirm the available space in the unit s internal storage and SD card Security location Contains settings that control security related features such as screen lock Also contains settings related to location information Accounts Allows you to configure settings related to adding accounts and data syncing Accessibilit...

Page 35: ... a screenshot Security mode turns off the screen and sound Display the screen when it is turned off Changing the functions assigned to the buttons 1 Swipe up the home screen and then in the app list tap UserButtonManager 2 Tap next to the item you want to change and then select the desired function Default button assignments The default button assignments are explained below Short press assignment...

Page 36: ...change a variety of settings that affect sound volume screen brightness etc Configuring customized silent mode You can adjust the settings that will be enabled when customized silent mode is turned on 1 Swipe up the home screen and then in the app list tap Settings Sound Customized silent mode 2 Under Customize tap the switch of the desired settings to turn them on or off 3 Tap the Customized sile...

Page 37: ...ion mode 2 Select the desired mode 3 When necessary tap Advanced select the desired feature and configure it as desired Finger sensitivity Set the sensitivity required for the screen to respond to touch operations If the sensitivity is high or the screen is wet select Low If you feel that the sensitivity is low select High Glove thickness Set the screen sensitivity according to the glove thickness...

Page 38: ...you to correct the colors in the screen Color inversion Allows you to invert the colors in the screen Large mouse pointer Allows you to make the pointer size larger when a mouse is connected Remove animations Allows you to speed up the unit by disabling animations Accessibility Menu If on allows you to display large menus anytime you tap the icon at the bottom right of the screen Switch Access mod...

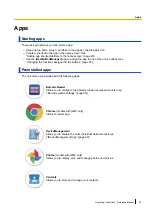
Page 39: ...ned to the buttons page 35 Preinstalled apps The unit comes preinstalled with the following apps Barcode Reader Allows you to configure the barcode reader equipped models only Barcode reader settings page 45 Chrome models with GMS only Internet browser app DeviceManagement Allows you to disable the unit s individual hardware features DeviceManagement app page 32 Photos models with GMS only Allows ...

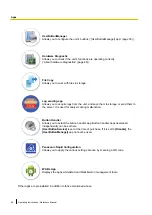
Page 40: ...rver It is used for analysis during malfunction Button Handler Allows you to select the button handler app Button handler apps developed independently can be set here UserButtonService is set at the time of purchase If it is set to Disable the UserButtonManager app cannot be used Panasonic Rapid Configuration Allows you to apply the various settings at once by scanning a QR code WL BL App Displays...

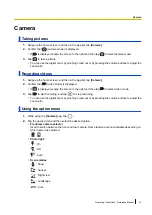
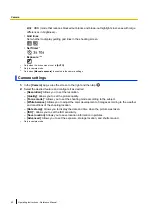
Page 41: ...ode is displayed If is displayed swipe the screen to the right and then tap to select video mode 3 Tap to start recording and tap to stop recording You can use the digital zoom by pinching in and out or by pressing the volume buttons to adjust the zoom ratio Using the option menu 1 While using the Camera app tap 2 Tap the desired icon and then select the desired option Front rear camera selector U...

Page 42: ...nd configure it as desired Resolution Allows you to set the resolution Quality Allows you to set the picture quality Focus mode 1 Allows you to set the shooting mode according to the subject White balance Allows you to adjust the color development of images according to the weather and conditions of the shooting location Date stamp Allows you to display the date and time when the picture was taken...

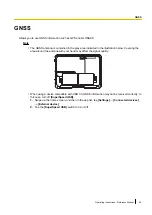
Page 43: ...the antenna with your hand may affect the signal quality When using a device compatible with USB 3 0 GNSS information may not be received correctly In this case turn off SuperSpeed USB 1 Swipe up the home screen and then in the app list tap Settings Connected devices External device 2 Tap the SuperSpeed USB switch to turn it off Operating Instructions Reference Manual 43 GNSS ...

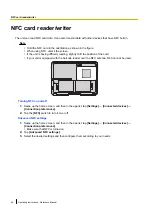
Page 44: ...ader over the NFC antenna NFC cannot be used Turning NFC on and off 1 Swipe up the home screen and then in the app list tap Settings Connected devices Connection preferences 2 Tap the NFC switch to turn it on or off Advanced NFC settings 1 Swipe up the home screen and then in the app list tap Settings Connected devices Connection preferences Make sure that NFC is turned on 2 Tap Advanced NFC setti...

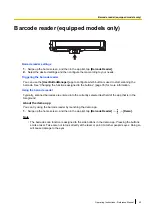
Page 45: ...mation Using the barcode reader Typically scanned barcodes are entered into the currently selected text field of the app that is in the foreground About the demo app You can try using the barcode reader by launching the demo app 1 Swipe up the home screen and then in the app list tap Barcode Reader Demo Note The barcode scan function is assigned to the side buttons in the demo app Pressing the but...

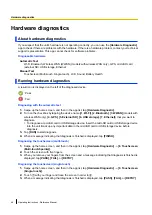
Page 46: ...AN only 4 GPS 5 External SD 6 USB storage 7 Ethernet that you want to diagnose To diagnose a microSD card or USB storage device insert the microSD card or USB storage device into the unit Back up any important data in the microSD card or USB storage device before diagnosis 3 Tap RUN to start diagnosis 4 When a message indicating that diagnosis is finished is displayed tap FINISH Diagnosing the tou...

Page 47: ...d 1 Swipe up the home screen and then in the app list tap Hardware Diagnostic 11 Sound 2 Tap speak into the unit s microphone and then tap to stop recording 3 Tap SAVE 4 Tap the saved file to check the sound 5 Tap twice and the confirmation items are displayed Tap the test result items to turn on the checkboxes and then tap OK Diagnosing the battery health 1 Swipe up the home screen and then in th...

Page 48: ...lts 1 Swipe up the home screen and then in the app list tap Hardware Diagnostic Test Result 2 Select the XML file of a saved test result and then tap OK 3 Check the details and then tap to finish displaying the diagnosis results Sharing saved test results 1 Swipe up the home screen and then in the app list tap Hardware Diagnostic Attach test result to mail 2 Select the zip file of a saved test res...

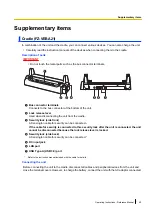
Page 49: ...t A Kensington cable for security can be connected 1 If the cable for security is connected to this security lock after the unit is connected the unit cannot be disconnected because the lock release lever is locked D Security lock side back A Kensington cable for security can be connected 1 E DC input jack F LAN port G USB Type A USB 3 0 port 1 Refer to the instruction manual included with the cab...

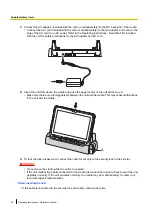
Page 50: ...ere are no foreign objects between the unit and the cradle This may cause malfunctions in the unit and the cradle A 3 To lock the lock release lever connect the cable for security to the security lock at the side A IMPORTANT Do not move the cradle while the unit is connected If the unit malfunctions while connected to the cradle disconnect the unit and check to see if the unit operates normally If...

Page 51: ...the unit push the lock release lever while holding the unit from the top for easy disconnection Charging the batteries When you connect the unit with the AC adaptor attached to the cradle the batteries attached to the unit are automatically charged Operating Instructions Reference Manual 51 Supplementary items ...

Page 52: ...lt to see 1 Use a soft dry cloth to remove dirt dust fingerprints etc from the screen surface If the Protective Film is applied while foreign matter remains on the screen surface air bubbles or abrasions may result 2 Hold the white tape of the peel off sheet A and peel back about 3 cm of the sheet from the Protective Film At this time do not touch the adhesive side B or leave the Film lying around...

Page 53: ...ove any remaining air bubbles Remove air bubbles by pushing them toward the outer edge of the screen as shown in the figure Do not apply too much force as damage to the screen may result Also be careful not to scratch the surface of the Protective Film with the corner of the spatula 5 Hold the blue tape of the peel off sheet D and peel away the entire sheet from the Protective Film Note If the sur...

Page 54: ...he hand strap becomes dirty wet a soft cloth with water and wring it thoroughly before wiping the hand strap Do not clean the hand strap with benzene thinner alcohol household cleansers etc as these may damage the hand strap Description of parts A Pen holder B Stands Unfold the stands to use the unit upright C Rings You can attach the shoulder strap Attaching 1 Place the unit on a flat surface suc...

Page 55: ...e cover adjust the hand strap to fit your hand fold back and fasten the belt and then fold the cover Make sure that the ring does not go past the stopper A If it does the belt may get detached from the ring and the unit may fall The part where you insert your hand can be rotated Replacing the batteries To replace the batteries unfold the stands in step 2 above K press the buckle protrusions L to r...

Page 56: ... Pass the strap through the rings as shown in the figure A pass it through the buckles B and then adjust it to the desired length 56 Operating Instructions Reference Manual Supplementary items ...

Page 57: ...ve all peripheral devices Screen Nothing appears on the screen The screen turned off automatically sleep because the unit has not been used for a certain period of time Press power button The batteries may have become completely discharged while the screen was off In this case any data which has not been saved will be lost Charge the batteries or replace with fully charged ones The unit may be too...

Page 58: ... then turn it on again Indicator The indicator flashes in orange The battery cannot be charged temporarily because the ambient temperature is too low or too high Leave the unit in an environment of 10 C to 35 C 50 F to 95 F for about an hour then charge again The indicator lights in red The remaining battery level is approximately less than 30 of a full charge Charge the battery The indicator flas...

Page 59: ... unit s sounds see Configuring customized silent mode page 36 Do not disturb was turned on Open the notifications panel and then turn off Do not disturb mode or configure Do not disturb settings to not mute the unit s sounds To configure Do not disturb settings swipe up the home screen and then in the app list tap Settings Sound Do not disturb Sound stops or is distorted It is normal for the sound...

Page 60: ...sing your voice Make sure the unit can connect to the Internet Some apps do not function after updating the unit s software The apps may not be compatible with the newest version of the unit s software To return the unit to the previous version of the software contact your technical support representative The unit cannot connect to external services Google services mobile networks etc Confirm all ...

Page 61: ...ll not be erased Tips for battery usage Minimizing battery deterioration The battery is a consumable and the deterioration of its performance and battery life is accelerated under the following conditions Repeatedly charging the battery Using charging or storing the battery in a high temperature environment To minimize battery deterioration and ensure longer battery life keep the following tips in...

Page 62: ...before use By using this service you agree to accept all terms of use 2 Disclaimer Panasonic is not liable for any loss or damage of data with user installed software from use of this service Nor are we liable for any malfunction or damage to the product due to user error For details see Precautions below No guarantee is made that this service will be suitable for specific purposes and we are not ...

Page 63: ...eriod for which updates will be valid This service is not available under the following conditions When the product is not turned on or when it is in sleep mode When the product is not connected to a wireless network When the product is in international roaming mode When the product is in airplane mode When tethering mode is enabled When the correct date and time is not set When the remaining batt...

Page 64: ...antenna s and all person s body excluding extremities of hands wrist and feet during wireless modes of operation Antenna list Model Manufacturer Type Frequency range MHz Gain 1 dBi AP PAN MMF C Q BL Airgain Monopole 698 960 1 4 1710 2700 4 1 AP PAN MMF WG Q BL Airgain Monopole 2 4 3 2 5500 0 7 2 1 Loss of cable permanently attached to the antenna is included For Canada models Pour les modèles du C...

Page 65: ...ximal autorisé indiqué a été approuvée par l ISDE L utilisation de ce produit avec des types d antennes non inclus dans cette liste dont le gain est supérieur au gain maximal indiqué pour n importe quel type répertorié est strictement interdite L utilisateur doit se tenir à une distance minimale de 20 cm de la ou des antennes externes à l exception de l extrémité des mains des poignets et des pied...

Page 66: ...old products please take them to applicable collection points in accordance with your national legislation By disposing of them correctly you will help to save valuable resources and prevent any potential negative effects on human health and the environment For more information about collection and recycling please contact your local authority Penalties may be applicable for incorrect disposal of ...

Page 67: ...0 64 ch W56 100 104 108 112 116 120 124 128 132 136 140 144 ch W58 149 153 157 161 165 ch IEEE 802 11b IEEE 802 11g IEEE 802 11n 2 4 GHz 1 ch 11 ch RF frequency band 2 4 GHz Band 2 412 GHz 2 462 GHz 5 GHz Band 5 18 GHz 5 32 GHz 5 5 GHz 5 72 GHz 5 745 GHz 5 825 GHz Wi Fi for Europe models Standards supported IEEE 802 11a b g n ac d h i r k v MIMO compatible Wireless channels used IEEE 802 11a IEEE ...

Page 68: ... 5 Camera Front 5 megapixels Video 1920 x 1080 pixels Still 2592 x 1944 pixels Rear 8 megapixels Video 1920 x 1080 pixels Still 3264 2448 pixels GNSS GPS GLONASS Galileo Beidou QZSS CEP50 2 to 4 m Sensors Ambient light sensor Digital compass Gyro sensor Acceleration sensor Proximity sensor NFC ISO IEC 14443 Type A Type B FeliCa ISO IEC 15693 Card slots microSD card slot 1 6 microSDXC compatible In...

Page 69: ...urs when using the optional cradle Dimensions W D H 11 without protrusions Approx 272 mm 196 mm 16 4 mm 10 7 in x 7 72 in x 0 65 in with FZ VZSUT10 excluding the optional devices Weight 12 Approx 885 g 1 98 lb with FZ VZSUT10 excluding the optional devices Approx 895 g 1 96 lb with FZ VZSUT10 and stylus excluding the optional devices Operating environment 13 Temperature 20 C to 50 C 4 F to 122 F H...

Page 70: ...ual weight may vary by unit configuration 13 Product or application booting can dependent upon the battery charge level Do not expose the skin to this product when using the product in a hot or cold environment When using the product in hot or cold environments some peripherals may not perform properly Confirm the recommended operation environment of the peripherals Using the product continuously ...

Page 71: ... Plus warranty has been purchased will receive additional coverage for any failure that occurs due to accidental damage All other terms and conditions of the standard warranty apply and this additional coverage will exist for the duration of the standard warranty period of the Product If an extended Protection Plus warranty program is purchased coverage is extended to the end of the last year of e...

Page 72: ...ition all modems must be approved by Panasonic as compatible with the device hardware before installation or use Panasonic s sole responsibility for the warranty or technical support of the software required to install or operate the modem is defined in Section 2 Limited Software Warranty Any attempted software installation by anyone other than a Panasonic Authorized Wireless Integrator is not cov...

Page 73: ...y Panasonic Failures which result from alteration accident misuse introduction of liquid or other foreign matter into the unit abuse neglect installation maladjustment of consumer controls improper maintenance or modification use not in accordance with product use instructions Failures due to service by anyone other than a Panasonic Authorized Service Provider Failures caused by improper installat...

Page 74: ...E LIMITED TO THE APPLICABLE WARRANTY PERIOD SET FORTH ABOVE Some states do not allow the exclusion or limitation of incidental or consequential damages or limitations on how long an implied warranty lasts so the above limitations or exclusions may not apply to you This limited warranty gives you specific legal rights and you may also have other rights which vary from state to state For technical s...

Page 75: ...mer Purchase Defective Materials or Workmanship All consumable items including protection film cleaning cloth carry case tether and harness No Coverage Remedy In the event of a warranty claim contact PCI s representatives within the applicable warranty period identifying the nature of the defect claimed at 1 800 668 8386 between 9 00 A M and 5 00 P M Eastern Time Zone Mon Fri excluding holidays fo...

Page 76: ... copy of your purchase receipt and an explanation of the suspected defect PCI will replace in Canada the defective disk s or other media Remedy PCI s entire liability and your only remedy for any breach of this software media warranty is limited to replacement of the media only It does not cover any other damages including but not limited to loss of use or profit loss or special indirect or conseq...

Page 77: ...mmables incluant les pellicules protectrices chiffons de nettoyage étuis de transport longes et sangles Aucune couverture Recours Pour obtenir des informations sur la marche à suivre dans le cas où une réclamation en vertu de la garantie deviendrait nécessaire communiquez par téléphone avec un représentant de PCI au 1 800 668 8386 entre 9h00 et 17h00 heure de l Est du lundi au vendredi sauf les jo...

Page 78: ... votre achat et une description du problème Recours La responsabilité de PCI et votre seul recours dans le cas de toute défaillance couverte par la garantie sur ce support de logiciel est limitée au seul remplacement du support Elle ne couvre aucun autre dommage y compris mais non exclusivement la perte d usage ou de profits ni aucun dommage spécial indirect ou consécutif ni aucune autre réclamati...

Page 79: ...battery is returned under this contract and testing determines that it has charge capacity greater than 50 the battery will be returned with an invoice for the retail purchase price of a new battery This warranty is extended solely to the original purchaser A purchase receipt or other proof of date of original purchase will be required before warranty performance is rendered Limits and Exclusions ...

Page 80: ... warranty period Panasonic shall have no obligation for any defects in the disk s or other media on which the Programs are furnished resulting from your storage thereof or for defects that have been caused by operation of the disk s or other media otherwise than on the Product or in the environment conditions other than those specified by Panasonic by alteration accident misuse abuse neglect misha...

Page 81: ...s French 41 0 800588017 Italy 39 800986915 Spain 34 0 901101157 UK 44 0 8000884324 e mail toughbooksupport eu panasonic com Czech speaking service 0800 143234 in country only Hungarian speaking service 06800 163 67 in country only Polish speaking service 00800 4911558 in country only Romanian speaking service 0800 894 743 in country only Slovakian speaking service 00800 42672627 in country only e ...

Page 82: ...Panasonic Mobile Communications Co Ltd 600 Saedo cho Tsuzuki ku Yokohama city Kanagawa 224 8539 Japan DHQP1053YA J1 C0420 1070 ...

Reviews: