8
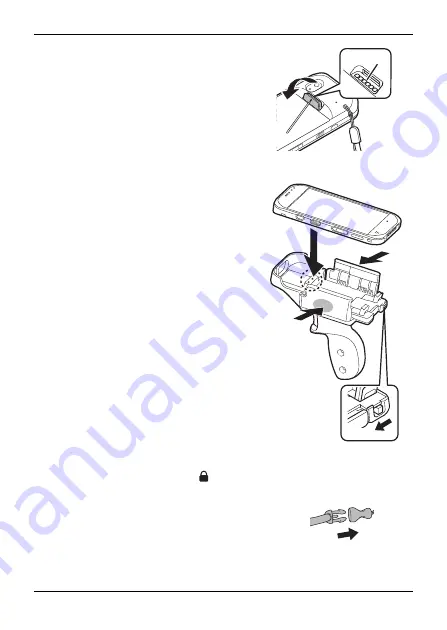
2. Attach the unit strap to the unit
(
C
).
R
Attach it to the strap attachment hole at
the upper part of the unit.
3. Place the unit on a flat surface
such as a desk with the screen
facing down.
R
Check that there are no foreign objects
under the unit.
4. Remove the gadget cover from the
unit (
D
).
R
Insert a sharp-tipped object into the hole
on the cover to remove the cover.
5. Attach the unit to the product (
F
).
R
If the Extended Life Battery is attached
to the unit, lower the two stands of the
product.
R
Align the expansion bus connector (
E
)
of the unit with the terminal section of
the product (circled in the figure).
R
Take care so that no objects, fingers, or
straps get caught between the unit and
product.
R
If the unit is not attached correctly, the
trigger switch may not work when
pressed.
6. Hold the lower parts (gray area in the
figure) of the left and right holders,
and close them until you hear a click
(
G
).
7. Slide the lock (
H
) towards to lock.
R
Firmly slide it until the red part of the lock is no longer visible.
8. Connect the unit strap and the strap
attached to the product (
I
).
③
④
⑤
⑥
⑦
⑦
⑧
⑨
Summary of Contents for FZ-VGGT111
Page 34: ......


