background image

- 42 -

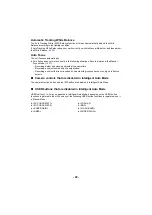
Intelligent Auto Mode

When switching to Intelligent Auto Mode, the Automatic Tracking White Balance and Auto Focus 
operate and automatically adjust the color balance and focusing.
Depending on the brightness of the subject etc., the Iris, gain and shutter speed are automatically 
adjusted for an optimum brightness.

Color balance and focus may not be adjusted automatically depending on light sources or 
scenes. If so, manually adjust these settings. (

l

47

56

)

The following settings in Manual Mode are canceled when you switch to Intelligent Auto Mode:

j

Focus (

l

47

)

j

Focus Assist (

l

49

)

j

Iris (

l

53

)

j

GAIN (

l

54

)

j

White Balance (

l

56

)

j

Shutter speed (

l

59

)

j

[SCENE MODE] (

l

114

)

When you switch this unit from Manual Mode to Intelligent Auto Mode, Image Stabilizer will be set 
to 

/

 ([ON]). (

l

83

)

If you set the Image Stabilizer to 

 (setting canceled) in Manual Mode and then switch to 

Intelligent Auto Mode, the Image Stabilizer setting that is selected when you switch to Manual 
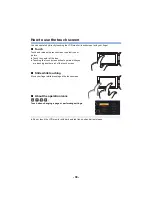
Mode again will be determined by whether or not you touch the operation icon 

 in Intelligent 

Auto Mode.*

* In the same way, the Image Stabilizer setting is also determined by whether or not you press the 

USER button to which <O.I.S.> is registered.

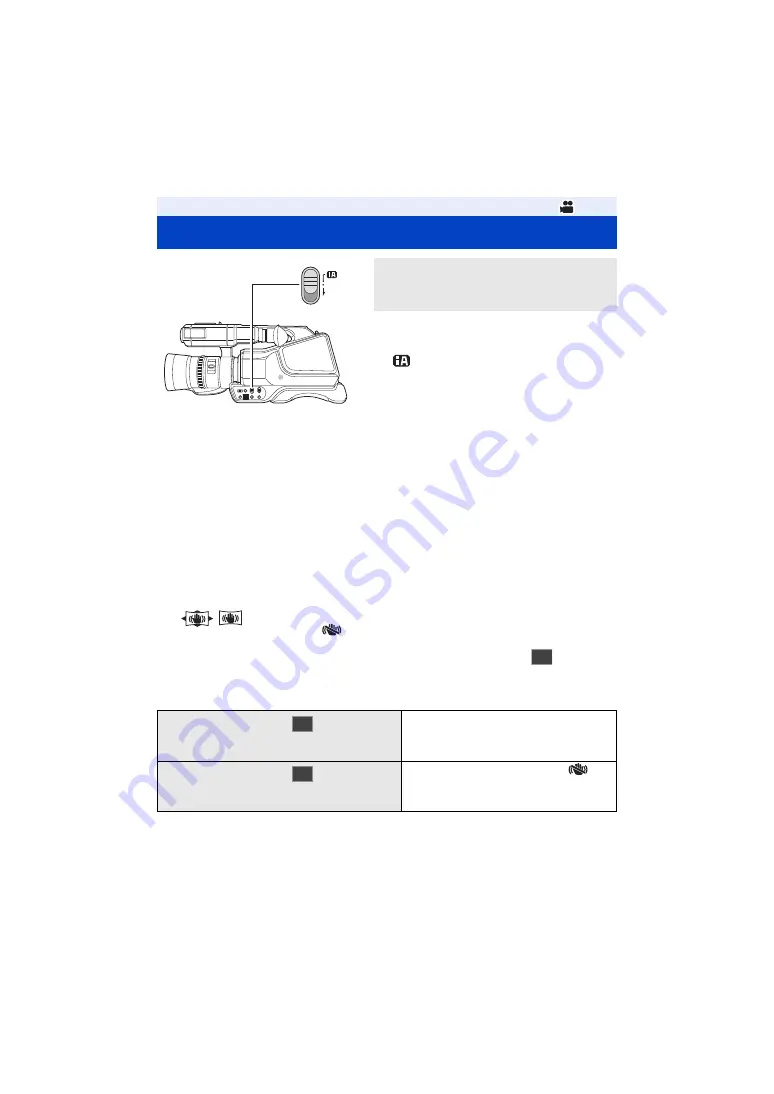
Recording

Intelligent Auto Mode/Manual Mode

iA/MANUAL/FOCUS switch

Slide the switch to change the Intelligent Auto 
Mode/Manual Mode.

When you slide the switch to FOCUS, the unit 
will switch between Auto Focus Mode and 
Manual Focus Mode. (

l

47

)

 appears on the screen in Intelligent Auto 

Mode.

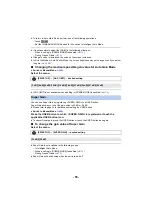
ヮモワヶモロ

ョヰヤヶヴ

When the operation icon 

 is pressed

or the USER button to which <O.I.S.> is 
registered is pressed

The Image Stabilizer setting in Intelligent 
Auto Mode will be applied.

When the operation icon 

 is not pressed

or the USER button to which <O.I.S.> is 
registered is not pressed

The Image Stabilizer will be set to 


(setting canceled).

O.I.S.

O.I.S.

O.I.S.

Summary of Contents for HC-MDH3

Page 1: ...tructions carefully before using this product and save this manual for future use DVQP1612ZA F0418AR0 Register online at http shop panasonic com support U S customers only If you have any questions vi...

Page 2: ...h as vases on this unit Use the recommended accessories Do not remove covers Do not repair this unit by yourself Refer servicing to qualified service personnel CAUTION To reduce the risk of fire elect...

Page 3: ...cate the receiving antenna Increase the separation between the equipment and receiver Connect the equipment into an outlet on a circuit different from that to which the receiver is connected Consult t...

Page 4: ...ly of greater than AC 125 V ensure the cord you use is suited to the voltage of the AC supply and the rated current of the AC adaptor Contact an electrical parts distributor for assistance in selectin...

Page 5: ...unding prong The wide blade or the third prong are provided for your safety If the provided plug does not fit into your outlet consult an electrician for replacement of the obsolete outlet 10 Protect...

Page 6: ...fire If any electrolyte should come into contact with your hands or clothes wash it off thoroughly with water If any electrolyte should come into contact with your eyes never rub the eyes Rinse eyes t...

Page 7: ...ables Do not spray insecticides or volatile chemicals onto the unit If the unit is sprayed with such chemicals its body may be marred and the surface finish may peel off Do not leave rubber or plastic...

Page 8: ...es or falls In cold areas the full charge indication may not appear or the low battery indication may appear about 5 minutes after starting use At high temperatures the protection function may be trig...

Page 9: ...rvals until charging is completed Flashing with approx 0 5 second period off for approx 0 25 second on for approx 0 25 second The battery is not charged Remove the battery from the unit and try chargi...

Page 10: ...content if recording or editing does not work properly Likewise the above also applies in a case where any type of repair is made to the unit About Condensation When the lens the viewfinder or LCD Mo...

Page 11: ...you can use with this unit SDHC Memory Card and SDXC Memory Card 4 GB or more Memory Cards that do not have the SDHC logo or 48 GB or more Memory Cards that do not have the SDXC logo are not based on...

Page 12: ...e 56 Manual shutter speed 59 Audio Input 61 Adjusting the audio input level 61 Counter display 63 Setting the Time Code 63 Setting the Recording Counter 65 USER button 66 Setting the USER button 66 Us...

Page 13: ...139 Video Setup 140 Picture Setup 141 Copy 141 Display Indications 142 Messages 145 Warning Indications 147 Others Troubleshooting 149 About recovery 152 About copyright 153 Recording functions that c...

Page 14: ...2018 These may be subject to change For U S A only If accessories are lost customers can visit us at http shop panasonic com support for further information about obtaining replacement parts Accessor...

Page 15: ...ch the ND Filter and MC Protector of the VW LF49N Filter Kit to the front side of the lens Optional accessories Accessory No Figure Description VW VMS10 Stereo microphone AG BRD50 Battery charger VW V...

Page 16: ...ures and still pictures recorded on this unit to the external media device It can also play back the scenes and still pictures copied to the external media device This unit supports USB 2 0 Use the US...

Page 17: ...commercially available High Speed HDMI cable If possible we recommend using a cable with a length of 3 m 9 84 feet or less Importing data to a PC A SDHC Memory Card SDXC Memory Card B PC Connecting t...

Page 18: ...metimes noise may be heard depending on the microphone type In this case please switch to the battery for the power supply and the noise will stop Check that the unit is turned off Connecting or remov...

Page 19: ...tton IRIS l 53 29 Intelligent auto Manual Focus switch iA MANUAL FOCUS l 42 30 Mode switch l 28 31 Menu button MENU l 36 32 Jog dial SEL PUSH SET l 54 56 59 85 90 33 USER1 button PUSH AF l 66 34 USER2...

Page 20: ...irection 38 Eyecup mount l 22 39 Eyecup l 22 40 Accessory shoe 41 Viewfinder l 32 Extend the viewfinder before use 42 Speaker 43 VIDEO OUT terminal l 101 44 AUDIO OUT terminal l 101 45 Charging lamp C...

Page 21: ...esses on the lens cap to hold it when attaching or removing it To attach the lens cap align its projections horizontally and then push them into the slits on the lens hood until a clicking sound is he...

Page 22: ...22 Attaching the eyecup Attach by aligning the notch of the eyecup attachment part with the protrusion at the inside of the eyecup A Notch B Protrusion...

Page 23: ...tected with internal protection to meet the requirements of appropriate safety standards There is a possibility that these battery packs may lead to fire or explosion Please be advised that we are not...

Page 24: ...use other batteries we cannot guarantee the quality of this product Do not heat or expose to flame Do not leave the battery ies in a car exposed to direct sunlight for a long period of time with door...

Page 25: ...starting stopping recording turning the unit on off moving the zoom lever etc The batteries heat up after use or charging This is not a malfunction Batteries that support quick charging Charging Reco...

Page 26: ...Preparation of SD cards Card type Capacity SDHC Memory Card 4 GB to 32 GB SDXC Memory Card 48 GB to 128 GB When using an SDHC Memory Card SDXC Memory Card with other equipment check the equipment is...

Page 27: ...t j Remove the SD card j Turn the unit off j Insert and remove the USB Cable j Expose the unit to vibrations or shock Performing the above while the lamp is on may result in damage to data SD card or...

Page 28: ...again l 137 Slide the mode switch to or Preparation Turning the unit on off To turn off the unit Set the power switch to OFF while pressing the lock release button The status indicator goes off Prepar...

Page 29: ...se refer to page 66 for details about setting the USER button When the recording screen is displayed press the USER button to which LCD EVF OUTPUT is registered Switches the setting each time the butt...

Page 30: ...con or picture Touch the center of the icon Touching the touch screen will not operate while you are touching another part of the touch screen Slide while touching Move your finger while pressing on t...

Page 31: ...ailable while the LCD monitor is turned off l 29 It adjusts brightness and color density on the LCD monitor 1 Select the menu l 36 2 Touch the desired setting item 3 Touch to adjust settings You can s...

Page 32: ...n be lifted vertically up to approximately 90o Close the LCD monitor and turn on the viewfinder 2 Adjust the focus by operating the eyepiece corrector lever A Brightness of the viewfinder can be switc...

Page 33: ...cording yourself can be switched by setting SELF SHOOT l 134 Only some indications will appear on the screen when the SELF SHOOT is set to MIRROR When appears return the direction of the LCD monitor t...

Page 34: ...n set the desired value using The year can be set between 2000 and 2039 3 Touch EXIT to complete the setting The date and time function is driven by a built in lithium battery If the time display beco...

Page 35: ...Caracas r6 00 Dhaka s5 00 Toronto New York Miami Lima r6 30 Yangon s6 00 Chicago Houston Mexico City r7 00 Bangkok Jakarta s7 00 Denver Phoenix r8 00 Beijing Hong Kong Kuala Lumpur Singapore s8 00 Van...

Page 36: ...jog dial l 85 1 Press the MENU button A 2 Touch the top menu B 3 Touch the submenu C Next Previous page can be displayed by touching 4 Touch the desired item to enter the setting 5 Touch EXIT to exit...

Page 37: ...till pictures The media is selected separately for motion pictures or still pictures and is then highlighted in yellow 3 Touch EXIT to complete the setting In the following situation if you start reco...

Page 38: ...c l 105 When using two SD cards format both SD cards 1 Select the menu 2 Touch SD CARD 1 or SD CARD 2 When formatting is complete touch EXIT to exit the message screen Do not turn this unit off or rem...

Page 39: ...rded between pressing the recording start stop button to start recording and pressing it again to pause recording become one scene Recording Recording motion picture REC TC 00 00 00 00 Counter display...

Page 40: ...lease refer to page 155 about approximate recordable time AVCHD scene Approximately 4 GB MOV MP4 scene when using an SDHC Memory Card Approximately 4 GB or 30 minutes MOV MP4 scene when using an SDXC...

Page 41: ...ding a motion picture the remaining recordable time will shorten If you turn off the unit or change the mode switch position the remaining recordable time may increase Maximum number of recordable pic...

Page 42: ...setting canceled in Manual Mode and then switch to Intelligent Auto Mode the Image Stabilizer setting that is selected when you switch to Manual Mode again will be determined by whether or not you tou...

Page 43: ...ose up objects at the same time j Recording a subject behind dirty or dusty window j Recording a subject that is surrounded by objects with glossy surfaces or by highly reflective objects Camera contr...

Page 44: ...m lever will vary depending on the setting of SUB ZOOM l 124 If you take your finger off the zoom lever during zoom operation the operation sound may be recorded When returning the zoom lever to the o...

Page 45: ...D light is turned on depending on recording conditions In this case switch to Manual Mode and adjust the White Balance l 56 When the battery becomes low the built in LED light may not turn on Using th...

Page 46: ...FOCUS position or press the IRIS button The iA MANUAL FOCUS switch will return to the MANUAL position 3 When adjusting focus and iris Press the camera function button to change the manual ring settin...

Page 47: ...s FOCUS the focus will be adjusted to MF95 on the infinity side To return to Auto Focus perform one of the following operations j Set the iA MANUAL FOCUS switch to FOCUS again j Set the iA MANUAL FOCU...

Page 48: ...AIL is canceled in following cases j When Focus Assist peaking function is used l 49 One Push AF If you press the USER button to which PUSH AF is registered in Manual Focus Mode the camera performs hi...

Page 49: ...button to which FOCUS ASSIST 1 or FOCUS ASSIST 2 is registered For information on how to set the USER buttons refer to page 66 FOCUS ASSIST 1 is registered to the USER3 button by default To select th...

Page 50: ...ation level Touch or rotate the jog dial to change the magnification level You can adjust the magnification from 3k to 10k Moving the magnified area Touch or slide the screen while touching it to move...

Page 51: ...re displayed l 83 Focus Assist is canceled in following cases j If you turn the unit off j When the mode switch position is changed j If you operate the USER button to which FOCUS ASSIST 1 is register...

Page 52: ...ified In the following cases the screen is not magnified during Focus Assist j During motion picture recording or PRE REC l 77 128 j When using Digital Zoom j When using Area Mode l 73 j During auto r...

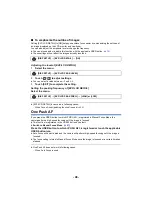
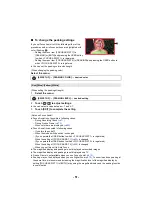
Page 53: ...to Auto Iris Mode perform one of the following operations j Press the IRIS button j Set the iA MANUAL FOCUS switch to iA to switch to Intelligent Auto Mode It is not possible to adjust the iris in the...

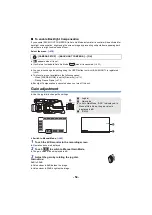
Page 54: ...llowing cases j When SCENE MODE is set to Fireworks l 114 j During Freeze Frame l 72 Backlight Compensation is canceled when you turn off this unit Gain adjustment Use the jog dial to change the setti...

Page 55: ...l 114 You can use Super Gain by registering SUPER GAIN to a USER button Super Gain allows you to set the gain value to 33 dB or 36 dB Please refer to page 66 for details about setting the USER button...

Page 56: ...al White Balance Mode The previously used White Balance mode will be selected Each time you touch the icon the White Balance mode is switched between Auto Tracking White ATW Balance Mode and Manual Wh...

Page 57: ...sing a mode other than ATW 2 Press the USER button to which ATW LOCK is registered or touch the applicable USER button icon to switch to LOCK To cancel ATW Lock press the USER button or touch the USER...

Page 58: ...ng other than Ach or Bch Auto Black Balance adjustment is performed when you touch and hold or or press and hold the jog dial during recording pause Adjustment is complete when the screen blacks out m...

Page 59: ...tions j Touch j Set the iA MANUAL FOCUS switch to iA to switch to Intelligent Auto Mode Shutter speed The shutter speed varies depending on the frame rate in REC FORMAT l 118 The shutter speed closer...

Page 60: ...ecord under indoor lighting color and screen brightness may change or a horizontal line may appear on the screen In such cases change settings as follows j Set this unit to Auto Shutter Mode j Adjust...

Page 61: ...if operation icons are displayed The jog dial icon turns white Function Execution Mode 3 Rotate the jog dial to adjust the input level After adjusting press the jog dial The jog dial icon turns yello...

Page 62: ...e 1 Set AUDIO LEVEL to MANUAL l 61 2 Select the menu Using the ALC function AUDIO SETUP AUDIO ALC desired setting ON Enables ALC allowing you to record audio with reduced noise OFF Allows you to recor...

Page 63: ...rame NDF TC 00 00 00 00 hour minute second frame DF The number of frames frame count per second varies depending on the frame rate in REC FORMAT l 118 Recording Counter display Counter display Indicat...

Page 64: ...127 The time code will reset when the built in lithium battery is exhausted when it is set to FREE RUN You can set the initial time code 1 Select the menu 2 Touch the item to set and change with It wi...

Page 65: ...the recording time in seconds 0 00 00 hour minute second When REC COUNTER is set to TOTAL SCN 0 00 00 hour minute second When REC COUNTER is set to SCENE Select the counting method during the recordin...

Page 66: ...can be displayed by touching 3 Touch EXIT to complete the setting The tables below show the default settings Performing YES in INITIAL SET restores these default settings l 138 Using the USER button...

Page 67: ...tor can be switched Select the menu Check the setting of the USER buttons Functions of the USER button List of USER button functions When using button icons USER4 to USER7 A USER4 B USER5 C USER6 D US...

Page 68: ...LOCK ATW L ATW Lock D ZOOM D ZM Digital Zoom HISTOGRAM HIST Histogram REC CHECK REC C Recording Check LAST SCN DEL LstDel Last Scene Delete DRS DRS DRS FRZ FRAME FRZ Freeze Frame SUPER GAIN S Gain Su...

Page 69: ...possible to press the recording start stop button during the fade in or fade out Black Fade is not possible in following cases j During Super Slow Recording l 78 j During the Interval Recording l 127...

Page 70: ...m magnification will change each time you press the button 2k 5k 10k Setting canceled To change the zoom magnification of Digital Zoom The zoom magnification of Digital Zoom varies depending on the DI...

Page 71: ...ding Check Recording Check is not possible in following cases j When the unit is turned on off j When the mode switch position is changed j When the SD card is inserted removed j When the setting of R...

Page 72: ...n picture during Freeze Frame the frozen image and sounds will be recorded You can perform the following camera operations during Freeze Frame Other camera operations will be disabled j Recording moti...

Page 73: ...E desired setting INH Does not apply any effects of Area Mode FOCUS Optimizes the focus automatically for the subject you touch IRIS Optimizes the iris automatically for the subject you touch Y GET Di...

Page 74: ...evel will not be displayed if AREA MODE is set to FOCUS IRIS or FOCUS IRIS Register PUSH AF to a USER button l 66 You can use One Push AF and Push AF l 48 Register CAPTURE to a USER button l 66 You ca...

Page 75: ...be displayed correctly j When moving this unit j When pointing this unit up or down at an angle closer to perpendicular Register LEVEL SHOT to a USER button l 66 This function detects the horizontal...

Page 76: ...screen The function as a result may be activated in recording situations such as when you zoom in or out on a bright window We recommend using the function in recording situations where flashes are e...

Page 77: ...erval Recording l 127 In the following cases a 3 second image that precedes the recording of an AVCHD scene or a 4 second scene that precedes the recording of an MOV MP4 scene may not be recorded j Im...

Page 78: ...n or touch USER button icon Frame rates and their effects The slow motion speed during playback varies depending on the frame rate in REC FORMAT This function can also be set from the menu RECORD SETU...

Page 79: ...ue below 1 120 BLACK FADE and WHITE FADE are disabled l 69 Still picture recording cannot be used Even if you press the recording start stop button as soon as recording has started it may take some ti...

Page 80: ...als will be transmitted prompting the external device to stop the recording Register O I S to a USER button l 66 This enables disables the Image Stabilizer l 83 Register ZEBRA to a USER button l 66 Yo...

Page 81: ...o White Balance Mode and Manual White Balance Mode by pressing the button l 56 In addition if you press and hold the button Auto White Balance or Auto Black Balance adjustment is performed l 58 Regist...

Page 82: ...of functions assigned to the USER buttons USER1 to USER3 and the settings of SUB REC BUTTON and SUB ZOOM are displayed If the screen is touched while mode information is displayed or no touch operati...

Page 83: ...setting of this function cannot be changed during Freeze Frame l 72 Stabilization may not be possible under strong shaking conditions When using a tripod we recommend that you set the Image Stabilize...

Page 84: ...frame B in It makes the adjustment of the brightness of the object easier by checking the luminance level of the object when recording same object in different surroundings Luminance level C is displ...

Page 85: ...the jog dial when a screen that lets you adjust a value is displayed Example When adjusting the brightness for LCD SET 1 Rotate the jog dial to move the cursor to the value display B Push the jog dia...

Page 86: ...s the white balance mode VAR VAR adjustment l 58 Adjusts the White Balance VAR value AREA Area Mode l 73 Changes the area frame setting ASSIST Focus Assist l 49 Changes the magnification level of the...

Page 87: ...rations after the adjustment allows you to exit the setting Actual volume to be recorded does not change 3 Push the jog dial to finish the adjustment Functions Settings to be changed in advance Gain a...

Page 88: ...be displayed differs depending on the size of recording format j Scenes recorded in FHD 1920k1080 If you touch the recording format option ALL all scenes of the same recording mode in the selected med...

Page 89: ...u touch the screen while an operation icon is being displayed or do not touch the icon for a certain period it will disappear To display again touch the screen Motion picture playback Still picture pl...

Page 90: ...h you will return to 9 scene display By displaying in 1 scene recording date and time are displayed when playing back motion pictures and recording date and file number when playing back still picture...

Page 91: ...heck compatibility in the instruction manual of your device Motion pictures recorded with devices other than this unit are not supported by this unit Still picture compatibility This unit is compliant...

Page 92: ...d continuously while the display is touched and held Normal playback is restored when you touch For slow rewind playback the intervals between frames and the display time per frame vary depending on t...

Page 93: ...SER button For information on how to register functions to the USER buttons refer to page 66 It is convenient to use Pause Slow motion Playback and Frame by frame Playback Date of the motion picture w...

Page 94: ...playback of a scene was stopped halfway the playback can be resumed from where it was stopped Select the menu If playback of a motion picture is stopped appears on the thumbnail view of the stopped s...

Page 95: ...1 2 may be added after the date j When the number of scenes exceeds 99 j When the number of still pictures exceeds 999 j When you change the REC FORMAT setting l 118 j When you set REC MODE to AVCHD...

Page 96: ...selected in Step 1 Touch the scene still picture to be deleted 3 When MULTI is selected in Step 1 Touch Delete To continuously delete other scenes still pictures repeat Steps 2 3 When you stop deletin...

Page 97: ...tandard with this unit all the data related to the scenes still pictures may be deleted When still pictures recorded on an SD card by other products are deleted a still picture other than JPEG that ca...

Page 98: ...Touch desired items following the screen display It will return to the previous step by touching Return When SELECT SCENES is selected When touched the scene still picture is selected and the indicat...

Page 99: ...ctures that have been recorded on another device may not be copied Data recorded on a PC cannot be copied The settings for the copied motion pictures and still pictures will be cleared if the protecte...

Page 100: ...OM S S terminal 2 5 mm 0 1 q diameter super mini jack allows you to remotely control the zoom and start stop recording Do not connect any device other than a remote control to the CAM REMOTE terminals...

Page 101: ...ting input switch and the audio input setting on the TV For more information please read the operating instructions for the TV 3 Play back the recorded images of this unit Confirm the terminals on you...

Page 102: ...ges correctly Check the TV setting Select the menu This item is fixed to SQUEEZE in the following cases j When REC FORMAT is set to SA 480 59 94i Example of images with a 16 9 aspect ratio on a regula...

Page 103: ...N CONV which enables the images to be displayed on your TV external device Please read the operating instructions for the TV external device DOWN CONV outputs images in standard picture quality Select...

Page 104: ...59 94p SYSTEM 1080 59 94p s 1080p 1080i 1080 59 94i DOWN CONV 480 59 94p 480 59 94i FHD 1920k1080 59 94i PH 1080 59 94i HA 1080 59 94i HE 1080 59 94i SYSTEM 1080 59 94i s 1080p 1080 59 94p 1080i 1080...

Page 105: ...still pictures in JPEG format 01000001 JPG etc 2 MOV format motion picture data 01000001 MOV etc 3 MP4 format motion picture data 01000001 MP4 etc 4 JPEG format still pictures created from the motion...

Page 106: ...rd s folders on a PC Doing so may make the SD card unusable in this unit When data not supported by this unit has been recorded on a PC it will not be recognized by this unit Always use this unit to f...

Page 107: ...rtitions j If an external media device is in a format other than FAT32 or exFAT j When connected by using a USB hub FAT32 is a format used for SDHC Memory Cards exFAT is a format used for SDXC Memory...

Page 108: ...copy when there are many scenes If you copy protected scenes or still pictures the protection setting of the copied scenes or still pictures are canceled The order in which the scenes were copied cann...

Page 109: ...exFAT Displaying media information The used space of the external media device can be checked Connect this unit to the external media device and touch Playback from External Media Select the menu If...

Page 110: ...selected When touched the scene still picture is selected and the indication appears on the thumbnail Touch the scene still picture again to cancel the operation When SELECT DATE is selected When touc...

Page 111: ...ill picture to be played back and then play it back The playback operation is performed the same as when playing back motion pictures or still pictures l 88 92 To terminate the connection between this...

Page 112: ...or DVD recorder Linking to external devices Dubbing with a Blu ray disc recorder video device etc Equipment used for dubbing Dubbing picture quality To dub Equipment with SD card slot High definition...

Page 113: ...set RESOLUTION to DOWN CONV l 103 Some screens such as the menu screen may be displayed in reduced sizes on the TV If the date and time display and function indication are not wanted cancel them befo...

Page 114: ...is high contrast image setting for both color and luminance SCENE MODE OFF Cancel the setting Sports To make fast moving scenes less shaky with slow playback and pause of playback Portrait To make peo...

Page 115: ...j If the brightness is insufficient the effect may not be clear j If you record a person in the distance the face may not be recorded clearly In this case cancel Soft Skin Mode or zoom in on the face...

Page 116: ...a value between s5 and r5 3 Touch EXIT to exit the menu screen The default setting is 0 Finely adjusts color temperature after Bch Auto White Balance adjustment Switch to Manual Mode l 42 1 Touch AWB...

Page 117: ...mages Note that this also tends to increase noise Adjusting the setting in the plus r direction enhances the noise reduction effect thereby reducing noise Note that this may also cause afterimages to...

Page 118: ...l that divides the effective scanning lines to half and send them alternatively Progressive progressive scanning High density video signal sending the effective scanning lines simultaneously It will b...

Page 119: ...s Not available Not available includes instances where the desired function cannot be used or selected Recording format Picture size Frame rate Bit rate VBR PS 1080 59 94p 1920k1080 59 94p Average 25...

Page 120: ...sets the camera number for this unit 1 Touch CAMERA NUMBER SET 2 Touch to change the Camera Number Numbers between 0 and 16 can be set 3 Touch RETURN Touch EXIT to exit the menu screen This function s...

Page 121: ...ows j USER1 PUSH AF j USER2 WHITE BAL j USER3 FOCUS ASSIST 1 Register functions to USER button icons l 66 For the functions of the USER button that can be registered refer to page 67 The default setti...

Page 122: ...h to Manual Mode l 42 Sets the maximum possible gain value for Auto Gain Mode l 55 Switch to Manual Mode l 42 You can set the Hybrid Optical Image Stabilizer l 83 SW SETUP desired setting IRIS RING DO...

Page 123: ...utter speed becomes 1 30 or 1 24 the screen may be seen as if frames are missed and after images may appear Sets the Focus Assist method for the FOCUS ASSIST button and the USER button to which FOCUS...

Page 124: ...handle can be switched Enable disable of the sub zoom lever on the handle can be switched Zoom speed will be different depending on the setting The larger the value is the faster the zoom speed becom...

Page 125: ...ected separately to record motion pictures or still pictures l 37 You can set relay simultaneous recording Insert SD cards to card slot 1 and card slot 2 1 This function is not available in the follow...

Page 126: ...g used as a destination still has sufficient remaining recordable time The maximum recording time for Relay Recording is 10 hours When the recording time of Relay Recording reaches 10 hours the record...

Page 127: ...on the screen The icon changes to I REC after recording starts After recording the setting of Interval Recording is canceled Audio cannot be recorded h is an abbreviation for hour min for minute and s...

Page 128: ...or the time code l 64 Sets the way the time code will move l 64 Initial value of the time code can be set l 64 Audio Setup All default settings are indicated with underlined text Reduces the level of...

Page 129: ...spect ratio l 102 Set RESOLUTION to DOWN CONV l 103 This enables disables a function that controls recording performed with an external device connected to the unit When ON is selected you can control...

Page 130: ...und will be output according to RECORDING When ON is selected you can adjust the headphone volume in Recording Mode l 87 Selects the test tone output when color bars are displayed l 83 This sets how t...

Page 131: ...EXIT to complete the setting This function s default setting is 80 Selects the brightness level of the right leaning zebra patterns on the screen 1 Touch ZEBRA DETECT 2 Touch SET 2 Touch to adjust set...

Page 132: ...TV j The setting cannot be changed When REC FORMAT is set to SA 480 59 94i and ASPECT CONVERT is set to SIDE CROP l 118 120 The safety zone is not displayed on the images that is actually recorded Dis...

Page 133: ...tical axis is displayed It is possible to determine the exposure of the whole image by looking at the distribution in the graph l 71 Select to display the audio level meter In Playback Mode Touch the...

Page 134: ...ensity on the LCD monitor l 31 The default settings are as follows j COLOR 0 j BRIGHTNESS 0 j CONTRAST 0 Brightness of the viewfinder can be switched l 32 Switches the mirror function of the LCD monit...

Page 135: ...outlines of an image displayed on the LCD monitor and viewfinder l 48 Adjusts the emphasis strength for EVF LCD DETAIL l 48 This function s default setting is 0 Sets the peaking frequency for EVF LCD...

Page 136: ...The SD card requires some space to store information and manage system files so the actual usable space is slightly less than the indicated value The usable space is generally calculated as 1 GB 1 000...

Page 137: ...g etc 2 Beeps for 4 times When an error occurs Check the message displayed on the screen l 145 When about 5 minutes have passed without any operation this unit automatically turns off to save battery...

Page 138: ...number of the MOV MP4 and still picture recorded next to 0001 Folder number is updated and file number will start from 0001 l 105 To reset the folder number format the SD card and then perform NUMBER...

Page 139: ...it how many times the zoom lever has been operated how many times the zoom motor has worked and how many times the jog dial has been pressed MAINTENANCE desired setting VERSION UPDATE For the latest u...

Page 140: ...playback of the last scene finishes when set to ON l 94 If playback of a scene was stopped halfway the playback can be resumed from where it was stopped when set to ON l 94 Scenes can be protected so...

Page 141: ...still picture l 96 Copy Set the mode switch to l 28 This copies all scenes and still pictures recorded with this unit that have never been copied to another device to the external media device connect...

Page 142: ...Recording to card possible motion picture Green Card is being recognized motion picture R 1h20m Remaining time for motion picture recording l 39 Card slot selected for motion picture recording during...

Page 143: ...de l 53 Backlight Compensation l 69 OPEN F2 0 Iris value l 53 Z00 iZ00 Zoom magnification l 44 Z99 i Zoom l 44 ALC A REC White Card recording possible status still picture Number of recording pixels f...

Page 144: ...88 118 10 Scene Number In 9 scene display in thumbnail mode l 88 Playback of the external media device l 111 Time display The built in battery is low l 34 Warning for recording of yourself l 33 SD ca...

Page 145: ...t match This is displayed when the SD card contains scenes recorded with another device for example Match the device and content version ERROR OCCURRED RECORDING IS STOPPED This is displayed when the...

Page 146: ...recording mode option and recording format option Select a recording mode option or recording format option containing recorded scenes CANNOT DELETE The content versions do not match This is displaye...

Page 147: ...EDIA Copying cannot be performed due to for example a problem with the copy destination media device Check the copy destination media device THIS SCENE CANNOT BE COPIED Cannot copy contains recordings...

Page 148: ...r Status indicator It flashes once per second On screen display s Meaning of the warning A recording error or recording circuit setting error has occurred Recording playback The recording may either c...

Page 149: ...ross the image very fast but this is because the unit is using MOS for the image sensor This is not a malfunction Power Problem Check points This unit cannot be turned on This unit does not stay on lo...

Page 150: ...he recordable time may have shortened due to the deterioration of the data writing speed or repeated recording and deletion Using the unit format the SD card l 38 Auto Focus function does not work If...

Page 151: ...ase the data l 38 Please be aware that if a SD card is formatted then all the data recorded on the SD card is erased and cannot be recovered Back up important data on a PC etc With other products Prob...

Page 152: ...ata it may not be possible to completely repair the data If recovery fails it will not be possible to play back scenes recorded before the unit turned off When data recorded on another device is recov...

Page 153: ...o No license is granted or shall be implied for any other use Additional information may be obtained from MPEG LA L L C See http www mpegla com Others About copyright This product incorporates the fol...

Page 154: ...be used or selected Others Recording functions that cannot be used simultaneously Recording function to be set Currently set recording function Interval Rec Super Slow Recording Relay recording Simul...

Page 155: ...The recordable time may be reduced if recording with a lot of action is recorded or recording of short scene is repeated The recordable times depends on the recording condition or card type to be reco...

Page 156: ...recordable pictures is 9999 or less The number of recordable pictures depends on the recording condition or card type to be recorded The memory capacity indicated on the label of an SD card is the tot...

Page 157: ...re size and recordable time of a motion picture Still picture recording Recording method JPEG corresponding Design rule for Camera File system based on Exif 2 2 standard Refer to page 156 for picture...

Page 158: ...jack Camera remote terminal 2 5 mm 0 1 q super mini jack k1 ZOOM S S 3 5 mm 0 14 q mini jack k1 FOCUS IRIS MIC input j60 dBV Mic sensitivity j40 dB equivalent 0 dB 1 V Pa 1 kHz Input impedance 5600 S...

Page 159: ...m ec soporte 1 800 726276 Costa Rica www panasonic com cr soporte 800 7262737 El Salvador www panasonic com sv soporte 800 7262 Guatemala www panasonic com gt soporte 1 801 811 7262 Uruguay www panaso...

Page 160: ...sonic com Printed in Japan Panasonic Corporation of North America Two Riverfront Plaza Newark NJ 07102 5490 Panasonic Canada Inc 5770 Ambler Drive Mississauga Ontario L4W 2T3 Panasonic Corporation 201...

Reviews: