background image

116

VQT2U82

Others

Indications

1

Indications

Recording indications

Motion picture recording mode

Still picture recording mode

Remaining battery power 
(

l

15)

1h30m

Remaining battery time 
(

l

15)

R 1h20m

Remaining time for motion 
picture recording (

l

25)

0h00m00s

Elapsed recording time 
(

l

25)

15. 11. 2010

Date indication (

l

22)

12:34

Time indication (

l

22)

World time setting (

l

35)

/

/

/

Motion picture recording mode (

l

55)

1080/50p recording (

l

47)

0h00m00s

99

99%

99%

1/100
OPEN
0dB

MF

R 1h20m

1h30m

A

HG

1920

15. 11. 2010

12:34

F

1/100
OPEN
0dB

MNL

MEGA

MF

R 3000

1h30m

A

F

99

99%

99%

14.2

M

1080/50p

 (White)

Card recording possible 
status

 (Green)

Recognising the card

¥

/

;

 (Red)

Recording

;

 (Green)

Recording pause

PRE-REC (

l

49)

Interval recording (

l

56)

Manual mode (

l

71)

/

/

/

/

/

/

/

/

Intelligent auto mode (

l

28)

/

Operation icon is displayed/
not displayed. (

l

48)

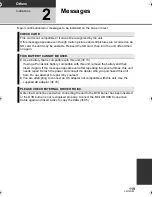
MF

Manual focus (

l

74)

/

/

/

/

/

White balance (

l

72)

1/100

Shutter speed (

l

73)

OPEN/F2.0

Iris value (

l

73)

0dB

Gain value (

l

73)

/

/

/

/

/

/

/

/

/

/

Scene mode (

l

54)

/

/

/

Power LCD (

l

38)

/

/

/

/

/

Image stabilizer (

l

45)

/

AF/AE tracking (

l

46)

Zebra (

l

64)

Picture adjustment (

l

64)

Digital cinema (

l

57)

High-speed burst shooting 
(

l

69)

Digital cinema colour (

l

61)

AF assist lamp (

l

70)

PRE-REC

MNL

F

F

AWB

+2

+1

-1

A

HDC-SD600EB-VQT2U82_mst.book  116 ページ  2010年4月15日 木曜日 午後3時2分

Summary of Contents for HDC-SD600

Page 1: ...Operating Instructions High Definition Video Camera Model No HDC SD600 Before use please read these instructions completely VQT2U82 Model number suffix EB denotes UK model ...

Page 2: ... Should the fuse need to be replaced please ensure that the replacement fuse has a rating of 5 ampere and that it is approved by ASTA or BSI to BS1362 Check for the ASTA mark Ï or the BSI mark Ì on the body of the fuse If the plug contains a removable fuse cover you must ensure that it is refitted when the fuse is replaced If you lose the fuse cover the plug must not be used until a replacement co...

Page 3: ... the instructions below Illustrations may differ from actual AC mains plug 1 Open the fuse cover with a screwdriver 2 Replace the fuse and close or attach the fuse cover WARNING TO REDUCE THE RISK OF FIRE ELECTRIC SHOCK OR PRODUCT DAMAGE DO NOT EXPOSE THIS APPARATUS TO RAIN MOISTURE DRIPPING OR SPLASHING AND THAT NO OBJECTS FILLED WITH LIQUIDS SUCH AS VASES SHALL BE PLACED ON THE APPARATUS USE ONL...

Page 4: ...tential negative effects on human health and the environment which could otherwise arise from inappropriate waste handling For more information about collection and recycling of old products and batteries please contact your local municipality your waste disposal service or the point of sale where you purchased the items Penalties may be applicable for incorrect disposal of this waste in accordanc...

Page 5: ... work properly Likewise the above also applies in a case where any type of repair is made to the unit Cards that you can use with this unit SD Memory Card SDHC Memory Card and SDXC Memory Card 4 GB or more Memory Cards that do not have the SDHC logo or 48 GB or more Memory Cards that do not have the SDXC logo are not based on SD Memory Card Specifications Refer to page 17 for more details on SD ca...

Page 6: ...ing still pictures in motion picture recording mode 27 4 Intelligent auto mode 28 5 Motion picture Still picture playback 30 Setup 1 Using the menu screen 33 Using the quick menu 34 2 Using the Setup Menu 35 3 Using with the remote control 42 Operation of direction buttons OK button 43 Advanced Recording Advanced 1 Zoom in out function 44 Extra optical zoom 44 2 Optical image stabilizer function 4...

Page 7: ...ng With this unit other products 1 Connecting a DVD burner to copy to play back a disc 95 Preparing for copying playing back 95 Copying to discs 97 Playing back the copied disc 100 Managing the copied disc 101 2 Dubbing images onto other video device 102 With a PC Before using 1 What you can do with a PC 103 End User License Agreement 105 2 Operating environment 106 Setup 1 Installation 109 2 Conn...

Page 8: ... For customers 0844 844 3856 Order accessory and consumable items for your product with ease and confidence by phoning our Customer Care Centre Monday Thursday 9 00 a m 5 30 p m Friday 9 30 a m 5 30 p m Excluding public holidays Or go on line through our Internet Accessory ordering application at www pas europe com Most major credit and debit cards accepted All enquiries transactions and distribut...

Page 9: ...vent swallowing Product numbers correct as of Apr 2010 These may be subject to change Battery pack VW VBG130 AC adaptor VSK0698 AC cable K2CT39A00002 DC cable K2GJYDC00004 Remote control Battery built in N2QAEC000024 AV multi cable K1HY12YY0004 USB cable K1HY04YY0032 Stylus pen VGQ0C14 Lens hood VDW2053 CD ROM Software ...

Page 10: ...r a genuine Panasonic AC adaptor VW AD21EB K optional 10 HDMI mini connector HDMI l 89 93 11 USB terminal l 96 111 12 AV multi connector l 89 102 Use the AV multi cable only the supplied cable 13 Card slot l 18 14 Access lamp ACCESS l 18 15 Lens cover The lens cover opens in motion picture recording mode or still picture recording mode l 20 16 Remote control sensor l 43 17 Built in flash l 51 18 L...

Page 11: ... stop button l 23 This button functions in the same manner as the recording start stop button 24 Adjust zoom buttons l 44 25 Menu button MENU l 33 26 Delete button l 84 27 Tripod receptacle 21 22 23 24 25 26 Due to limitations in LCD production technology there may be some tiny bright or dark spots on the LCD monitor screen However this is not a malfunction and does not affect the recorded picture...

Page 12: ...ng mode l 44 Thumbnail display switch Volume lever sVOLr In playback mode l 32 31 Internal microphones 32 Mode switch l 20 33 Recording start stop button l 24 34 Shoulder strap fixture 35 Grip belt Adjust the length of the grip belt so that it fits your hand 1 Flip the belt 2 Adjust the length 3 Replace the belt 28 29 30 31 32 33 34 35 ...

Page 13: ...then the battery will not charge Remove the DC cable from the AC adaptor 1 Connect the AC cable to the AC adaptor and the AC outlet 2 Insert the battery into the AC adaptor by aligning the arrows It has been found that counterfeit battery packs which look very similar to the genuine product are made available to purchase in some markets Some of these battery packs are not adequately protected with...

Page 14: ...Inserting removing the battery Removing the battery Be sure to hold down the power button until the status indicator goes off Then remove the battery while supporting the unit to prevent it dropping Move the battery release lever in the direction indicated by the arrow and remove the battery when unlocked BATT A Insert the battery until it clicks and locks CAUTION Danger of explosion if battery is...

Page 15: ...1250 mAh 2 h 35 min 1080 50p 1 h 40 min 1 h HA HG HX 1 h 45 min 1 h 5 min HE 1 h 50 min 1 h 5 min VW VBG260 optional 7 2 V 2500 mAh 4 h 40 min 1080 50p 3 h 15 min 2 h HA HG HX 3 h 25 min 2 h 5 min HE 3 h 25 min 2 h 10 min VW VBG6 optional 7 2 V 5400 mAh 9 h 25 min 1080 50p 8 h 10 min 5 h HA HG HX 8 h 30 min 5 h 15 min HE 8 h 35 min 5 h 20 min Battery capacity indication The display changes as the ...

Page 16: ...it is designed only for this unit Also do not use the AC cable from other equipment with this unit 1 Connect the AC cable to the AC adaptor and the AC outlet 2 Connect the DC cable to the AC adaptor 3 Connect the DC cable to the DC input terminal DC IN When removing the AC adaptor be sure to hold down the power button until the status indicator goes off Then remove the AC adaptor Connecting to the...

Page 17: ... protect switch A on SD card is locked no recording deletion or editing will be possible on the card Keep the Memory Card out of reach of children to prevent swallowing This unit an SDXC compatible device is compatible with SD Memory Cards SDHC Memory Cards and SDXC Memory Cards When using an SDHC memory card SDXC memory card with other equipment check the equipment is compatible with these memory...

Page 18: ... USB cable jExpose the unit to vibrations or shock Performing the above while the lamp is on may result in damage to data SD card or this unit Do not expose the terminals of the SD card to water garbage or dust Do not place SD cards in the following areas jIn direct sunlight jIn very dusty or humid areas jNear a heater jLocations susceptible to significant difference in temperature condensation ca...

Page 19: ... turn the unit on off To turn on the unit A The status indicator lights To turn off the unit B The status indicator goes off The unit will not turn off while recording motion pictures even if the LCD monitor is closed In the following cases opening the LCD monitor does not turn on the unit Press the power button to turn on the unit jWhen the unit is purchased jWhen you have turned off the unit usi...

Page 20: ...eparation Setup 4 Selecting a mode Change the mode to recording or playback Operate the mode switch to change the mode to or Motion picture recording mode l 24 Still picture recording mode l 26 Playback mode l 30 75 ...

Page 21: ...nd thumbnail display page for item selection and setting etc Touch to return to the previous screen such as when setting menus Do not touch the LCD monitor with hard pointed tips such as ball point pens Perform the touch screen calibration when the touch is not recognised or wrong location is recognised l 40 Change the mode to or Rotate the LCD monitor towards the lens side The image is horizontal...

Page 22: ...me setting may be displayed Perform the World time setting by touching the screen l 35 Touch EXIT or press the MENU button to complete the setting The date and time function is driven by a built in lithium battery When this unit is purchased the clock is set If the time display becomes the built in lithium battery needs to be charged To recharge the built in lithium battery connect the AC adaptor ...

Page 23: ...ur legs for better balance Do not cover the microphones or the cooling fan inlet with your hand etc Basic motion picture recording The unit should normally be held steady when recording If you move the unit when recording do so slowly maintaining a constant speed The zoom operation is useful for recording subjects you cannot get close to but overuse of zoom in and zoom out can make the resulting m...

Page 24: ...ording the motion picture l 27 The images recorded between pressing the recording start stop button to start recording and pressing it again to pause recording become one scene Maximum number of recordable scenes 3900 Maximum number of different dates 200 l 79 When either of them reaches to the maximum limit more scenes cannot be recorded In the case of SD cards it is the maximum number of recorda...

Page 25: ...r equipment supports AVCHD by referring to the operating instructions There are some cases where the recorded motion pictures cannot be played back even if the device supports AVCHD In such cases play the recorded motion picture with this unit instead 0h00m00s 0h00m00s 0h00m00s R 1h20m R 1h20m R 1h20m HG A Recording mode B Remaining time left for recording When the remaining time is less than 1 mi...

Page 26: ...ed when the button is pressed halfway The AF assist lamp lights in dark places Focus indication will change to registered focus icon when FACE RECOG is set to ON l 59 It is recommended using a flash or tripod when recording still pictures in dark places because the shutter speed becomes slow The screen will become darker when the button is pressed halfway if the shutter speed is 1 25 or slower A F...

Page 27: ...ject in the focus area the subject may not be focused If so move the contrasting object out of the focus area Focus area is not displayed in the following conditions jWhen the intelligent auto mode portrait is used jWhen AF AE tracking is used jWhen the Extra optical zoom is used jWhen the unit determines that the AF assist lamp is necessary You can record still pictures even in motion picture rec...

Page 28: ... mode MANUAL Mode Scene Effect Portrait When the object is a person Faces are detected and focused automatically and the brightness is adjusted so it is recorded clearly Scenery Recording outdoors The whole landscape will be recorded vividly without whiting out the background sky which may be very bright Spotlight 1 Under a spotlight Very bright object is recorded clearly Low light 1 Dark room or ...

Page 29: ...ce The illustration shows the range over which automatic white balance functions 1 The effective range of automatic white balance adjustment on this unit 2 Blue sky 3 Cloudy sky rain 4 TV screen 5 Sunlight 6 White fluorescent lamp 7 Halogen light bulb 8 Incandescent light bulb 9 Sunrise or sunset 10 Candlelight If the automatic white balance is not functioning normally adjust the white balance man...

Page 30: ...ill picture playback 1 Change the mode to 2 Touch the play mode select icon A 3 Touch VIDEO SD CARD or PICTURE SD CARD 4 Touch the scene or the still picture to be played back Next previous page can be displayed by touching A VIDEO SD CARD B PICTURE SD CARD ...

Page 31: ...viewed at the same time The thumbnails are displayed on separate screens in motion picture playback mode A Operation icon Touch to display not display the operation icon Motion picture playback Still picture playback 1 Playback Pause 6 Rewind playback 5 Fast forward playback Stops the playback and shows the thumbnails 1 Displays the direct playback bar l 76 1 Slide show playback of the still pictu...

Page 32: ...during normal playback If pause play is continued for 5 minutes the screen returns to the thumbnails The elapsed time for playback indication will be reset to 0h00m00s each scene Motion picture compatibility Please refer to page 47 about 1080 50p This unit is based on the AVCHD format The video signal that can be played back on this unit is 1920k1080 50i 1920k1080 25p or 1440k1080 50i This unit ma...

Page 33: ...isplayed by touching 4 Touch the desired item to enter the setting 5 Touch EXIT or press the MENU button to exit the menu setting About guide display After touching touching the submenus and items will cause function descriptions and settings confirmation messages to appear After the messages have been displayed the guide display is cancelled ...

Page 34: ...e position of the mode switch or settings 2 Touch the desired item to enter the setting 3 Touch EXIT or press Q MENU button to exit the quick menu Using the quick menu Icon Function Page REC MODE l 55 TIME LAPSE REC l 56 PICTURE SIZE l 67 DISPLAY l 35 POWER LCD l 38 GUIDE LINES l 53 MIC LEVEL l 63 MF ASSIST l 74 ZEBRA l 64 LUMINANCE l 65 HISTOGRAM l 66 14 2M 13 3M A ON ON A 13 3M ...

Page 35: ...hen the HOME your home region is not set the message appears Touch ENTER and proceed to Step 3 2 Only when setting your home region Touch HOME Touch ENTER 3 Only when setting your home region Touch to select your home region and touch ENTER Touch SUMMER TIME SET to set daylight saving time appears and the summer time setting is turned on the time difference from GMT is set forward by one hour Touc...

Page 36: ...display to the home setting Set the home region using Step 1 to 3 and close the setting by touching EXIT or pressing the MENU button If you cannot find your travel destination in the area shown on the screen set it by using the time difference from your home region It is possible to change the date and time display mode You can also show or change the date and time display by repeatedly pressing t...

Page 37: ... A lights red and the unit is put into recording pause When in quick start standby mode about 80 of the power used in recording pause mode is being consumed so the recording time will be reduced Quick start standby mode is cancelled if jabout 5 minutes elapsed jmode is set to Time for quick start will be more than 0 6 seconds slower when digital cinema is used Depending on the recording conditions...

Page 38: ...he sentence displayed on the screen l 119 This makes it easier to view the LCD monitor in bright places including outdoors These settings will not affect the images actually recorded It is possible to set from the quick menu l 34 Makes even brighter Makes brighter Normal Makes less bright Automatic adjustment It is not displayed in the manual mode or in the playback mode When the AC adaptor is in ...

Page 39: ...he LCD monitor COLOUR Colour level of the LCD monitor 3 Touch to adjust settings 4 Touch ENTER Touch EXIT or press the MENU button to exit the menu screen Please refer to page 92 Please refer to page 92 Please refer to page 92 Please refer to page 93 Please refer to page 91 LCD SET AV MULTI COMPONENT AV OUT COMPONENT OUT 576i 1080i HDMI RESOLUTION AUTO 1080p 1080i 576p VIERA Link OFF ON TV ASPECT ...

Page 40: ... the indication The SD card requires some space to store information and manage system files so the actual usable space is slightly less than the indicated value The usable space is generally calculated as 1 GB 1 000 000 000 bytes The capacities of this unit PCs and software are expressed as 1 GB 1 024k1 024k1 024 1 073 741 824 bytes Therefore the indicated value of the capacity appears to be smal...

Page 41: ...nutes the demonstration automatically starts again To stop the demonstration set DEMO MODE to OFF or insert an SD card This item is used to start the optical image stabilizer demo Only when the mode is at the or position Touch O I S DEMO the demonstration automatically starts When you touch EXIT the demonstration will be cancelled You can select the language on the screen display and the menu scre...

Page 42: ...ion buttons 3 4 2 1 7 Zoom volume thumbnail display switch buttons T W VOL 8 Recording start stop button START STOP 9 Date time button DATE TIME l 36 10 Menu button MENU 11 OK button OK means that these buttons function in the same manner as the corresponding buttons on the unit SETUP REMOTE CONTROL ON SEARCH STILL ADV STILL ADV SEARCH VOL DATE TIME START STOP EXT DISPLAY PLAY STOP OK SKIP SKIP ME...

Page 43: ...f operation icons thumbnail display etc can be operated Wherever you can touch with your finger can be operated by the remote control Excluding some functions CAUTION Danger of explosion if battery is incorrectly replaced Replace only with the same or equivalent type recommended by the manufacturer Dispose of used batteries according to the manufacturer s instructions Warning Keep the Button Type ...

Page 44: ... centre area allowing a picture with a higher zoom effect If you take your finger off the zoom lever during zoom operation the operation sound may be recorded When returning the zoom lever to the original position move it quietly When the zoom magnification is 12k the subjects are focused at about 1 2 m or more When the zoom magnification is 1k this unit can focus on a subject approx 4 cm away fro...

Page 45: ... recording mode When in MODE1 appears When in MODE2 appears Stabilization may not be possible under strong shaking conditions RECORD SETUP O I S MODE1 or MODE2 Optical image stabilizer button Pressing the button changes the optical image stabilizer setting Motion picture recording mode OFF Still picture recording mode OFF Switch to manual mode before setting the Optical Image Stabilizer function t...

Page 46: ...tion will be cancelled About target frame When target lock fails the target frame blinks in red and then disappears Touch a characteristic part colour etc on the object to lock onto it again When the button is pressed halfway in still picture recording mode the focus is set to the object that is locked The target frame turns green when it focuses and the target cannot be changed It may track diffe...

Page 47: ...his unit Change the mode to Please refer to page 133 about approximate recordable time 1080 50p The scenes recorded in 1080 50p can be saved or played back by this unit or the HD Writer AE 2 1 1080 50p 1080 50p button To set to 1080 50p recording mode press and hold the button until is displayed To return to normal recording mode press and hold the button until disappears 1080 50p 1080 50p ...

Page 48: ...e recording mode 2 It is not displayed in the intelligent auto mode 3 It is not displayed in motion picture recording mode If you turn off the unit or change the mode to PRE REC backlight compensation colour night view self timer and tele macro functions are cancelled If you turn off the unit the fade function is cancelled It is possible to set from the menu Except for the PRE REC and on off of th...

Page 49: ...art approximately 3 seconds before the recording start stop button is pressed appears on the screen Aim the unit at the subject beforehand There is no beep sound PRE REC is cancelled in the following cases jIf you change the mode jIf you remove the SD card jIf you press the MENU button or 1080 50p button jIf you turn the unit off jIf you start recording jAfter 3 hours have passed After setting PRE...

Page 50: ...d are red does not function when FACE RECOG is OFF or no one is registered The face of the subject may not be detected correctly depending on the recording conditions The number of recording pixels are 4864k2736 3840k2160 or 1920k1080 l 67 When still pictures that have been recorded using the smile shot are displayed as thumbnails the appears When the AF AE tracking function is target locking a fa...

Page 51: ... desired setting ßj Less bright ßd0 Normal ßi Much brighter Set the flash to where using a flash is prohibited The light from the flash may be blocked by the lens hood when the lens hood is attached Do not use the flash with the ND filter optional or the conversion lens optional attached If the ß indication etc flashes when the button is pressed halfway the flash is not activated The available ran...

Page 52: ...ENU button Setting the self timer to Ø2 is a good way to prevent image shake when the button is pressed while using a tripod etc This brightens dark parts so the image can be recorded clearly If there are extremely dark parts or the brightness is insufficient the effect may not be clear This makes the image brighter to prevent darkening of a backlit subject This makes skin colours appear softer fo...

Page 53: ...n the images actually recorded Selecting the type of Guideline RECORD SETUP GUIDE LINES desired setting It is possible to set from the quick menu l 34 Displaying Guidelines at playback Change the mode to VIDEO SETUP GUIDE LINES desired setting To cancel the Guideline function during playback set to OFF This function allows you to record colour images in very low light situations Minimum required i...

Page 54: ...oes not function The display flashes Portrait jColour and screen brightness may change under indoor lighting SCENE MODE RECORD SETUP SCENE MODE desired setting OFF Cancel the setting 5Sports To make fast moving scenes less shaky with slow playback and pause of playback Portrait To make people stand out against the background Spotlight Improved quality when subject is brightly illuminated Snow Impr...

Page 55: ... be recorded Change the mode to A Image quality prioritised B Recording time prioritised Recordable time using the battery l 15 This function s default setting is HG mode Please refer to page 133 about approximate recordable time When the unit is moved a lot or moved quickly or when a fast moving subject is recorded particularly when recording in HE mode mosaic type noise may appear at playback ZO...

Page 56: ...in the 1080 50p recording mode Recording mode cannot be changed when the interval recording is set If you turn off the unit or change the mode to this function is cancelled The shortest motion picture recording time is 1 second Colour balance and focus may not be adjusted automatically depending on light sources or scenes If so manually adjust these settings l 72 74 TIME LAPSE REC RECORD SETUP TIM...

Page 57: ...for finding faces that resemble faces which have already been registered and automatically prioritising focus and exposure for those faces This function makes it possible to keep the face of your loved ones in focus even when they are at the back or on the end of a line in a group picture Change the mode to or DIGITAL CINEMA RECORD SETUP DIGITAL CINEMA ON FACE RECOG RECORD SETUP FACE RECOG desired...

Page 58: ...tions In this case try recording the face again 3 Entering the person s name Touch the text entry icon in the centre of the screen and enter the name After entering the name touch Enter Entering text A maximum of 9 characters can be entered 4 Touch ENTER to end registration Touch EXIT RECORD SETUP FACE RECOG SET SAVE Icon Description of operation A etc Enters a character Moves cursor left Moves cu...

Page 59: ...ars during still picture recording Only displayed when face recognition is in use Touch the icon you wish to have displayed 3 Touch ENTER Canceling a registered person 1 Select the menu Touching DELETE ALL cancels all the registered people 2 Only when DELETE is selected Touch the person to cancel When touched the person is selected and is displayed To cancel the selected person touch again Touch E...

Page 60: ...ming is displayed in orange Focus and adjustment of brightness will be performed against the prioritised face framing Prioritised face framing is only displayed in intelligent auto mode Focus will be set to prioritised face framing and the brightness adjusted when the unit is set to Portrait mode in intelligent auto mode Focus will be set to prioritised face framing when the unit is in Spotlight o...

Page 61: ...V multi cable the TV cannot detect the digital cinema colour setting on this unit automatically We recommend connecting this unit to TVs compatible with x v Colour using an HDMI mini cable When viewing on the TV with the digital cinema colour function turn off the digital cinema colour function on the TV This function cannot be used when switch to intelligent auto mode When motion pictures recorde...

Page 62: ...sm Change the mode to Switch to manual mode l 71 When switching to intelligent auto mode WIND NOISE CANCELLER is set to ON and the setting cannot be changed You may not see the full effect depending on the recording conditions Directivity of the microphone is interlocked with the zoom operation Sounds near the front of the unit are recorded more clearly if you zoom in close up and surrounding soun...

Page 63: ...ne input level so that the last 2 bars of the gain value are not red Otherwise the sound is distorted Select a lower setting for microphone input level 3 Touch ENTER to determine the microphone input level and then touch EXIT Microphone input level meter appears on the screen When switching to intelligent auto mode the setting is fixed to AUTO and cannot be changed When ZOOM MIC is ON the volume w...

Page 64: ...occur extremely brightly lit or shiny parts are displayed with diagonal lines zebra pattern Change the mode to or Switch to manual mode l 71 You can record an image with little white saturation if you manually adjust the shutter speed or brightness iris gain l 73 The zebra pattern does not appear on the images actually recorded PICTURE ADJUST RECORD SETUP PICTURE ADJUST SHARPNESS Sharpness of the ...

Page 65: ...g IRIS l 73 Change the mode to or Switch to manual mode l 71 Luminance level is displayed between 0 and 99 It will be displayed as 99 when it is over 99 Luminance is displayed while adjusting IRIS even if DISPLAY is set to OFF LUMINANCE RECORD SETUP LUMINANCE desired setting It is possible to set from the quick menu in manual mode l 34 OFF Cancel the setting ANYTIME Constantly display ON ADJUST Di...

Page 66: ...raph Adjust the brightness using IRIS l 73 Change the mode to or Switch to manual mode l 71 Histogram is displayed while adjusting IRIS even if DISPLAY is set to OFF HISTOGRAM RECORD SETUP HISTOGRAM desired setting It is possible to set from the quick menu in manual mode l 34 OFF Cancel the setting ANYTIME Constantly display ON ADJUST Display only when IRIS is adjusted l 73 A Normal B Dark C Brigh...

Page 67: ...cture recording mode Please refer to page 134 about the number of recordable pictures The recording will become longer depending on the recording pixels PICTURE SIZE PICTURE PICTURE SIZE desired setting It is possible to set from the quick menu l 34 Aspect ratio Picture size Extra optical zoom l 44 4 3 4032k3024 3200k2400 13 2k 2560k1920 16 5k 640k480 25k 3 2 4608k3072 3600k2400 13 2k 2880k1920 16...

Page 68: ...ures recorded on this unit with a 16 9 aspect ratio may be cut at printing Check the printer or photo studio before printing QUALITY PICTURE QUALITY desired setting Still pictures with a high picture quality are recorded Priority is given to the number of still pictures recorded Still pictures are recorded in normal picture quality ASPECT RATIO PICTURE ASPECT RATIO desired setting 4 3 Aspect ratio...

Page 69: ...the range of pictures that will be stored Previous Next page is displayed by touching Only select the picture for start point if only 1 picture is to be stored A confirmation message is displayed when Enter is touched after selecting the start point and finish point Touch YES to store the pictures If you turn off the unit or change the mode this function is cancelled The maximum number of times yo...

Page 70: ...t lamp is approx 1 5 m A conversion lens optional can block the AF assist lamp and it will become harder to adjust the focus When switching to intelligent auto mode the setting is fixed to AUTO and cannot be changed You can add a shutter sound when recording still pictures Change the mode to No shutter sound is emitted in motion picture recording mode AF ASSIST LAMP PICTURE AF ASSIST LAMP AUTO SHT...

Page 71: ...o manual mode appears on the screen Perform the setting by touching the desired item to be set Touch 1 to change the page and the manual icon appears or disappears each time is touched MNL MANUAL Focus l 74 White balance l 72 Manual shutter speed l 73 Aperture adjustment l 73 FOCUS WB SHTR IRIS F IRIS SHTR WB FOCUS F F ...

Page 72: ...ng the white balance cannot be set In this case use other white balance modes When the display flashes the manual white balance previously adjusted is stored Whenever recording conditions change re set the white balance When setting both the white balance and the iris gain set the white balance first is not displayed on the screen when is being set White balance Icon Mode Recording conditions Auto...

Page 73: ...nual shutter speed adjustment When the shutter speed is set lower than 1 12 in the still picture recording mode it is recommended using a tripod Also white balance cannot be set The shutter speed will be set to 1 25 when the unit is turned on again or when the quick start is performed You may see a band of light around the object that is shining very bright or having very high reflection During no...

Page 74: ...ust the focus by touching The in focus area is displayed in blue The normal screen returns approximately 2 seconds after you finish bringing the subject into focus When MF ASSIST is OFF the blue area is not displayed To restore auto focus touch AF in step 3 or press the iA MANUAL button again The blue display does not appear on the images actually recorded Manual focus adjustment RECORD SETUP MF A...

Page 75: ...motion playback During Pause When the operation icon disappears touch the screen to display the icon again With the playback paused continue touching is for slow rewind playback Playback is slow while touching Normal playback is restored when you touch When slow motion pictures are played back in reverse they will be shown continuously at approximately 2 3rd the speed of normal playback intervals ...

Page 76: ...orded will be registered as date of the still picture Quality will be different from the normal still picture Playback operation Playback display Operating steps Direct playback During Playback 1 Touch 1 to display the direct playback bar A 2 Touch the direct playback bar The playback is paused and the image is skipped until the position you touched Playback starts again when you release the touch...

Page 77: ...ch faces were recognised will be displayed A portion judged to be clearly recorded will be detected and displayed in thumbnail if you select HIGHLIGHT 3 Only when MINUTES is selected Touch to set the time It can be set up to a maximum of 60 minutes Touch ENTER 4 Touch the thumbnail to be played back Next previous thumbnail can be displayed by touching Playback of the first scene starts after playb...

Page 78: ... zoomed in on centering on the part you touched With each touch you zoom in further k1 k2 k4 2 Move your position on the zoomed still picture by touching 3 4 2 1 The location of the zoom displays for about 1 second when zooming in zooming out or moving the displayed location The more picture is enlarged the more its quality deteriorates Zooming out from the zoomed still picture Touch to zoom out k...

Page 79: ...es are recorded on the same day they are grouped separately in the following cases 1 2 is added after the recording date displayed on the screen jWhen the number of scenes exceeds 99 jWhen the media is repaired jWhen the interval recording is used Even if still pictures are recorded on the same day they are grouped separately in the following cases jWhen the number of still pictures exceeds 999 jW...

Page 80: ...rity to the parts with detected faces the part that was recognised as clearly recorded is extracted from a long recording and it can be played back in a short time with music added HIGHLIGHT Part that was recognised as clearly recorded is extracted from a long recording and it can be played back in short time with music added INTEL SCENE Scenes can be played back with music excluding a portion of ...

Page 81: ...nd is displayed Touch the scene again to cancel the operation When SELECT DATE is selected Touch the date to be played back A maximum of 7 days can be selected When touched the date is selected and surrounded by red Touch the date again to cancel the operation 3 Touch Enter ENTER Priority settings 1 Touch SELECTED FACE Touch NONE any detected face including the face of person registered for face r...

Page 82: ...s short Date setting Touch the playback date Music setting 1 Touch your favourite music When NO MUSIC is selected the audio recorded at the time of shooting is played back To adjust the volume of music during playback or audio testing operate the volume lever or the adjust zoom buttons l 32 2 Touch ENTER To test the music audio Touch START Touch the other music option to change the music to be tes...

Page 83: ...ART and start the audio testing Touch the other music option to change the music to be tested When you touch STOP the music playback stops 4 Touch START 5 Select the playback operation l 30 When the playback is finished or stopped the screen to select REPLAY SELECT AGAIN or EXIT is displayed Touch the desired item Changing the playback settings and playing back the slide show DATE SETUP Select the...

Page 84: ...e is selected and the indication appears on the thumbnails Touch the scene still picture again to cancel the operation Up to 99 scenes can be selected to be deleted 4 Only when SELECT is selected in step 2 Touch Delete or press the button To continuously delete other scenes still pictures repeat steps 3 4 When you stop deleting halfway Touch CANCEL or press the MENU button while deleting The scene...

Page 85: ... scenes still pictures cannot be deleted Scenes still pictures which cannot be played back the thumbnails are displayed as cannot be deleted In case of ALL SCENES the deletion may take time if there are many scenes or still pictures If you delete scenes recorded on other products or still pictures conforming to DCF standard with this unit all the data related to the scenes still pictures may be de...

Page 86: ...ess the MENU button to complete dividing 5 Delete the unnecessary scene l 84 To delete all the divided points The scenes that were deleted after division cannot be recovered You cannot divide a scene if you are playing back a disc with a DVD burner optional connected or if the number of scenes of a given date would exceed 99 scenes It may not be possible to divide scenes with a short recording tim...

Page 87: ... is cancelled cannot be restored During face highlight playback highlight playback intelligent scene selection or disc playback when connected to a DVD burner optional scenes still pictures cannot be deleted Scenes still pictures can be protected so that they are not deleted by mistake Even if you protect some scenes still pictures formatting the media will delete them Change the mode to 1 Select ...

Page 88: ...ommercial printing services support this feature at this time 1 Select the menu 2 Touch the still picture to be set 3 Touch to set the number of prints Up to 999 prints can be selected Prints for set number can be printed with a printer that supports DPOF To cancel the setting set the number of prints to 0 4 Touch ENTER To continuously set other still pictures repeat steps 2 4 Press the MENU butto...

Page 89: ...uality sound 1 Connect this unit to a TV Confirm the terminals on your TV and use a cable compatible with the terminals Image quality may vary with the connected terminals 1 High quality 2 HDMI terminal 3 Component terminal 4 Video terminal A HDMI mini cable optional Be sure to connect to the HDMI terminal B AV multi cable supplied If your TV is not equipped with AV Input Sockets the 21 pin Adapto...

Page 90: ...component terminal plug is connected simultaneously 2 Select the video input on the TV Example Select the HDMI channel with a HDMI mini cable Select the Component or Video 2 channel with an AV multi cable The name of the channel may differ depending on the connected TV Check the input setting input switch and the audio input setting on the TV For more information please read the operating instruct...

Page 91: ...V multi cable is connected to this unit the setup screen of the AV multi destination is displayed on the screen of this unit Touch either COMPONENT or AV OUT in accordance with the terminal connecting to the TV l 92 If the HDMI mini cable and AV multi cable are connected at the same time output will be prioritised in order of the HDMI mini cable AV multi cable SETUP TV ASPECT 4 3 TV ASPECT setting...

Page 92: ...tion picture recording mode jWhen CHANGE VIDEO is touched during motion picture playback mode AV multi connector output setting can be changed Changing the component output setting Connecting with a HDMI mini cable SETUP HDMI RESOLUTION AUTO 1080p 1080i 576p Connecting with the AV multi cable SETUP AV MULTI desired setting COMPONENT When connecting to the component terminal AV OUT When connecting ...

Page 93: ...Link This function allows you to use your remote control for the Panasonic TV for easy operations when this unit has been connected to a VIERA Link compatible device using a HDMI mini cable optional for automatic linked operations Not all operations are possible VIERA Link is a unique Panasonic function built on a HDMI control function using the standard HDMI CEC Consumer Electronics Control speci...

Page 94: ...TV to turn off the power this unit also turns off Automatic input switching If you connect with a HDMI mini cable and then turn on this unit the input channel on the TV automatically switches to this unit s screen If the TV s power is in standby status it will turn on automatically if Set has been selected for the TV s Power on link setting Depending on the HDMI terminal on the TV the input channe...

Page 95: ...sed to allow playback on other devices and additional copying will not be possible 2 Only DVD RAM copied with the DVD burner or HD Writer AE 2 1 can additionally copy 3 Connect this unit and a DVD burner before formatting If you format a used disc you can copy on that disc Please be aware that if a disc is formatted then all the data recorded on the disc will be erased l 101 4 Only VW BN2 can be u...

Page 96: ...burner A Mini AB USB Connection Cable supplied with DVD burner B DVD burner optional Insert the plugs as far as they will go 4 Insert the disc in the DVD burner Insert the DVD disc with the recording side down when using the DVD burner 5 Touch the desired item BURN DISC Refer to page 97 for how to copy discs PLAY DISC Refer to page 100 for how to play back the copied discs To terminate the connect...

Page 97: ...d the scene still picture is selected and the indication appears on the thumbnail Touch the scene still picture again to cancel the operation When SELECT DATE is selected When touched the date is selected and surrounded by red Touch the date again to cancel the operation Up to 99 scenes 99 dates can be selected in succession 3 Touch START When 2 or more discs are necessary for copying follow the o...

Page 98: ...eed more discs for copying than SP Before you delete the data on the media after copying is complete be sure to play back the discs to check that they have been copied to correctly l 100 Important Notice When connecting an optional DVD burner and this unit for copying a disc do not insert a disc with recorded motion pictures in high definition picture quality into devices that do not support the A...

Page 99: ...quality to a disc the recordable time of Standard XP is approx 60 minutes and that of Standard SP is approx 120 minutes To copy approx 600 MB still pictures Picture size Disc type Copy time DVD RAM DVD RW DVD R RW R Approx 10 min to 20 min To copy approx 30 minutes of motion pictures recorded in 1080 50p converted to AVCHD Standard Disc type Copy time DVD RAM DVD RW DVD R RW R Approx 45 min to 60 ...

Page 100: ...T or FACE of highlight time frame index The remaining copy time displayed while copying is the time for the disc 1 Only discs that have been copied by connecting this unit to the DVD burner or created with HD Writer AE 2 1 can be played back A Mini AB USB Connection Cable supplied with DVD burner 1 Connect this unit to the DVD burner to prepare for playback l 96 When playing back on a TV connect t...

Page 101: ...c when copying motion pictures or still pictures in high definition picture quality to the disc 1 Select the menu If a disc that you copied to is inserted in another device without protecting it a message may be displayed prompting you to format the disc We recommend setting AUTO PROTECT to ON in order to prevent accidental deletion 2 Copy to the disc l 97 After copying the disc is write protected...

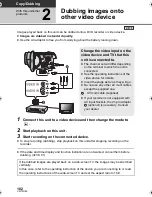
Page 102: ... wanted cancel them before dubbing l 36 91 Change the video input on the video device and TV that this unit is connected to The channel set will differ depending on the terminal to which the unit is connected See the operating instructions of the video device for details Insert the plugs as far as they will go Do not use any other AV multi cables except the supplied one A AV multi cable supplied I...

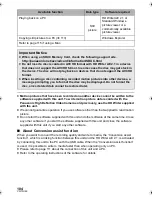
Page 103: ...finition picture quality or conventional standard picture quality MPEG2 format Select the function you wish to use and follow the on screen instructions for easy copying Available function Data type Software required Copying data to a PC Motion picture and still picture CD ROM supplied HD Writer AE 2 1 Copying in BD AVCHD format Copying in DVD Video format Converted to conventional standard qualit...

Page 104: ... Conversion assist function is used it is possible to write to media faster than when operating only on PC Please refer to page 111 about the connection of this unit and a PC Refer to the operating instructions of the software for details Available function Data type Software required Playing back on a PC Still picture HD Writer AE 2 1 or Standard Windows picture viewer or a commercially available...

Page 105: ...rse Engineering Decompiling or Disassembly Licensee may not reverse engineer decompile or disassemble the Software except to the extent either of them is permitted under law or regulation of the country where Licensee resides Panasonic or its distributors will not be responsible for any defects in the Software or damage to Licensee caused by Licensee s reverse engineering decompiling or disassembl...

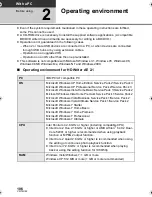
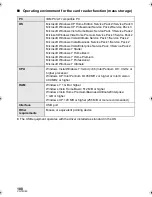
Page 106: ...rvice Pack 2 Service Pack 3 Microsoft Windows XP Professional Service Pack 2 Service Pack 3 Microsoft Windows Vista Home Basic Service Pack 1 Service Pack 2 Microsoft Windows Vista Home Premium Service Pack 1 Service Pack 2 Microsoft Windows Vista Business Service Pack 1 Service Pack 2 Microsoft Windows Vista Ultimate Service Pack 1 Service Pack 2 Microsoft Windows 7 Starter Microsoft Windows 7 Ho...

Page 107: ...y back or properly operate depending on the environment of the PC used Refer to the operating environment and notes Operation during the playback may become slow if the CPU or memory is not fulfilling the requirements of the operating environment Always use the most current driver for the video card Always make sure there is enough capacity on the HDD in the PC It may become inoperable or the oper...

Page 108: ...ft Windows Vista Business Service Pack 1 Service Pack 2 Microsoft Windows Vista Enterprise Service Pack 1 Service Pack 2 Microsoft Windows 7 Starter Microsoft Windows 7 Home Basic Microsoft Windows 7 Home Premium Microsoft Windows 7 Professional Microsoft Windows 7 Ultimate CPU Windows Vista Windows 7 32 bit k86 Intel Pentium III 1 0 GHz or higher processor Windows XP Intel Pentium III 450 MHz or ...

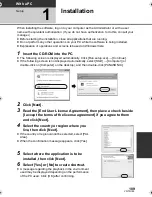
Page 109: ...setup exe Continue If the following screen is not displayed automatically select Start Computer or double click on Computer on the desktop and then double click PANASONIC 2 Click Next 3 Read the End User License Agreement then place a check beside I accept the terms of the license agreement if you agree to them and click Next 4 Select the country or region where you live then click Next If the cou...

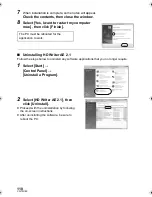
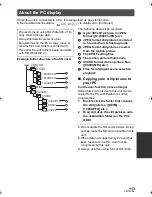
Page 110: ...ng HD Writer AE 2 1 Follow the steps below to uninstall any software applications that you no longer require 1 Select Start Control Panel Uninstall a Program 2 Select HD Writer AE 2 1 then click Uninstall Proceed with the uninstallation by following the on screen instructions After uninstalling the software be sure to reboot the PC The PC must be rebooted for the application to work ...

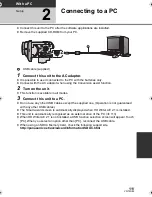
Page 111: ...is available in all modes 3 Connect this unit to a PC Do not use any other USB cables except the supplied one Operation is not guaranteed with any other USB cables The Smart wizard screen is automatically displayed when HD Writer AE 2 1 is installed This unit is automatically recognised as an external drive of the PC l 113 When HD Writer AE 2 1 is not installed a USB function selection screen will...

Page 112: ...erforming reading writing between a PC and an SD card be aware that some SD card slots built into PCs and some SD card readers are not compatible with the SDHC memory card or SDXC memory card To disconnect USB cable safely 1 Double click the icon in task tray displayed on the PC Depending on your PC s settings this icon may not be displayed 2 Select USB Mass Storage Device and click Stop 3 Verify ...

Page 113: ...age Still pictures recorded with this unit can be copied to the PC with Explorer or other programmes 1 Double click the folder that contains the still pictures DCIM 100CDPFQ etc 2 Drag and drop the still pictures onto the destination folder on the PC s HDD Do not delete the SD card s folders Doing so may make the SD card unusable in this unit When data not supported by this unit has been recorded ...

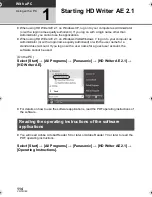
Page 114: ...ame equally authorized or with the user name for a standard user account If you log on with a user name for a guest user account the software cannot be used On the PC Select Start All Programs Panasonic HD Writer AE 2 1 HD Writer AE For details on how to use the software applications read the PDF operating instructions of the software You will need Adobe Acrobat Reader 5 0 or later or Adobe Reader...

Page 115: ...n the OS Supplied CD ROM is available for Windows only Copying still pictures on PC 1 Connect this unit to a PC via the supplied USB cable The USB function selection screen will appear 2 Touch PC 3 Double click CAM_SD displayed on the desktop Files are stored in 100CDPFQ or 101CDPFR folder etc in the DCIM folder 4 Using a drag and drop operation move the pictures you want to acquire or the folder ...

Page 116: ...30m A HG1920 15 11 2010 12 34 F 1 100 OPEN 0dB MNL MEGA MF R 3000 1h30m A F 99 99 99 14 2M 1080 50p White Card recording possible status Green Recognising the card Red Recording Green Recording pause PRE REC l 49 Interval recording l 56 Manual mode l 71 Intelligent auto mode l 28 Operation icon is displayed not displayed l 48 MF Manual focus l 74 White balance l 72 1 100 Shutter speed l 73 OPEN F2...

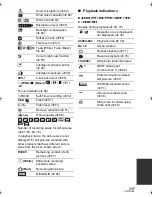
Page 117: ...ture size is not displayed for still pictures recorded with other products that have different picture sizes from the sizes shown above R3000 Remaining number of still pictures l 27 White Still picture recording possible status Red Recording still picture MEGA OIS l 26 12 2M 7 7M 4 9M 0 3M 14 2M 8 6M 5 5M 13 3M 8 3M 5 3M 2 1M MEGA 1 5 6 7 8 9 D E 1 2 Display during playback l 30 75 Operation icon ...

Page 118: ...ons Confirmatory indications when a DVD burner is connected Accessing the card l 112 Time display The built in battery is low l 22 Warning for recording yourself l 21 Disc playback l 100 Scene copied in Standard XP Scene copied in Standard SP Disc type l 95 Unusable disc XP SP ...

Page 119: ...If using a Panasonic battery compatible with this unit remove the battery and then insert it again If the message appears even after repeating this several times this unit needs repair Detach the power and consult the dealer who you purchased this unit from Do not attempt to repair it by yourself You are attempting to connect an AC adaptor not compatible with this unit Use the supplied AC adaptor ...

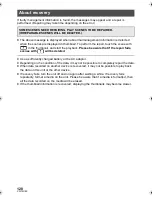
Page 120: ...ery or the AC adaptor Depending on the condition of the data it may not be possible to completely repair the data When data recorded on another device is recovered it may not be possible to play back the data on this unit or the other device If recovery fails turn the unit off and on again after waiting a while If recovery fails repeatedly format a media on the unit Please be aware that if a media...

Page 121: ...ng the TV remote control the VIERA Link is at work If you are not using the VIERA Link set VIERA Link to OFF l 93 When this unit is connected to a DVD burner to copy or play back images a disc is being accessed the unit turns off automatically if the Mini AB USB Connection Cable is removed A clicking sound is heard when the unit is shaken This is the sound of the lens moving and is not a defect Th...

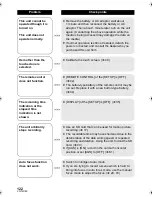
Page 122: ...EMOTE CONTROL of the SETUP is OFF l 42 The button type battery of the remote control may be run out Replace it with a new button type battery l 42 The remaining time indication or the elapsed time indication is not shown DISPLAY of the SETUP is OFF l 35 The unit arbitrarily stops recording Use an SD card that can be used for motion picture recording l 17 The recordable time may have shortened due ...

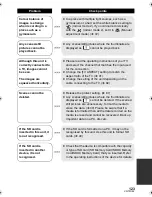
Page 123: ...l 91 Change the setting of the unit depending on the cable connecting to the TV l 92 Scenes cannot be deleted Release the protect setting l 87 Any scenes still pictures where the thumbnails are displayed as cannot be deleted If the scenes still pictures are unnecessary format the media to erase the data l 40 Please be aware that if a media is formatted then all the data recorded on the media is er...

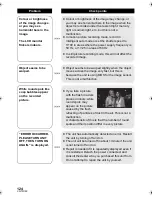
Page 124: ...s is because the unit is using MOS for the image sensor This is not a malfunction White round spots like soap bubbles appear on the recorded picture If you take a picture with the flash in a dark place or indoors white round spots may appear on the picture caused by the flash reflecting of particles of dust in the air This is not a malfunction A characteristic of this is that the number of round s...

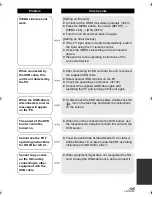
Page 125: ... l 106 Connect the supplied USB cable again after restarting the PC and turning on this unit again When the USB cable is disconnected an error message will appear on the PC To disconnect the USB cable safely double click the icon in the task tray and follow the instructions on the screen The power of the DVD burner cannot be turned on When the unit is connected to the DVD burner use the respective...

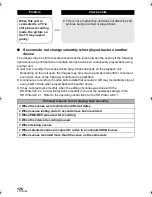
Page 126: ...e It may not play back smoothly when the editing of scenes was done with the HD Writer AE 2 1 but it will play back smoothly if you set the seamless settings in the HD Writer AE 2 1 Refer to the operating instructions for the HD Writer AE 2 1 Problem Check points When this unit is connected to a TV in still picture recording mode the picture on the TV may appear grainy This is not a malfunction an...

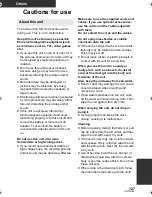
Page 127: ... and cables If you use optional accessories use the cords and the cables supplied with them Do not extend the cords and the cables Do not spray insecticides or volatile chemicals onto the unit If the unit is sprayed with such chemicals its body may be marred and the surface finish may peel off Do not leave rubber or plastic products in contact with the unit for a long time When you use the unit in...

Page 128: ...unction may be triggered making it impossible to use the unit Be sure to detach the battery after use If the battery is left attached a minute amount of current continues to flow even if the unit is off Keeping the unit in this state may result in over discharge of the battery This may result in you not being able to use the battery even after it is charged The battery should be stored in the viny...

Page 129: ...he battery may not be charged If the charging lamp keeps flashing make sure that the terminals of the battery or the AC adaptor are not exposed to dirt foreign objects or dust then reconnect them properly Disconnect the AC cable from the AC outlet when you remove dirt foreign objects or dust on the terminals of the battery or the AC adaptor If the charging lamp is still flashing the temperature of...

Page 130: ...s dirty wipe it with a soft cloth such as eye glass cleaner Do not touch the LCD monitor with your finger nails or rub or press with strong force It may become hard to see or hard to recognise the touch when the LCD protection sheet is affixed In a place with drastic temperature changes condensation may form on the LCD monitor Wipe it with a soft cloth such as eye glass cleaner When the unit has b...

Page 131: ...nsure that condensation does not form If it does form take the actions described below Causes of condensation Condensation takes place when the ambient temperature or humidity is changed as follows When this unit is brought inside from the cold e g a ski slope to a warm room When this unit is moved from an air conditioned car to outside When a cold room has been warmed up quickly When cool wind fr...

Page 132: ... and or other countries Microsoft product screen shot s reprinted with permission from Microsoft Corporation IBM and PC AT are registered trademarks of International Business Machines Corporation of the U S Intel Core Pentium and Celeron are the registered trademarks or trademarks of the Intel Corporation in the United States and other countries AMD Athlon is a trademark of the Advanced Micro Devi...

Page 133: ... is recorded the recording time is reduced The recordable time may be reduced if recording of short scene is repeated Use time in the row of 4 GB in above table as a guideline for the time that can be copied onto one DVD disc 4 7 GB Recording mode 1080 50p HA HG HX HE Picture size 1920k1080 1920k1080 1920k1080 1920k1080 1920k1080 SD card 4 GB 19 min 30 min 40 min 1 h 1 h 30 min 8 GB 40 min 1 h 1 h...

Page 134: ...05000 24 GB 3600 5800 5800 9100 9100 14000 179000 301000 32 GB 5000 7900 7900 12500 12500 19500 246000 414000 48 GB 7200 11000 11000 18000 18000 28000 364000 613000 64 GB 10000 15800 15800 25000 25000 39000 492000 829000 Aspect ratio 3 2 Picture size 4608k3072 3600k2400 2880k1920 Picture quality SD card 512 MB 60 90 100 160 160 250 1 GB 120 180 200 320 320 500 2 GB 240 390 400 650 650 1000 4 GB 50...

Page 135: ...40k2160 3072k1728 Picture quality SD card 512 MB 65 100 100 160 160 270 1 GB 130 200 200 320 320 540 2 GB 270 400 400 700 700 1100 4 GB 550 850 850 1420 1420 2200 8 GB 1100 1700 1700 2800 2800 4500 16 GB 2200 3400 3400 5600 5600 9000 24 GB 3300 5100 5100 8400 8400 13000 32 GB 4500 7000 7000 11500 11500 18200 48 GB 6600 10000 10000 17000 17000 26000 64 GB 9000 14000 14000 23000 23000 36400 Aspect r...

Page 136: ...xels Motion picture 2530 Kk3 16 9 Still picture 2320 Kk3 4 3 2630 Kk3 3 2 2530 Kk3 16 9 Lens Auto Iris F1 5 to F2 8 Focal length 3 45 mm to 41 4 mm Macro Full range AF 35 mm equivalent Motion picture 35 mm to 420 mm 16 9 Still picture 38 8 mm to 466 mm 4 3 35 7 mm to 428 mm 3 2 35 mm to 420 mm 16 9 Minimum focus distance Normal Approx 4 cm Wide Approx 1 2 m Tele Tele macro Approx 70 cm Tele Intell...

Page 137: ...or video output level HDMI V 1 3a with x v Colour 1080p 1080i 576p AV multi connector audio output level Line 316 mV 600 h 2 ch HDMI mini connector audio output level Dolby Digital Linear PCM USB Card reader function No copyright protection support Hi Speed USB USB 2 0 USB terminal Type Mini AB USB host function for DVD burner Flash Available range Approx 1 0 m to 2 5 m Dimensions 62 mm W k66 mm H...

Page 138: ...e recordable time Picture size 1080 50p 1920k1080 50p HA HG HX HE 1920k1080 50i Audio compression Dolby Digital Recording media SD Memory Card FAT12 and FAT16 system compliant SDHC Memory Card FAT32 system compliant SDXC Memory Card exFAT system compliant Refer to page 17 for details on SD cards usable in this unit Compression JPEG Design rule for Camera File system based on Exif 2 2 standard DPOF...

Page 139: ... safety Specifications may change without prior notice Power source Power consumption DC output AC 110 V to 240 V 50 60 Hz 19 W DC 9 3 V 1 2 A Unit operation DC 8 4 V 0 65 A Battery charging Dimensions 92 mm W k33 mm H k61 mm D Mass Approx 115 g ...

Page 140: ...tery pack holder kit VW VH04 HDMI mini cable RP CDHM15 RP CDHM30 Wide conversion lens VW W4607H Wide end conversion lens VW WE08H 3 Filter kit VW LF46NE 4 Video DC light VW LDC103E 5 Light bulb for video DC light VZ LL10E Shoe adaptor VW SK12E DVD burner VW BN2 SD SDHC SDXC Memory Card Refer to page 17 1 The supplied DC cables cannot be used on this unit 2 The battery pack holder kit VW VH04 optio...

Page 141: ... You will not be able to use the flash Set the flash setting to OFF l 51 Be careful about the following When 2 lens accessories such as the ND filter and wide conversion lens are fitted and the zoom lever is pressed toward the W side the 4 corners of an image will be darkened Vignetting Attaching the lens cap Included in the Filter Kit VW LF46NE optional When the filter kit VW LF46NE optional is u...

Page 142: ...57 Digital cinema colour 61 Digital zoom 55 Direct playback 76 Disc status 101 Display 35 Divide 86 DPOF setting 88 Dubbing 102 DVD burner 95 E Economy 36 Extra optical zoom 44 F Face highlight playback 80 Face recognition 57 Fade 49 Fade colour 49 Flash 51 Flash level 51 Focus 26 74 Focus indication 26 Format disc 101 Formatting 40 101 Frame by frame playback 75 G Gain 73 Grip belt 12 Guide displ...

Page 143: ...ing time left for recording 25 Remote control 38 42 Repeat playback 77 Resume playback 78 S Scene mode 54 Scene protect 87 SD Memory Card 17 SD Speed Class Rating 17 SDHC Memory Card 17 SDXC Memory Card 17 Self recording 21 Self timer recording 52 Shooting guide 62 Shoulder strap fixture 12 Shutter sound 70 Shutter speed 73 Simultaneous recording 27 Skip playback 75 Slide show 31 83 Slow motion pl...

Page 144: ...ursuant to at the directive 2004 108 EC article 9 2 Panasonic Testing Centre Panasonic Marketing Europe GmbH Winsbergring 15 22525 Hamburg Germany Panasonic Corporation Web site http panasonic net Panasonic Corporation 2010 EU ...

Reviews: