13
• When the appliance is connected to the power supply or after a power failure, the word
“GLAS” is first displayed; then, the display flashes. To allow operation of the oven the time
must be set using (b) and (c) .
Using your oven
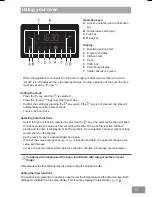
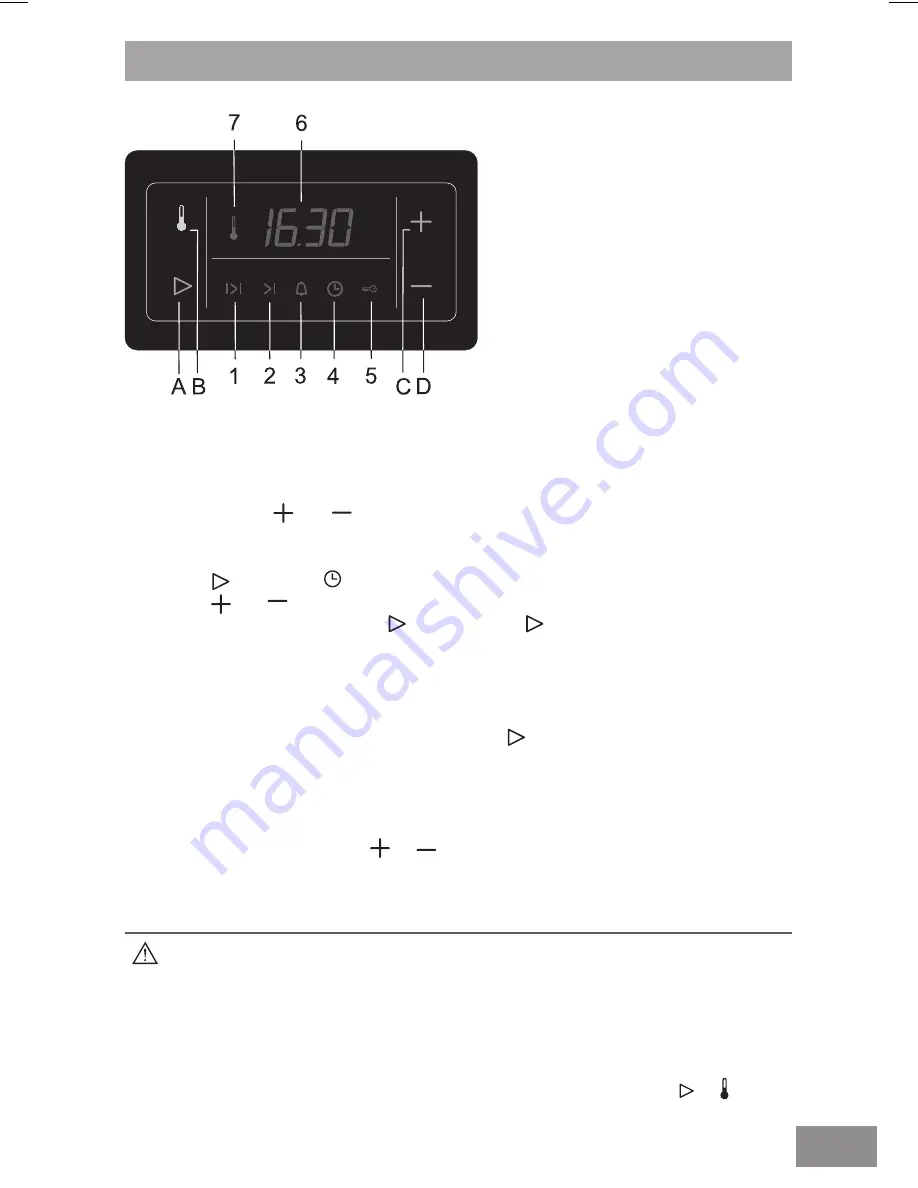
Operation keys:
A
Function selection and confirmation
key
B
Temperature setting key
C
Plus key
D
Minus
key
Display:
1
Duration/cooking timer
2
Program end time
3
Kitchen timer
4
Clock
5
Child lock
6
Time/ Temp display
7
Heater operation symbol
Setting the clock
• Press the (a) key until the (4) is selected .
• Press the (B) and (C) key to set the time of day.
• Confirm the setting by pressing the (A) key again; if the (A) key is not pressed, the time will
automatically set after a few seconds.
• This is a 24 hour clock.
To improve the response of the keys, touch them with a larger surface of your
finger.
Temperature and other settings may also be set using the plus/minus dial.
Setting the timer functions
The electronic program timer can also be used to set the temperature and the timer function. Both
settings are indicated on the same display. This is set by pressing the relevant key (A) or (B).
Selecting timer functions
• Select the type of function required by pressing the (A) key. The selected function will flash
for five seconds, the value can be set during this time. Once set, the function will flash
slowly and the time is displayed. N.B. The symbols lit are selected. The most recent setting
will be shown in the display.
• Each press of a key is acknowledged by a beep.
• If one of the value settings keys (B) or (C) is touched and held, the speed of changing the
value will increase.
• In case of a power failure which lasts less than two minutes, all settings are maintained.


