2
TABLE OF CONTENTS
PAGE
PAGE
1 Safety Precautions
-----------------------------------------------
3
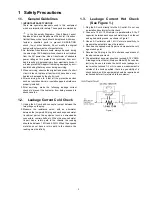
1.1. General Guidelines ----------------------------------------3
1.2. Leakage Current Cold Check ---------------------------3
1.3. Leakage Current Hot Check (See Figure 1.)--------3
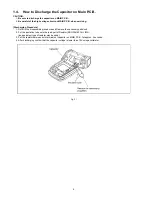
1.4. How to Discharge the Capacitor on Main
P.C.B.----------------------------------------------------------4
2 Warning
--------------------------------------------------------------
5
2.1. Prevention of Electrostatic Discharge (ESD)
to Electrostatically Sensitive (ES) Devices ----------5
2.2. How to Recycle the Lithium Ion Battery (U.S.
Only)-----------------------------------------------------------5
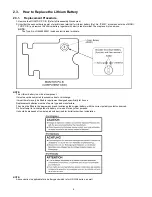
2.3. How to Replace the Lithium Battery-------------------6
3 Service Navigation
------------------------------------------------
7
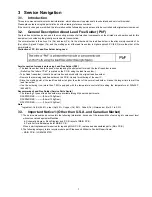
3.1. Introduction --------------------------------------------------7
3.2. General Description About Lead Free Solder
(PbF) ----------------------------------------------------------7
3.3. Important Notice 1:(Other than U.S.A. and
Canadian Market) ------------------------------------------7
3.4. How to Define the Model Suffix (NTSC or PAL
model)---------------------------------------------------------8
3.5. Formatting----------------------------------------------------9
3.6. Baking of IC and P.C.B.-----------------------------------9
4 Specifications
----------------------------------------------------
10
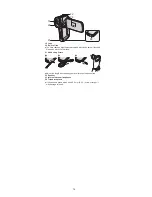
5 Location of Controls and Components
------------------
13
6 Troubleshooting Guide
----------------------------------------
15
6.1. Confirmation Flow of Waterproof--------------------- 15
6.2. Airtight Inspection with Air Leak Tester ------------- 16
6.3. Air Leak Tester (RFKZ0528) Operating
Instruction -------------------------------------------------- 17
7 Service Fixture & Tools
---------------------------------------
21
7.1. When Replacing the Main P.C.B. -------------------- 21
7.2. Necessary Tool & Jig------------------------------------ 21
8 Disassembly and Assembly Instructions
---------------
22
8.1. Disassembly Flow Chart-------------------------------- 22
8.2. PCB Location---------------------------------------------- 23
8.3. Disassembly Procedure -------------------------------- 23
9 Measurements and Adjustments
--------------------------
40
9.1. Electric Adjustment -------------------------------------- 40
10 Maintenance
------------------------------------------------------
42
10.1. Regular Maintenance Flow ---------------------------- 42
10.2. Component Kits of Waterproof------------------------ 43
11 Block Diagram
---------------------------------------------------
44
11.1. Overall Block Diagram ---------------------------------- 44
11.2. Main Block Diagram ------------------------------------- 45
11.3. CMOS Block Diagram----------------------------------- 46
11.4. Lens Block Diagram ------------------------------------- 46
11.5. Power Block Diagram ----------------------------------- 47
11.6. Flash Block Diagram ------------------------------------ 47
12 Wiring Connection Diagram
---------------------------------
48
12.1. Interconnection Diagram ------------------------------- 48
Summary of Contents for HX-WA2EB
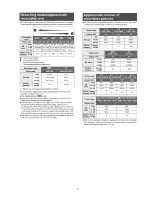
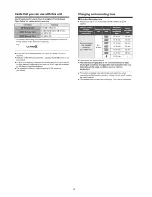
Page 10: ...10 4 Specifications ...
Page 11: ...11 ...
Page 12: ...12 ...
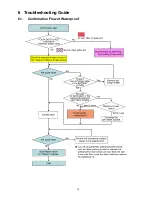
Page 15: ...15 6 Troubleshooting Guide 6 1 Confirmation Flow of Waterproof ...
Page 16: ...16 6 2 Airtight Inspection with Air Leak Tester ...
Page 17: ...17 6 3 Air Leak Tester RFKZ0528 Operating Instruction ...
Page 18: ...18 ...
Page 19: ...19 ...
Page 20: ...20 ...
Page 25: ...25 Fig D4 Fig D5 ...
Page 27: ...27 Fig D10 8 3 6 Removal of the Capacitor Capacitor Holder Fig D11 ...
Page 28: ...28 8 3 7 Removal of the Lens Unit Fig D12 Fig D13 ...
Page 30: ...30 Fig D16 8 3 10 Removal of the Lens Holder Fig D17 8 3 11 Removal of the Speaker Fig D18 ...
Page 31: ...31 8 3 12 Removal of the LCD Unit Fig D19 Fig D20 ...
Page 32: ...32 Fig D21 Fig D22 ...
Page 33: ...33 Fig D23 8 3 13 Removal of the Hinge Cover LCD Case T Unit Fig D24 Fig D25 ...
Page 34: ...34 Fig D26 Fig D27 8 3 14 Removal of the LCD O Ring Fig D28 ...
Page 35: ...35 Fig D29 8 3 15 Removal of the LCD Panel Fig D30 ...
Page 36: ...36 Fig D31 8 3 16 Removal of the Mic Unit Monitor P C B Fig D32 Fig D33 ...
Page 37: ...37 Fig D34 8 3 17 Removal of the LCD Hinge Unit Fig D35 ...
Page 38: ...38 Fig D36 Fig D37 ...
Page 39: ...39 8 3 18 Removal of the Switch Unit Fig D38 Fig D39 ...
Page 42: ...42 10 Maintenance 10 1 Regular Maintenance Flow ...
Page 43: ...43 10 2 Component Kits of Waterproof ...
Page 49: ...Model No HX WA2 Schematic Diagram Note ...
Page 50: ...Model No HX WA2 Parts List Note ...
Page 51: ...Model No HX WA2 Main CAA Schematic Diagram Main P C B ...
Page 52: ...Model No HX WA2 Main DMA Schematic Diagram Main P C B ...
Page 53: ...Model No HX WA2 Main PWA Schematic Diagram Main P C B ...
Page 54: ...Model No HX WA2 Main STA Schematic Diagram Main P C B ...
Page 55: ...Model No HX WA2 Monitor Schematic Diagram Monitor P C B ...
Page 56: ...Model No HX WA2 Main P C B Component Side ...
Page 57: ...Model No HX WA2 Main P C B Foil Side ...
Page 58: ...Model No HX WA2 Monitor P C B Component Side ...
Page 59: ...Model No HX WA2 Monitor P C B Foil Side ...
Page 66: ...Model No HX WA2 Frame and Casing Section 1 ...
Page 67: ...Model No HX WA2 Frame and Casing Section 2 ...
Page 68: ...Model No HX WA2 Packing Parts and Accessories Section ...


