26
7.3.
Replacing Limited Life Parts
7.3.1.
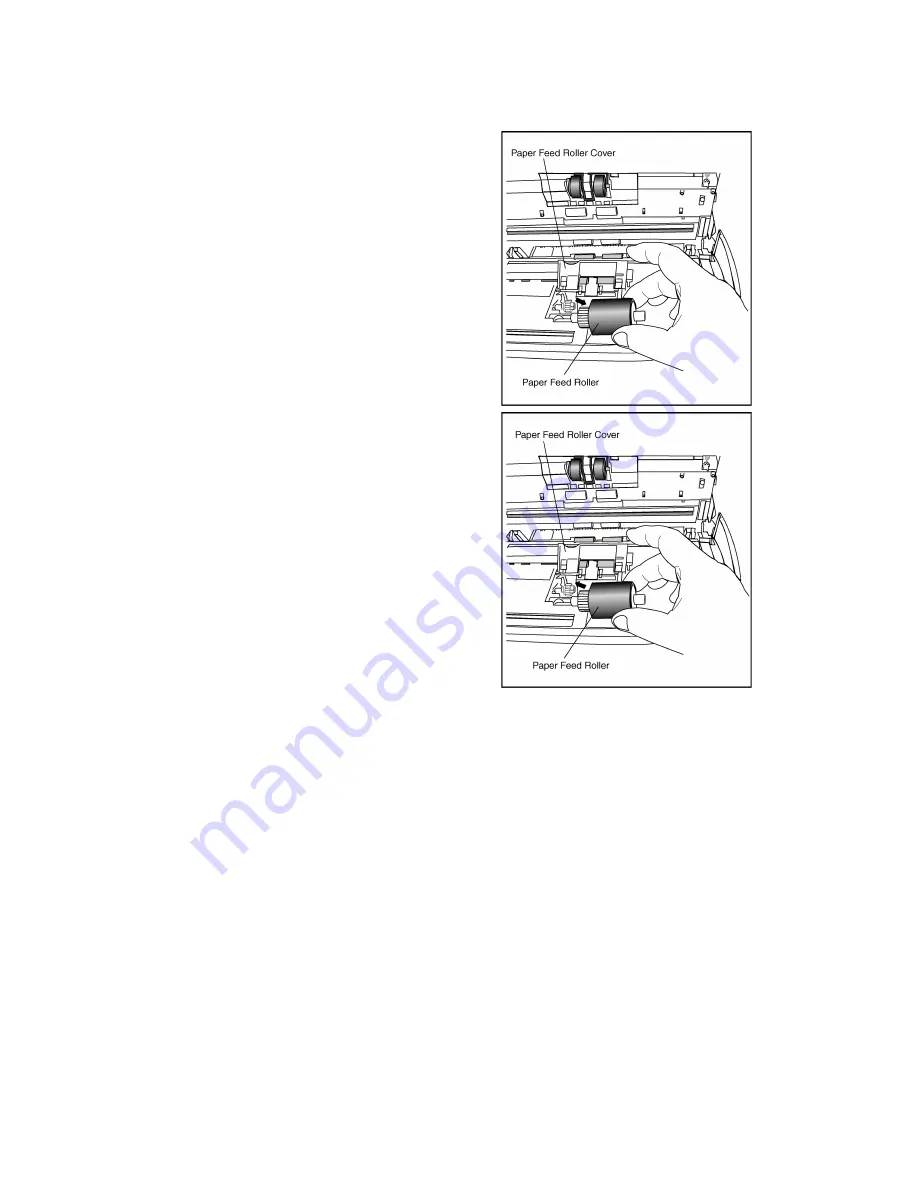
Paper Feed Roller
(1) Turn off the scanner by turning the Power Switch off and
unplugging the AC Adaptor from the scanner. (See 7.2.1.)
(2) Remove the Feed Tray. (See 7.2.1.)
(3) Push the Door Open Button to open the ADF Door.
(See 7.2.1.)
(4) After opening the Paper Feed Roller Cover, remove the
Paper Feed Roller.
(5) Take out a new Paper Feed Roller from the Roller
Exchange Kit (KV-SS030).
(6) Install the new Paper Feed Roller with its gear facing to the
left (seen from the back), and close the Paper Feed Roller
Cover.
Note:
Make sure to close the Paper Feed Roller Cover
tightly, by pressing both ends of the cover.
(7) Close the ADF Door slowly until it clicks into place.
(See 7.2.3.)
(8) After installing the Feed Tray, turn on the scanner by
plugging the AC Adaptor to the scanner and turning the
Power Switch on. (See 4.2 and 4.3.)
(9) Execute “
Clear Counter
” for replacing the Paper Feed
Roller with Service Utility. (See 9.3.4.)
Summary of Contents for KV-S1020C SERIES
Page 10: ...10 ...
Page 28: ...28 ...
Page 41: ...41 8 Remove the screw c and the screw d And pull out the Conveyor Motor ...
Page 62: ...62 ...
Page 78: ...78 Fig 10 1 1 Fig 10 1 2 Fig 10 1 3 Fig 10 1 4 Fig 10 1 5 Fig 10 1 6 ...
Page 79: ...79 Fig 10 1 7 Fig 10 1 8 ...
Page 85: ...85 Fig 10 2 5 Fig 10 2 6 Fig 10 2 7 Fig 10 2 8 Fig 10 2 9 ...
Page 86: ...86 ...
Page 89: ...89 11 3 Block Diagram 3 ...
Page 95: ...95 5 2 CONTROL Board KV S1025C Series KV S1020C Series ...
Page 96: ...96 5 3 CONTROL Board KV S1025C Series KV S1020C Series ...
Page 97: ...97 5 4 CONTROL Board KV S1025C Series KV S1020C Series ...
Page 102: ...102 ...
Page 104: ...104 13 1 CONTROL Board 13 1 1 Front Side PbF stamp ...
Page 105: ...105 13 1 2 Back Side ...
Page 109: ...109 14 Parts Location and Mechanical Parts List ...
Page 110: ...110 14 1 Exterior and Chassis ...


