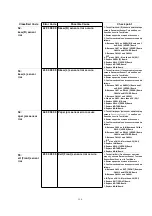
Classified Code
Error Code
Possible Cause
Check point
F60:
Front side gain error
50 00 00 00 Front side gain error occurs.
1. Check front side lamp lights properly.
2. Check front side lamp is installed to front
Lamp module properly.
3. Execute CCD Test in Test Mode.
Amp value is changing during this test?
4. Confirm each cable and connector condition
follows.
A. Between Front side lamp and CN2 on LAMP
INVERTER Board
B. Between CN1 on LAMP INVERTER Board
CN2026 on MOTHER Board
C. Between CN5101 on CCD Board [FRONT]
CN2005 on MOTHER Board
D. Between CN5102 on CCD Board [FRONT]
CN2002 on MOTHER Board
E. Between CN5103 on CCD Board [FRONT]
CN1002 on MAIN Board
5. Check input level (Test pin : TPFRO, TPFRE,
TPFGO, TPFGE, TPFBO, TPFBE)
6. Replace faulty cables.
7. Replace front side lamp.
8. Replace front lamp module.
9. Replace LAMP INVERTER Board.
10. Replace Front Side Optical Unit.
11. Replace MAIN Board.
F62:
Back side gain
52 00 00 00 Back side gain error occurs.
1. Check back side lamp lights properly.
2. Check back side lamp is installed to back side
lamp module properly.
3. Execute CCD Test in Test Mode.
Amp value is changing during this test?
4. Confirm each cable and connector condition
follows.
A. Between back side lamp and CN3 on LAMP
INVERTER Board
B. Between CN1 on LAMP INVERTER Board
CN2026 on MOTHER Board
C. Between CN5101 on CCD Board [BACK]
CN2004 on MOTHER Board
D. Between CN5102 on CCD Board [BACK]
CN2002 on MOTHER Board
E. Between CN5103 on CCD Board [BACK] and
CN1003 on MAIN Board
5. Check input level (Test pin : TPBRO, TPBRE,
TPBGO, TPBGE, TPBBO, TPBBE).
6. Replace faulty cables.
7. Replace back side lamp.
8. Replace back lamp module.
9. Replace LAMP INVERTER Board.
10. Replace Back Side Optical Unit.
11. Replace MAIN Board.
F70:
Size sensor error
47 ×× 00 00 Size sensor error occurs.
1. To confirm size sensor operates properly,
execute Document Sensor Test in Test Mode.
2. Remove paper dust around the sensor.
3. Confirm each cable and connector condition
follows.
A. Between CN3 on SIZE Board and CN6 on
HOPPER [CONNECTOR] Board
B. Between CN8 on HOPPER [CONNECTOR]
Board and CN2027 on MOTHER Board
C. Between CN1001 and CN2001
4. Replace SIZE Board.
5. Replace HOPPER [CONNECTOR] Board.
6. Replace MOTHER Board.
7. Replace MAIN Board.
160
Summary of Contents for KV-SS905C
Page 1: ...ORDER NO KM70108670C0 G14 High Speed Color Scanner KV SS905C 1 1 ...
Page 6: ...4 INSTALLATION 4 1 Minimum Space Requirements 6 ...
Page 8: ...8 ...
Page 15: ...2 Tighten all the screws 15 ...
Page 42: ...42 ...
Page 46: ...46 ...
Page 51: ...51 ...
Page 52: ...52 ...
Page 55: ...3 Use your fingers to pull the Retard Roller Door toward you 55 ...
Page 58: ...7 Close the Retard Roller Door 58 ...
Page 59: ...8 Close the Front Door Note Push down the Front Door slowly until it clicks into place 59 ...
Page 61: ...3 Using your fingers open the Retard Roller Cover 61 ...
Page 62: ...4 Pull and remove the Retard Pad in the direction of the arrow 62 ...
Page 64: ...7 Close the Retard Roller Cover 64 ...
Page 66: ...8 DISASSEMBLY INSTRUCTIONS 8 1 Disassembly Flowchart 66 ...
Page 69: ...69 ...
Page 77: ...8 2 9 Back Door Cover 1 Remove the 2 screws 77 ...
Page 78: ...2 Spread the 2 claws of right and left both sides toward the outside 78 ...
Page 84: ...6 Remove the 4 screws B and remove the Board Box Power Box 84 ...
Page 85: ...85 ...
Page 87: ...4 Remove the 2 screws B from the Hopper Motor with plate to remove the Hopper Motor 87 ...
Page 94: ...3 Pull the Lamp Modules out of the Scanner 94 ...
Page 96: ...5 Remove screws 96 ...
Page 97: ...6 Remove the Lamp Holder covers on the Lamp Modules 97 ...
Page 98: ...7 Remove the Lamps from the Lamp Modules in the direction of the arrow 98 ...
Page 106: ...5 Lift the Conveyor Bottom 4 and pull out toward the front of the unit to remove 106 ...
Page 107: ...6 Unhook the Drive Rollers from the notching hole of chassis and remove it 107 ...
Page 109: ...4 Unhook the Conveyor Rollers from the notching hole of chassis and remove it 109 ...
Page 115: ...8 4 3 I F Board 1 Remove 4 screws 2 Pull out the I F Board in the direction of the arrow 115 ...
Page 120: ...4 Remove the 2 screws B and Conveyor Upper 5 120 ...
Page 122: ...8 Remove the screw E and remove the Exit Rear Sensor 122 ...
Page 137: ...4 Remove the 2 screws from FAN 1 137 ...
Page 139: ...5 Remove the 2 screws B from FAN 2 139 ...
Page 169: ...13 2 I F Board SCSI Board 169 ...
Page 170: ...13 3 MOTHER Board 13 4 DRIVE Board 170 ...
Page 237: ...16 1 2 I F Board SCSI Board 237 ...
Page 238: ...16 1 3 MOTHER Board 16 1 4 DRIVE Board 16 1 5 PANEL SENSOR Boards 238 ...
Page 370: ......
Page 371: ......
Page 372: ......
Page 373: ......
Page 374: ......
Page 375: ......
Page 376: ......
Page 377: ......
Page 378: ......
Page 379: ......
Page 380: ......
Page 381: ......
Page 382: ......
Page 383: ......
Page 384: ......
Page 385: ......
Page 386: ......
Page 387: ......
Page 388: ......
Page 389: ......
Page 390: ......
Page 391: ......
Page 392: ......
Page 393: ......
Page 394: ......
Page 395: ......
Page 396: ......
Page 397: ......
Page 398: ......
Page 399: ......
Page 400: ......
Page 401: ......
Page 402: ......
Page 403: ......
Page 404: ......
Page 405: ......
Page 406: ......
Page 407: ......
Page 408: ......
Page 409: ......
Page 410: ......
Page 411: ......
Page 412: ......
Page 413: ......
Page 414: ......
Page 415: ......
Page 416: ......


