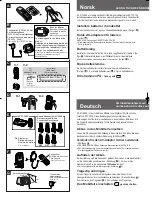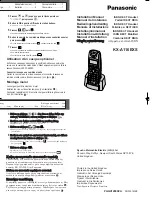
De KX-A116EXS is de optionele handset voor de KX-TCD706 draadloze
telefoon. Deze handleiding beschrijft alleen de nodige stappen om de
handset voor het eerst te gebruiken. Lees de handleiding van de
KX-TCD706 aandachtig door voor verdere details.
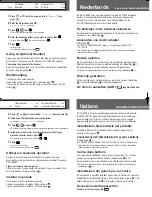
De batterijen in de handset installeren
Installeer eerst de batterijen zoals aangeduid. Schuif er dan het deksel van
de handset over. (Afbeelding
)
Aansluiten van de AC adapter
(Afbeelding
)
•
ALLEEN TE GEBRUIKEN MET Panasonic AC (wisselstroom) ADAPTER
KX-TCA1CE.
•
De AC adapter moet altijd aangesloten blijven. (Het is normaal dat de adapter
tijdens gebruik warm wordt.)
Batterij opladen
Op het ogenblik dat u het toestel koopt, zijn de batterijen niet opgeladen.
Plaats de handset op de lader en laadt de batterijen op. (Afbeelding
-1)
Bij ingebruikname moet u de batterijen ongeveer 15 uur opladen.
•
Tijdens het opladen verschijnt het batterij symbool als volgt. (Afbeelding
-2)
Riemclip gebruiken
Met de riemclip kunt u het toestel aan uw riem of zak hangen. (Afbeelding
-1: Riemclip bevestigen/
-2: Riemclip verwijderen.)
De stroom aanzetten (AAN):
ingedrukt houden.
D
D
C
C
B
A
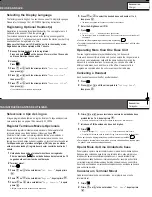
Using an Optional Headset
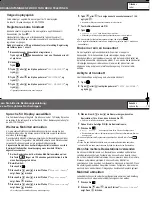
Plugging an optional headset into the handset allows a hands-free phone
conversation. Please use only the Panasonic KX-TCA89EX headset.
Connecting the headset to the handset
Open the headset jack cover, and connect the headset to the headset jack
as shown. (See the picture
.)
Wall Mounting
The charger can be wall mounted.
Install screws using the wall template. (See the picture
.)
Connect the AC adaptor. Mount the charger, then slide it down. (See the
picture
.)
G
H
F
es:
......................One
AC Adaptor.....................One
Batteries .........................Two
Handset Cover ...............One
Belt Clip..........................One
3
Press
or
until the arrow points to “
System
”, then
press
.
4
Enter the 4-digit base unit PIN.
•
“
Input Command
” is displayed.
5
Press
,
then
.
•
The current registered handset No. is/are displayed.
6
Enter the handset number(s) you want to cancel, then
.
•
If you misdial, press
, the corrected number(s) and
.
7
Press
.
•
A beep sounds.
•
To return to the standby mode, press
.
C
1
9
s:
r ......................um
Transformador ................um
Pilhas ............................duas
Tampa da Bateria ............um
Gancho do Auscultador ...um
Italiano
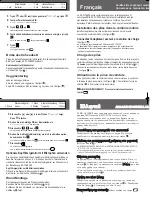
KX-A116EXS è il terminale portatile aggiuntivo per l’apparecchio portatile
ISDN KX-TCD706. Questo Manuale di Installazione descrive solamente i
passi necessari per l’utizzo corretto del terminale aggiuntivo. Leggere
ciascuna delle informazioni seguenti per l’accesso alle funzioni descritte.
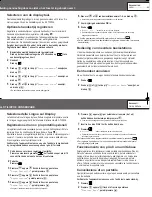
Installazione delle batterie nel portatile
Installare le batterie come illustrato. Quindi installare il coperchio sul
portatile. (Vedere figura
.)
Connessione dell’alimentatore AC al carica batterie
(Vedere figura
.)
•
UTILIZZARE ESCLUSIVAMENTE UN ADATTATORE CA KX-TCA1CE Panasonic.
•
L’adattatore CA deve sempre rimanere collegato. (Durante l’utilizzo, l’adattatore
tende a scaldarsi, ma questo è normale.)
Carica delle batterie
Al momento della spedizione, le batterie non sono cariche. Per caricarle,
posizionare il portatile sull’carica batteria. (Vedere figura
-1.) Si
raccomanda di caricare le batterie per circa 15 ore prima dell’uso iniziale.
•
Durante la carica delle batterie, l’icona delle batterie si presenta come illustrato.
(Vedere figura
-2.)
Installazione del gancio per la cintura
Se necessario, è possibile installare il gancio per la cintura, che consente
di appendere il portatile alla cintura o a una tasca.
(Vedere figura
-1: Per
fissare il gancio per la cintura/
-2: Per togliere il gancio per la cintura.)
Accensione dell’apparecchio:
Premere e mantenere premuto
.
D
D
C
C
B
A
LEGGERE PRIMA DELL’UTIL
Utilizar um Auricular opcional
Se ligar um auricular adicional ao terminal móvel poderá ter uma
conversação no modo mãos-livres. Utilizar apenas o auricular Panasonic
KX-TCA89EX.
Ligar o auricular ao terminal móvel
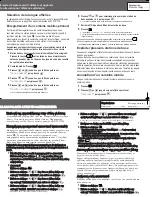
Retire a tampa da ficha de ligação do auricular e ligue o auricular à ficha,
conforme indicado. (Observe a figura
)
Instalar na parede
O carregador pode ser colocado na parede.
Coloque os parafusos na parede. (Observe figura
)
Ligue o transformador e instale-o. (Observe figura
)
G
H
F
3
Prima
ou
até a seta indicar “
Sistema
”, depois prima
.
4
Introduza o PIN da unidade de base (4 dígitos).
•
A indicação “
Comando d/ent.
” é visualizada.
5
Prima
,
e depois
.
•
O(s) número(s) do terminal(ais) móvel(eis) actualmente registado(s) é/são visualizado(s).
6
Introduza o(s) número(s) do(s) terminal(ais) móvel(eis) que
pretende cancelar, depois prima
.
•
Se pretende corrigir um numero, pressione
e
.
7
Prima
.
•
Ouve-se um sinal sonoro.
•
Para voltar ao modo standby, prima
.
C
1
9
Nederlands
Lees s.v.p. deze handleiding
A116EXS-(ALL) 01.3.19 5:54 PM Page 3


