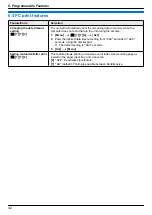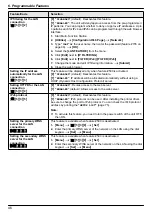
4.
Press
MCN
or
MDN
repeatedly to display the desired
item.
A
M
Menu
N
A
MGN
5.
Edit the name if necessary.
A
M
Set
N
6.
Edit the department code if necessary.
A
M
Set
N
7.
Edit the department settings if necessary. Press
MCN
or
MDN
repeatedly to select the desired setting.
A
M
Set
N
8.
M
Stop
N
A
M
Menu
N
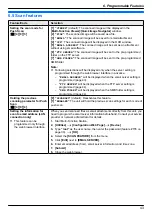
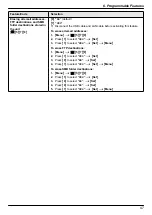
Erasing a stored item
Important:
R
Make sure feature #154 is set to “
ON
” beforehand
1.
Press
M
Menu
N
repeatedly to display
“
DEPARTMENT
SETUP
”
.
A
MEN
2.
Enter the administrator code (feature #151 on
page 38).
A
M
Set
N
3.
Press
MFN
or
MEN
repeatedly to select
“
EDIT
”
.
A
M
Set
N
R
To erase all items, press
MFN
or
MEN
repeatedly
to select
“
ERASE ALL
”
.
A
M
Set
N
A
M
Set
N
A
M
Stop
N
4.
Press
MCN
or
MDN
repeatedly to display the desired
item.
A
M
Menu
N
A
MBN
R
To cancel erasing, press
M
Stop
N
.
5.
M
Set
N
A
M
Menu
N
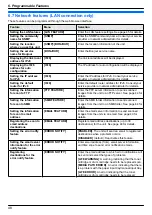
7.4.2 Counter view and print for departments
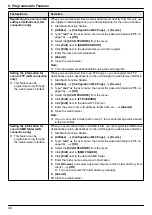
Viewing the count number of copies/prints for
departments
1.
M
Menu
N
A
MBNM
4
NM
7
NM
9
N
A
M
Set
N
2.
Enter the administrator code (feature #151 on
page 38).
A
M
Set
N
3.
Press
MCN
,
MDN
,
MFN
or
MEN
repeatedly to select the
desired item.
A
M
Menu
N
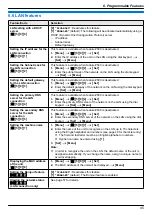
Printing the reports of the count number of copies/
prints for departments
1.
Press
M
Menu
N
repeatedly to display
“
REPORT
”
.
2.
Press
MFN
or
MEN
repeatedly to select
“
DEPT.PRINT
COUNT
”
.
A
M
Set
N
3.
Enter the administrator code (feature #151 on
page 38).
A
M
Set
N
4.
M
Menu
N
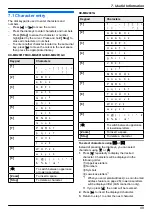
Resetting the counter for departments
1.
Press
M
Menu
N
repeatedly to display
“
DEPARTMENT
SETUP
”
.
A
MEN
2.
Enter the administrator code (feature #151 on
page 38).
A
M
Set
N
3.
Press
MFN
or
MEN
repeatedly to select
“
RESET
COUNTER
”
.
A
M
Set
N
4.
M
Set
N
A
M
Stop
N
R
To cancel resetting, press
M
Stop
N
.
Note:
R
Only the counter while mode restriction (feature #154
on page 51) is activated will be reset.
52
7. Useful Information

