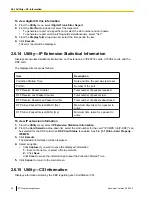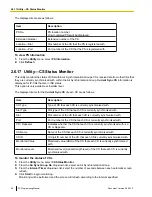
2.
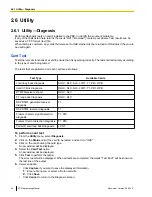
From the
Slot No
drop-down list, select the target slot.
3.
From the
Interval Timer
drop-down list, select the number of seconds between each automatic screen
refresh.
4.
Click
Start
.
Monitoring will be performed and the screen will refresh according to the interval specified.
5.
Click
Stop
to end monitoring.
To refresh the screen at any time while monitoring is stopped, click
Refresh
.
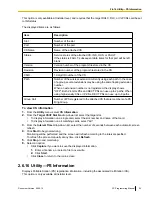
2.6.10 Utility—T1 Line Trace
Traces the sent and received signaling bits and dial numbers on the specified channel of the T1 line. This utility
is intended for use by dealers.
This option is only available at Installer level, and requires that the target T1 card be set to INS status.
To view T1 trace data
1.
From the
Utility
menu, select
T1 Line Trace
.
2.
From the
Slot No
drop-down list, select the target slot.
3.
From the
CH No
drop-down list, select the target channel.
4.
Click
Start
.
Trace information will be displayed. The information is automatically updated whenever the data being
monitored changes.
5.
Click
Stop
to end the trace.
6.
Select an option:
•
Click
Capture
to save the displayed trace information.
Information is saved as a text-format file.
•
Click
Clear
to erase the information.
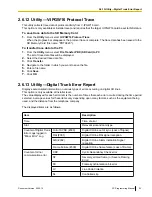
2.6.11 Utility—ISDN/QSIG Protocol Trace
This utility collects protocol trace data from PRI cards, and displays it on the PC.
This option is only available at Installer level, and requires that the target PRI card be set to INS status.
Protocol trace data is continually accumulated on ISDN cards, and 3 types of data can be downloaded:
•
Real Time Trace: Pseudo-real-time data is collected through data polling at one-second intervals. The
displayed information is updated beginning when the
Start
button is clicked.
•
Accumulation Trace: Previously accumulated data is retrieved and displayed.
•
Error Accumulation Trace: Previously accumulated error data is retrieved and displayed. This trace shows
the data snapshot that is taken just before a card resets.
To view trace data
1.
From the
Utility
menu, select
ISDN/QSIG Protocol Trace
.
2.
From the
Slot No
drop-down list, select the target slot.
3.
From the
Trace Data Type
drop-down list, select the type of data to view.
4.
Click
Start
.
Trace information will be displayed.
5.
Select an option:
•
Click
Capture
to save the displayed trace information.
•
Click
Clear
to clear the screen display.
6.
Click
Cancel
to return to the main screen.
52
PC Programming Manual
Document Version 2009-12
2.6.11 Utility—ISDN/QSIG Protocol Trace
Summary of Contents for KX-NCP500
Page 71: ...Section 3 1 Configuration Document Version 2009 12 PC Programming Manual 71 ...
Page 74: ... 3 4 1 Virtual Cards 74 PC Programming Manual Document Version 2009 12 3 1 1 1 Slot ...
Page 313: ...Section 4 2 System Document Version 2009 12 PC Programming Manual 313 ...
Page 450: ...450 PC Programming Manual Document Version 2009 12 4 21 2 11 2 Audio Gain Card ...
Page 451: ...Section 5 3 Group Document Version 2009 12 PC Programming Manual 451 ...
Page 533: ...Section 6 4 Extension Document Version 2009 12 PC Programming Manual 533 ...
Page 701: ...Section 7 5 Optional Device Document Version 2009 12 PC Programming Manual 701 ...
Page 731: ...Section 8 6 Feature Document Version 2009 12 PC Programming Manual 731 ...
Page 744: ...744 PC Programming Manual Document Version 2009 12 8 6 6 6 Tenant ...
Page 745: ...Section 9 7 TRS Document Version 2009 12 PC Programming Manual 745 ...
Page 753: ...Section 10 8 ARS Document Version 2009 12 PC Programming Manual 753 ...
Page 766: ...766 PC Programming Manual Document Version 2009 12 10 8 8 7 Authorization Code for TRG ...
Page 767: ...Section 11 9 Private Network Document Version 2009 12 PC Programming Manual 767 ...
Page 780: ...780 PC Programming Manual Document Version 2009 12 11 4 9 4 NDSS Key Table ...
Page 781: ...Section 12 10 CO Incoming Call Document Version 2009 12 PC Programming Manual 781 ...
Page 807: ...Section 13 11 Maintenance Document Version 2009 12 PC Programming Manual 807 ...
Page 847: ...Section 14 Appendix Document Version 2009 12 PC Programming Manual 847 ...

