Setting up
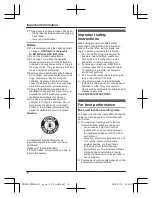
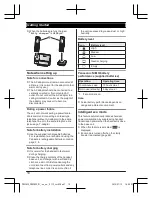
Connections
R
If you do not connect the telephone line
cord and use only cellular lines, set the
cellular line only mode to use this unit more
conveniently (page 18).
n
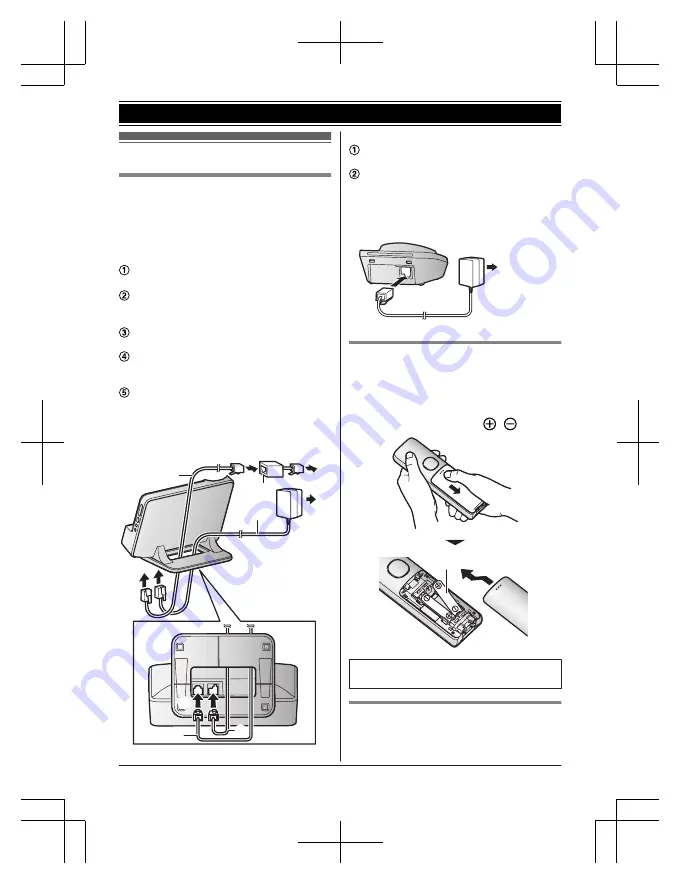
Base unit
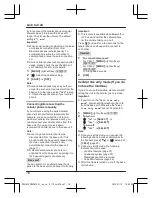
Run the telephone line cord (
1
) and AC
adaptor (
2
) through the slot of the stand.
Connect the telephone line cord (
1
) and
AC adaptor (
2
) to the jacks at the
bottom of the unit until you hear a click.
Connect the AC adaptor to the power
outlet.
Connect the telephone line cord to the
single-line telephone jack (RJ11C) until
you hear a click.
A DSL/ADSL filter (not supplied) is
required if you have DSL/ADSL service.
Note:
R
Use only the supplied Panasonic AC
adaptor PNLV238.
2
3
5
4
2
1
1
2
1
n
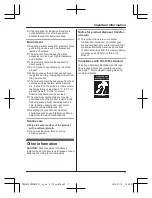
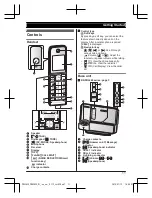
Charger
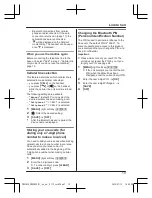
Connect the AC adaptor plug to the
charger until you hear a click.
Connect the AC adaptor to the power
outlet.
Note:
R
Use only the supplied Panasonic AC
adaptor PNLV233.
1
2
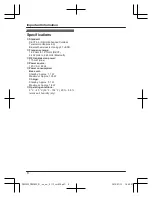
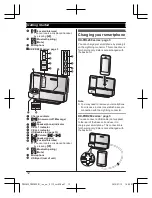
Battery installation
R
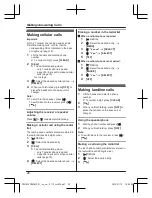
USE ONLY rechargeable Ni-MH batteries
AAA (R03) size (
1
).
R
Do NOT use Alkaline/Manganese/Ni-Cd
batteries.
R
Confirm correct polarities (
,
).
1
R
Follow the directions on the display to set
up the unit.
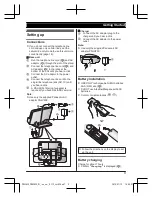
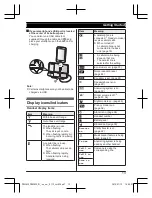
Battery charging
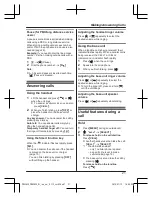
Charge for about 7 hours.
R
Confirm
“
Charging
”
is displayed (
1
).
9
Getting Started
PRL262C_PRD262C_OI_(en_en)_0113_ver030.pdf 9
2014/01/13 16:00:07


